Gradescope: Bubble sheet

Bubble sheet assignments can be used for paper based multiple choice questions.
Guidance
Use the links below to navigate to the guidance that’s relevant for you.
- How bubble sheets work
- How marking works
- Preparing for a Bubble sheet exam
- Create a bubble sheet assignment
- Define the correct answers and change the answer key after submission (Edit Answer Key)
- Upload papers to Gradescope (Manage Scans)
- Check and assign any papers not automatically matched to student records (Manage Submissions)
- Check and process uncertain marks (Grade Submissions)
- See a summary of grades and download statistical information (Review Grades)
- Post overall grades to Blackboard via the Review Grades screen.
How do bubble sheets work?
- Staff can predefine the answers for up to 200 questions, with answer choices A-E. Gradescope supports scoring options of exact, partial or either/or scoring.
- Students need to be provided with a printed Gradescope Bubble Answer Sheet (PDF) to enter their name, student ID number and their answer choices. (Please do not make any changes to this standard answer template).
- Completed answer sheets are scanned (using a standard photocopier). The scanned pdfs are then uploaded to Gradescope.
- Gradescope automatically matches students to their scanned paper based on name / student ID. (Staff can assign any papers not automatically matched).
How does marking work?
- Gradescope will automatically grade answers that it is sure about.
- Gradescope will identify uncertain marks which require checking (typically this may be because a student has crossed out an answer).
- Staff need to review and confirm uncertain marks.
- Once reviewed, final grades can be posted to Blackboard.
We recommend that you provide a practice test so that students have an opportunity to complete the answer sheet and you can see how the marking process works.
Download and print the Answer Sheet
Download the Gradescope Bubble Answer Sheet (PDF) and ensure a printed copy of the answer sheet, is provided to students sitting the exam. It’s important that you do not make changes to the answer template, as this could prevent Gradescope from being able to process the answer sheets correctly.
Set up your Gradescope submission
You will need to set up a Gradescope course and Bubble sheet assignment, before you can scan completed answer papers. Staff creating a bubble sheet assignment , will need a copy of the exam paper including the correct answers and the number of marks for each question.
What should students do on the exam day?
On the day of the exam, students must enter their name and ID number, section (unit code) and answers onto the printed Gradescope Bubble Answer Sheet. If a student needs to change their answer, we recommend they put a X through the incorrect answer (see example below).


In this example student has crossed out answer D as incorrect.
If you wish to give additional guidance to your students with their answer sheet, you can Download example instructions here. We recommend that you do not staple additional guidance to the answer sheet, as any additional cover sheet would need to be removed before the answer sheet is scanned.
Creating a Bubble Sheet assignment
Once you have created your Gradescope course within Blackboard next, you can set up a Bubble sheet. To create your bubble sheet either follow the Quick Steps or watch the short video below.
Quick steps
- Open the Blackboard space that the Gradescope course has been linked to and click on your Gradescope link to open the Gradescope Dashboard.
- Click on Assignment, then Create Assignment.
- For Assignment type select Bubble Sheet and click Next.
- Enter an Assignment Name.
- Submission Anonymization (leave this check box unticked).
- Who Uploads Assignment should be set to Instructor (as staff will be scanning and uploading the paper).
- Click Create Assignment to save the settings you have selected.
Watch the view below for a summary of the steps which take place once an assignment has been set up.
Edit Answer Key
Once you have created your Bubble sheet, you will need to define the correct answers for each question in the Edit Answer Key screen. (Contact the Unit Leader if you need a copy of the exam paper / correct answers).
- For questions with more than one answer option, the scoring key allows you to apply exact, partial or either/or scoring to all questions. The default point value for each question is listed as ‘1’.
- Allocate answers to the numbered questions by clicking on a letter or letters underneath the question.
- Click on the cog icon next to a question number if you wish to change the default scoring (exact, partial, either/or) or the points value for that question.
Once you have defined your answers click Save Answer Key. You can check or edit your answer key at any time, but opening the assignment and clicking on the menu option Edit Answer Key.
What happens if I need to change the answer to a question or exclude a question from marking after papers have been uploaded?
You can still Edit an answer key after submissions have been uploaded. Any changes that you make will be applied to the marking.
- To exclude a question from marking, go to the Edit Answer Key screen and uncheck any selected answer bubbles for that question and then Save the answer key to apply the changes.
- Next go to the Review Grades screen. You should see that the maximum total score for the paper has been adjusted to reflect that you have excluded a question from marking.
Manage Scans
Once students have completed their answers, the answer sheets need to be scanned and uploaded as a pdf to Gradescope. Gradescope recommends a maximum of 50 to 80 submissions per pdf upload. Therefore, for large groups we recommend that you scan papers in several smaller batches. (When scans are uploaded Gradescope will use the student name and ID number to identify split points and separate the papers into individual files for marking).
To upload scans follow the instructions below:
- Open the relevant Blackboard space and click on your Gradescope link to open the Gradescope Dashboard.
- Click on the relevant assignment from the Gradescope Dashboard.
NOTE: (If you cannot see the assignment, you may be listed as a ‘student’ in Gradescope. To change a role go to Roster screen. Support staff can be given the role of TA, so they can access the assignment and upload scans).
- Next click Manage Scans and then Select PDF Files. Then locate and upload your files.
- Gradescope will process the files, splitting each file into a separate page and matching submissions to each student.
- We recommend that you check the number of answer sheets against your class register. (You may have more than one batch of papers if the exam involved a main room and an extra time room).
You can return to the Manage Scans screen at any point to upload additional files.
Manage Submissions
The Manage Submissions screen shows an overview of students on the course.
You’ll see a summary of:
- Number of submissions (answer sheets uploaded)
- X/X Students Have Not Been Matched (click on this link to view a list of relevant students).
- All, Autoassigned and Unsassigned. Click on these options to filter the answer sheets shown.
- You can also use the Search by name field to search using a student name or student ID number.

How do I match an unassigned paper?
- Click on Unassigned to see a list of any answer sheets that Gradescope has been unable to match.
- Under Name & ID region, you will see a preview of the Name and ID number of the answer sheet.

- Check the name shown in the preview. If you wish to view the full paper click on the icon shown above to (View Page) or Show Details.
- To assign a paper. Click on the Enter student name field. You can search using the dropdown list or by typing in a student name or ID number.
- Once you’ve located the correct record click on the name to assign it. The name selected will appear alongside the paper.
- If you accidentally selected the wrong name or ID use the pencil Edit icon to change an assigned student.
Grade Submissions
Please check with the course unit leader which member of staff has been allocated to grade the bubble sheets. The member of staff marking will need an appropriate role, to access the course and will need to be notified once answer sheets have been uploaded and matched to student records.
Gradescope will automatically grade bubble sheet assignments as soon as answer sheets are uploaded. However, staff will still need to review and confirm uncertain marks. (Uncertain marks can occur when a student has crossed out or marked more than one answer.)
For guidance on how to locate your submissions, review and confirm uncertain marks you can watch the video or follow the quick step instructions below.
Quick steps
To access submissions for marking:
- Open the relevant Blackboard space and click on your Gradescope link to open the Gradescope Dashboard.
- Click on the relevant assignment from the Gradescope Dashboard.
- Next, click Grade Submissions from the left menu panel.
We recommend that you review marks on a question by question basis, which makes it easier to save your marking progress.
- Click on the Uncertain marks link next to the relevant question to open a list of uncertain marks.
- Gradescope will display a preview of all uncertain marks for the selected question.
- Underneath the preview an answer bubble will be completed, indicating what Gradescope assumes the student’s intended answer is. If Gradescope has incorrectly interpreted the student’s answer staff can click to select/deselect the assigned answer so it matches the student’s paper.
- If staff need to access the full submission they can click on the View page icon.
- Once answers are all checked, click Confirm All Marks.
- You will return to the grading dashboard, where you can see that the marking has been updated.
Review Grades
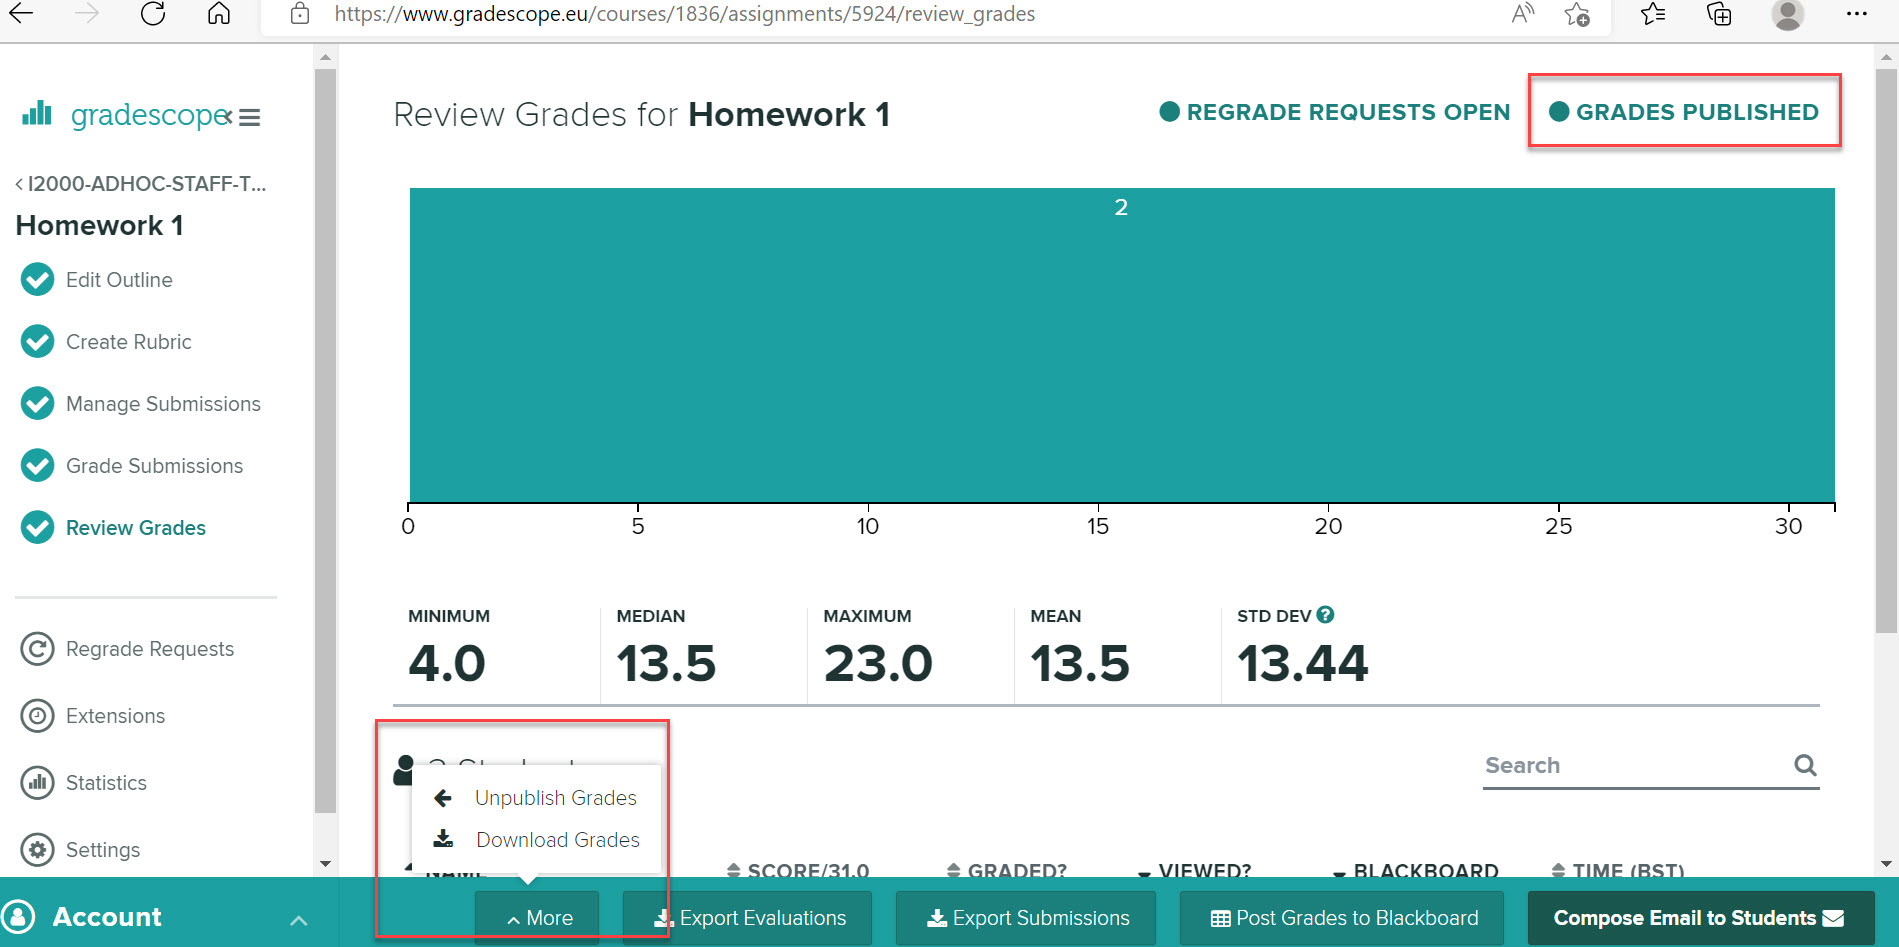
The review grades screen provides an overview of graded work. In this screen you can check grades, access statistical information on grading, download summary data and choose options to release grades to your students.
- Navigate to your Gradescope course via Blackboard and click on the relevant assignment from the Gradescope Dashboard.
- Next, click Review grades from the left menu panel.
- You can use the search box to search for an individual by name or student ID number.
- Click on an individual student name to view that student’s full submission.
Downloading data
The Download Grades option provides a breakdown of student responses by question, summarising the student’s total score for the paper and points scored for each question.
The Download Responses option provides a full breakdown of student responses for each question (including what letter(s) they answered), alongside the correct response, question point weighting and points scored for each question.
Posting grades to Blackboard
To post marks to Blackboard a column must be set up within Blackboard Gradecentre and linked to your Gradescope course. To do that follow the instructions: Gradescope: Get Started- Post to Blackboard
If you have already linked your Gradescope course to Blackboard then a the link icon will show in bold in the Review Grades screen. You can link or unlink a course from the Gradescope Dashboard by clicking on Course Settings.
Go to the Review Grades screen within Gradescope and click on Post to Blackboard to push the student’s overall mark to a column within the Blackboard Grade Centre.
Unpublishing Grades
If you have published grades within Gradescope, to Unpublish grades go to Review Grades, click on More then Unpublish Grades. For any grades posted to Blackboard, you will need to hide the associated column in the Blackboard Grade Centre.


