Camtasia
Camtasia is a screen recording and video editing software program, providing users with the tools to quickly create professional looking asynchronous video content and presentations via an intuitive user interface. Once exported, these videos can then be easily uploaded to the University video portal and embedded within your Blackboard courses.
Camtasia includes integration with PowerPoint, allowing users to turn presentations into videos from directly within PowerPoint. Alternatively, slides can be imported directly into Camtasia, which allows for the selection of particular points of interest, rather than creating a video using the entire presentation.
Camtasia is available for both Windows and Mac operating systems.
Click here for a full list of Camtasia features
Camtasia tutorials
Camtasia provide a full suite of video guides to help guide you through both basic and advanced video editing using the Camtasia suite. Click here to access all video tutorials. Below are some useful short video tutorials to guide you through the basics:
Remove Mistakes From a Video Using Trim & Split
Record a PowerPoint presentation
How to install Camtasia on a University managed Windows PC/Laptop
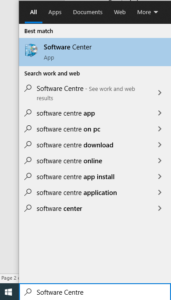
Using the Windows search bar located at the bottom left hand corner of your screen, search for Software Centre, and click on the software Centre App result that appears:
When the Software Centre loads, click on Applications on the left hand menu. Type Camtasia into the search bar located towards the top right hand corner of the screen and click enter. The software centre should then display Camtasia 2021.
Installation of Camtasia software will begin. Upon completion you can find the software by searching for Camtasia 2021 in the Windows search bar located at the bottom left hand corner of your screen.
Once you have downloaded and installed Camtasia you will initially be using the software as a trial. To unlock the full version you will require a licence key. To request a licence key from the University please click here and complete the ‘Camtasia and Snagit Request Form’. Once you have received your licence key, you can unlock the trail version of Camtasia for unlimited access by following these instructions.
How to install Camtasia on a non-managed computer.
To download Camtasia please click here and select either ‘Windows Download’ or ‘Mac Download’, dependent on your computer’s operating system. Find and open the downloaded file to begin the installation, and follow any on-screen prompts. Once you have downloaded and installed Camtasia you will initially be using the software as a trial. To unlock the full version you will require a licence key. To request a licence key from the University please click here and complete the ‘Camtasia and Snagit Request Form’. Once you have received your licence key, you can unlock the trail version of Camtasia for unlimited access by following these instructions.
How to use Camtasia for Screen Recording
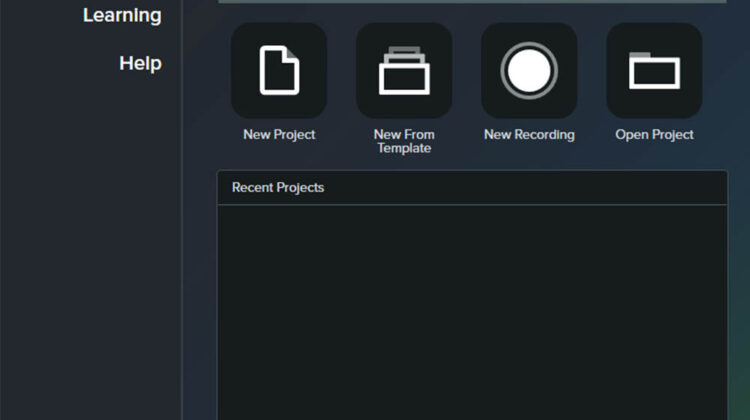
When you first open Camtasia you are met with the following Get Started screen:
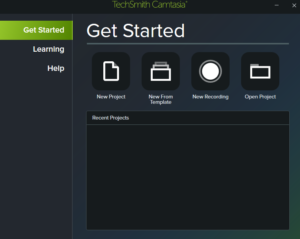
- New Project: Create a new video project from scratch.
- New From Template: Create a new video project using templates provided by Camtasia.
- New Recording: Take you straight into recording video content.
- Open Project: Open a pre-existing project that you have previously created or are part-way through creating.
New Recording
To begin a new recording click on the ‘New Recording’ icon:
You will then be taken to the options screen shown below. From here you can select what you would like to record:
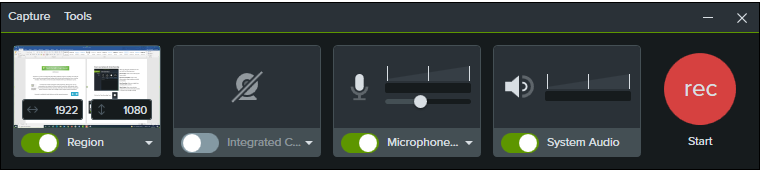
Region: This relates to the screen/area you would like to record. You can choose the entire screen, or even select a specific area of the screen by entering custom size value or dragging the edges of the screen border.
Integrated Camera: Select this option if you wish to include a web cam recording or yourself within the video.
Microphone Array: Allows you to select the microphone that you wish to use for recording audio. We recommend using an external microphone for optimum audio quality.
System Audio: By selecting this option, you will record an audio that is output from your computer. For example, if playing a video from the University video portal, the recording will capture both the video and audio from this.
Recording Button: Select the recording button when you are happy with your setup options and wish to begin the recording:
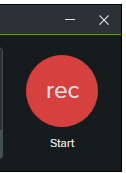
A countdown timer will display for a few seconds before the recording begins:
You can pause your recording by clicking on the pause icon, and resume by clicking on the circular record icon that appears.
You can also restart your recording by clicking on the restart icon, or minimise the recording bar by clicking on the minimise (-) icon.
Once you have finished your recording, click on the stop icon.
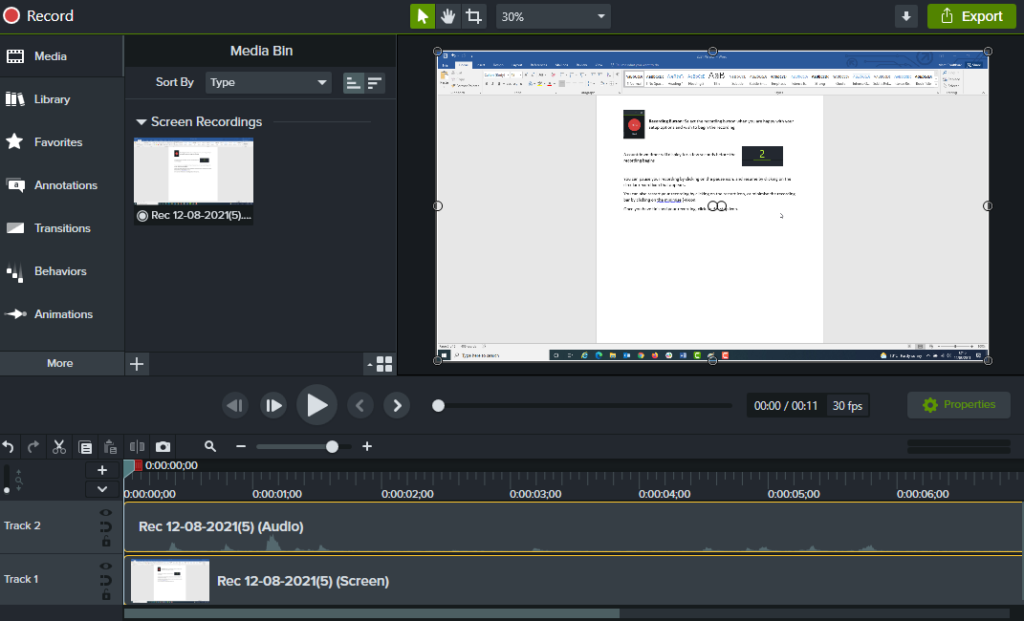
Your recording will then appear in the Camtasia editing screen. From here you can view the recording, make edits (such as adding content or removing sections of the recording), and then export the final edit as a video for uploading/embedding purposes:
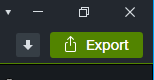
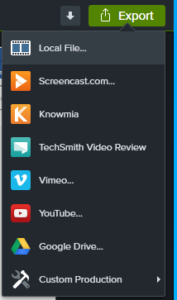
To export your video click on the green Export button in the top right hand corner of the screen:
Select Local File to save your video to your computer. Once saved you can upload your video to the University’s video portal and embed the video in your Blackboard course:
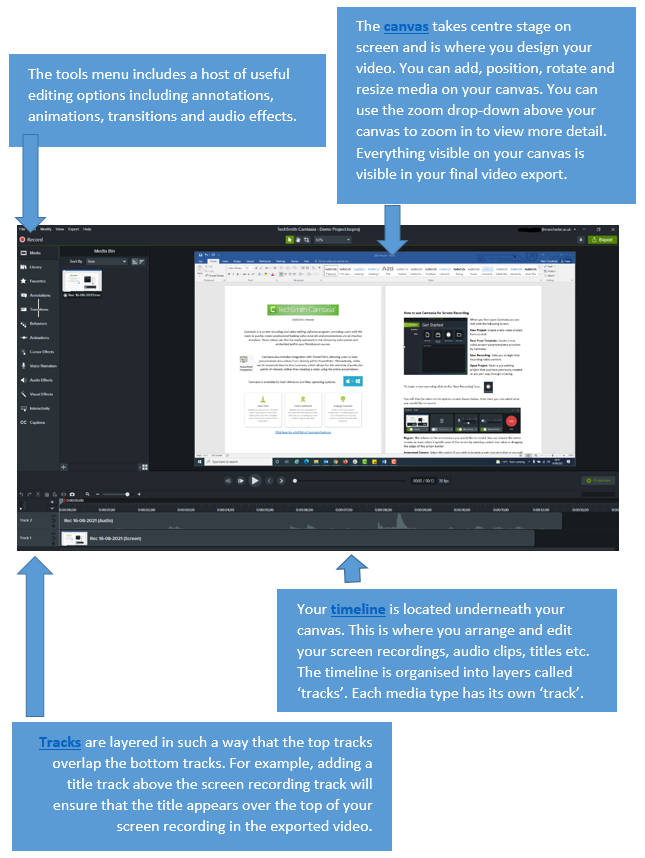
Camtasia Editing Screen – Overview
The Camtasia editing screen has a number of useful functions, some of which are highlighted below. For further information and a more in-depth explanation, please navigate to the Camtasia 2021 help website, where you can access various written guides and video tutorials:
Tools Menu – Overview
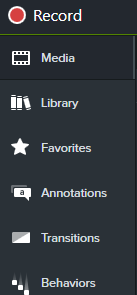
Record: Click on this to make a new recording
Media: Recorded media is stored here. Drag and drop media to the timeline or canvas to be included in the final video edit.
Library: A place to store your media and associated assets for use in your Camtasia project. Add sub folders to help organise your assets.
Favourites: Save your favourite video enhancements in one place for easy access in the future.
Annotations: Add annotations such as text, arrows/shapes and highlights to enhance your video.
Transitions: Add a transition to the beginning, middle or end of your video, to indicate a passage of time or flow between clips.
Behaviours: Animation pre-sets to bring your videos to life. Drag and drop on timeline or canvas, and combine for unique effects.
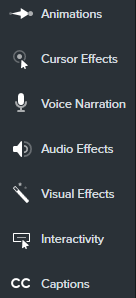
Animations: Zoom in, zoom out, or pan around your video. You can also rotate, tilt and scale your video.
Cursor Effects: Enhance your mouse cursor in any recordings by highlighting the cursor, magnifying, and adding sound effects.
Voice Narration: Record a voice-over whilst your video plays on the timeline, and add a script to read aloud for easy narration.
Audio Effects: Adjust the audio levels and audio quality of your video.
Visual Effects: Add effects to your video, such as removing a green screen or adding drop shadow.
Interactivity: Add an interactive quiz or survey to your video (requires uploading to Screencast.com)
Captions: Add written captions to your video. Includes manual or automatic syncing of text, or speech-to-text recognition.
Further Resources
For additional information and tutorials, please visit the Camtasia website. See also the UoM library’s Library For Educators website for more useful Camtasia Tips