Adaptive Release

What does Adaptive release do?
Adaptive release settings can be used to restrict the availability of course content (eg. folders, items, files, web links, assignment links) based on criteria set by a member of staff.
These criteria can include:
- Date / time.
- By membership – specific student(s) or groups of students can see the content.
- Grade – dependent on items, scores or attempts relating to a particular column within Blackboard Gradecentre.
- Review status – the content will only be released to students if they have reviewed a specific content item.
Using Adaptive Release
- Ensure Edit mode is switched ON in the Blackboard space.
- Locate the relevant content (folder, file, item, weblink).
- Click on the grey chevron next to the content name to reveal the menu options and choose Adaptive Release
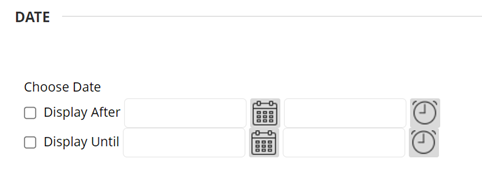
Adaptive release: Date / time:
The settings in this section can restrict the date and times that the relevant content is available.
- Display After: Content will become available to students once the date / time entered has passed.
- Display Until: Using this option allows you to set a date and time the content will be available to. Use the calendar and clock icons to select a relevant date / time
Adaptive release: Membership
The settings in this section can restrict which users can access the relevant content.
In the Membership section select the option(s) you’d like to use:
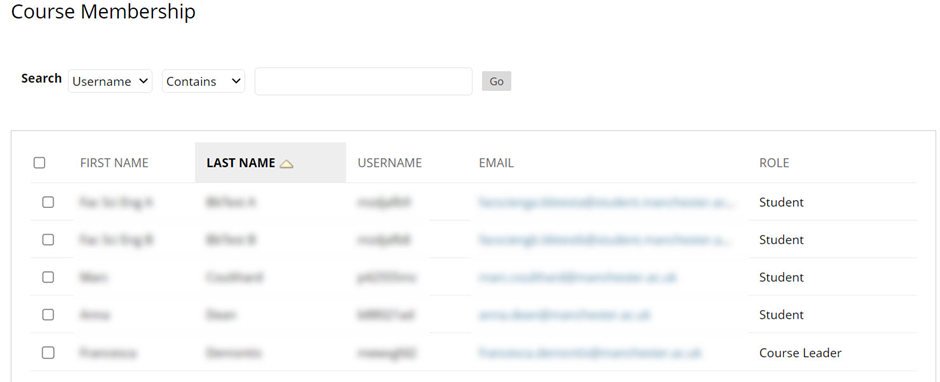
To release content to a specific student or student(s), under Username, choose Browse to open a new window with a list of users on the course, then select the relevant users and choose Submit. A list of selected usernames will appear in the username field.

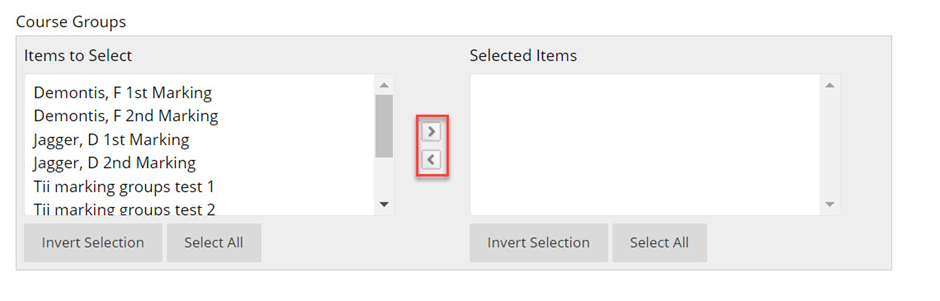
Groups
If you already have groups set up within the Blackboard space, you can choose to restrict availability to one or more groups.
- Under Course Groups select the names of the relevant groups and use the arrows or select all to add or remove groups from Selected Items field.
The content will be visible to any users who are part of a group that appears in the Selected Items field.
Adaptive release: Mark
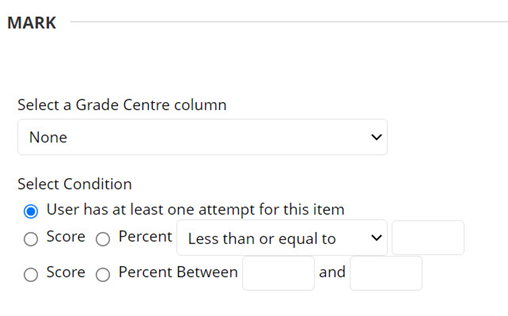
The settings in this section can restrict access to content until a user had attempted or received a minimum score for a test or assignment.
- Under Select a Grade Centre column choose the relevant test or assignment.
- Under Select Condition set the criteria that the user must fulfil in order to be able to see the content item.
Adaptive release: Review Status
The settings in this section can restrict access to the content you are editing (eg. ‘Content B’) until a user has reviewed another piece of content (eg. ‘Content A’ -Staff user guides).
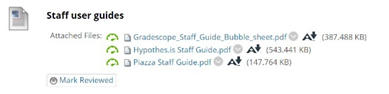
- Firstly, ensure that the Review Status for ‘Content A’ is enabled.
- Locate the item for ‘Content A’ in the relevant content area, then click on the Item Option button (the grey chevron) to bring up the contextual menu.
- Select Set Review Status (Disabled).
- From the Review Status window, select Enable and click Submit.
- Once the review status has been enabled for ‘Content A’, locate the item for ‘Content B’.
- Click on the Item Option button (the grey chevron) to bring up the contextual menu and select Adaptive Release.
- Under Review Status>Select An Item, choose Browse and locate the item (‘Content A’) that users must review before gaining access to ‘Content B’.
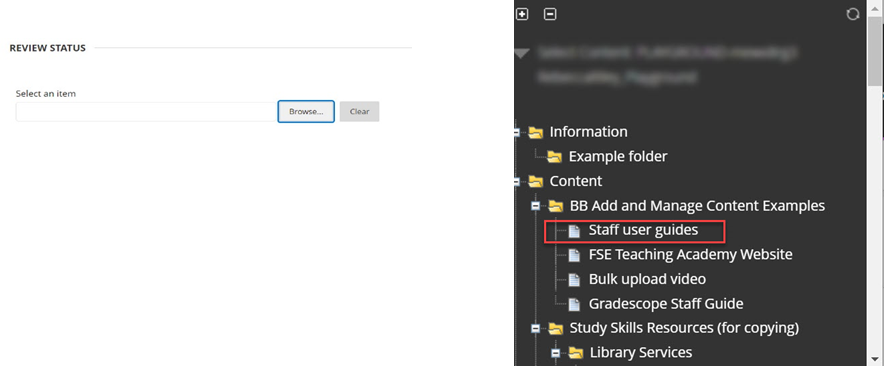
- Once the item has been selected, the full filepath will show in the Select an item field.

- Next choose Submit to save the changes.