Pages in Canvas are like mini webpages that can hold many different types of content, such as text, images, videos, external links, course links, and files. They are really useful for making content flow logically.
Creating a Page
Pages can be created either through the course’s Pages section or directly within a Module.
Option 1: Create a Page from the Pages section
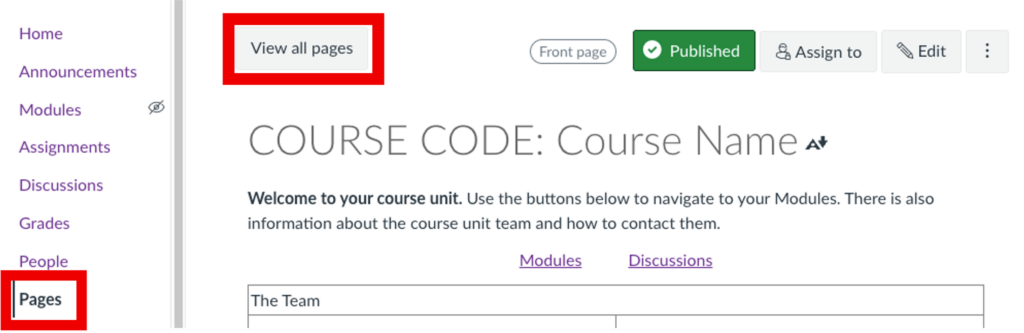
- Navigate to the Pages tab using the left-hand course menu.
- If the Front page label is displaying, select the View all pages button at the top of the page.
3. Select the + Page button at the top of the pages list.
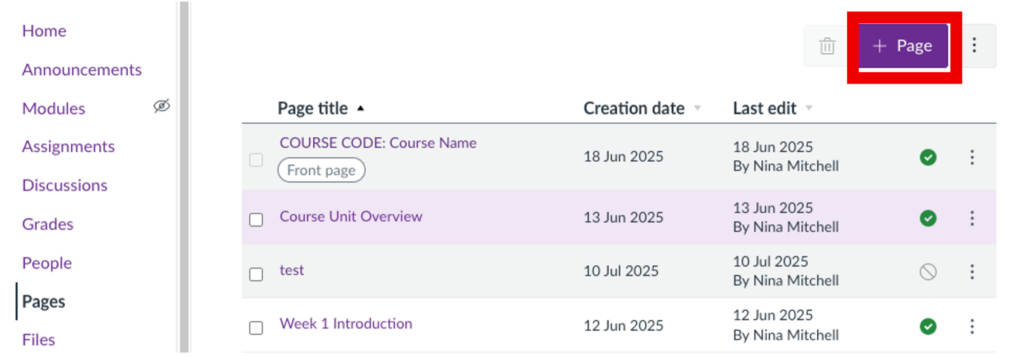
4. Edit the page to your preferences (read on for more detail) and click Save.
5. Select the Modules tab in the left-hand course menu, then navigate to the module you want to add the page to.
6. Select the + button on the Module bar.
7. Select the drop-down menu at the top and select Page from the list.
8. Select the name of the page you just created from the list below the drop down.
9. Click the Add item button at the bottom of the menu.
Option 2: Create a Page from within a Module
- Select the Modules tab in the left-hand course menu, then navigate to the module you want to add a page to.
- Select the + button on the Module bar.
- Select the drop-down menu at the top and select Page from the list.
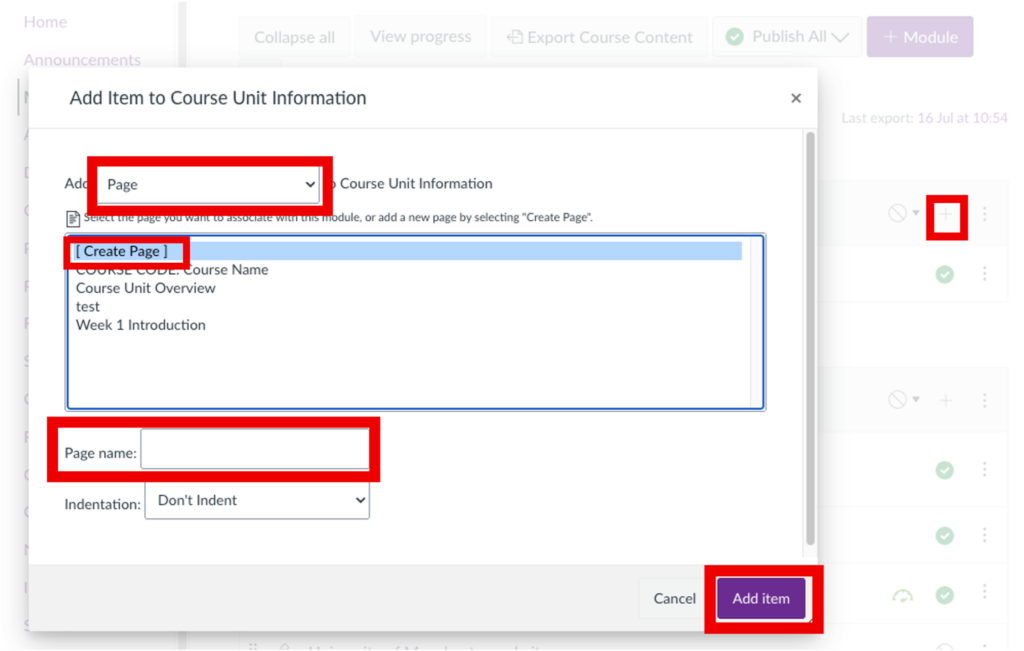
4. Select [ Create Page ] from the drop-down menu.
5. Enter the name of the page in the Page name field.
6. Select the Add item button at the bottom of the menu.
7. The page you just created will appear within the selected module; click on the name of the page to open it.
8. Select the Edit button at the top of the page to add content to the page.
Adding and formatting text
- Navigate to the page you wish to edit and select the Edit button at the top.
- Type text in the text box.
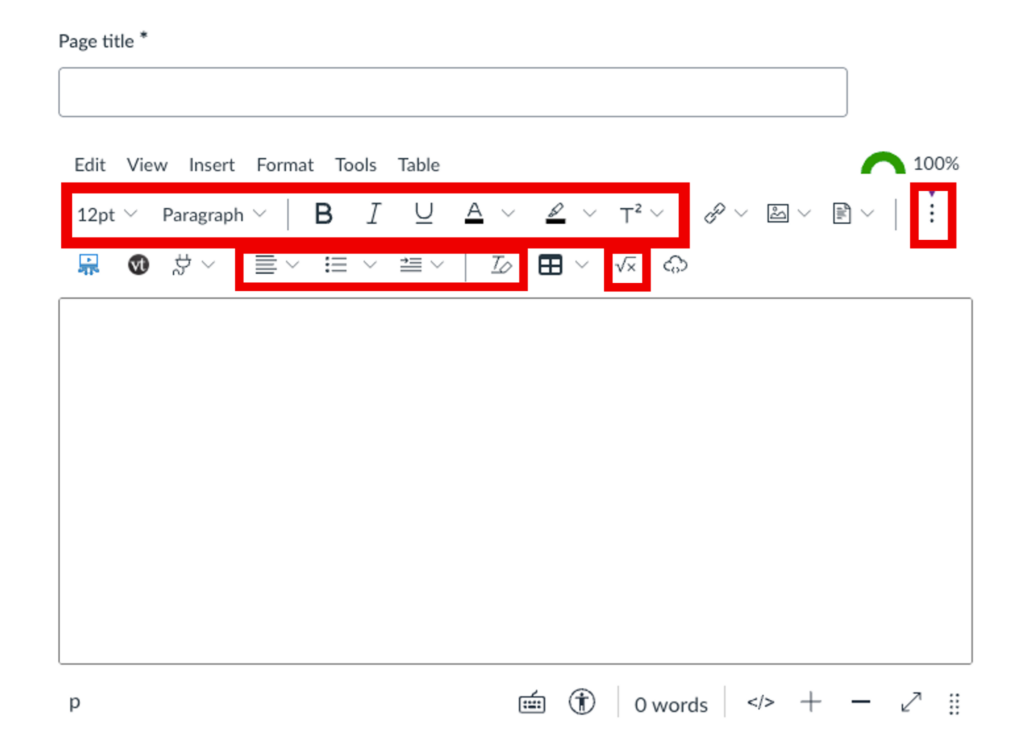
- Use the toolbar in the Rich Content Editor to format text. You can apply the following formatting:
- change the text style using the drop-down menu that is currently displaying Paragraph.
- make the text Bold, italic, a different colour, highlighted, superscript or subscript.
- Click the three vertical dots above the text box to reveal more formatting options such as align text, add bullets, indent, or clear styles.
Creating a table
- Navigate to the page you wish to edit and select the Edit button at the top.
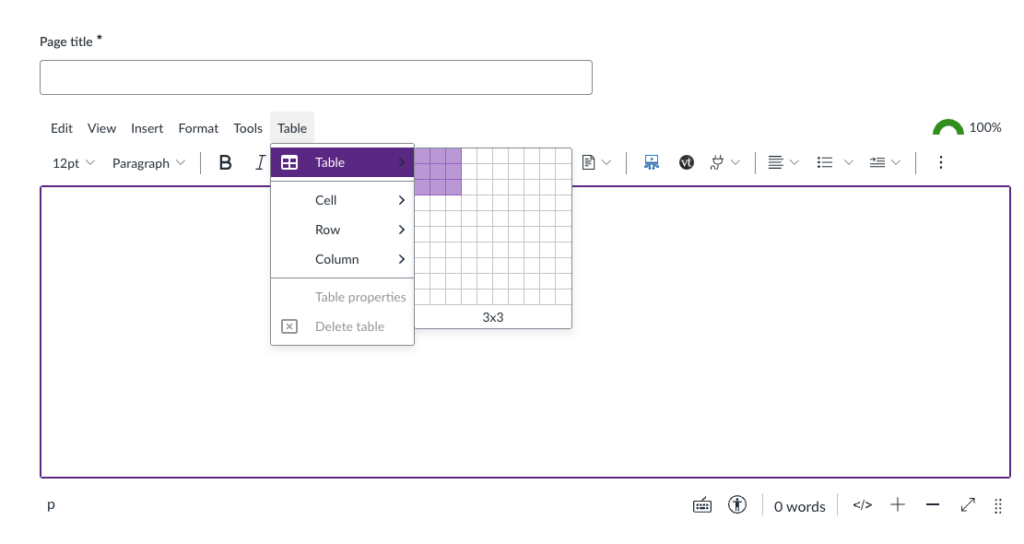
- From the toolbar in the Rich Content Editor, select either Table or Insert > Table.
- Move your cursor over the Table option.
- Drag your cursor over the grid and click to select the desired number of rows and columns for your table.
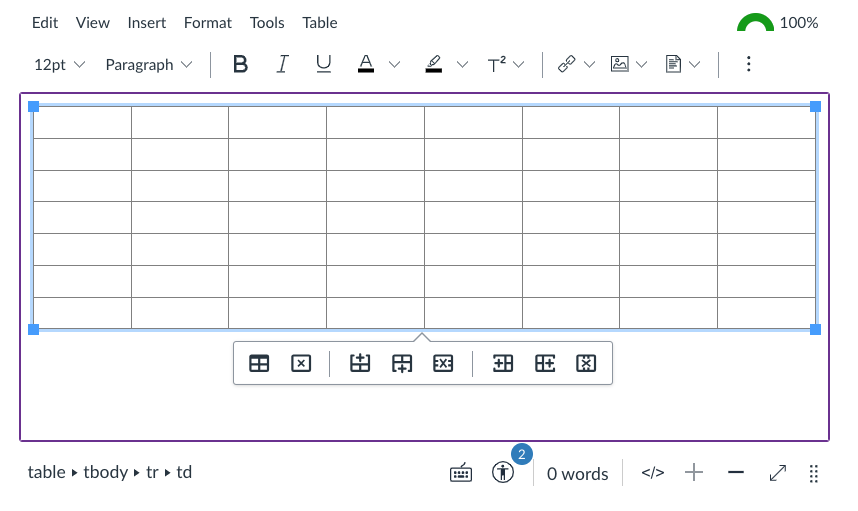
4. To edit the table, click anywhere on it to select it. Then, click Table in the toolbar to add or remove rows and columns, merge or split cells, or adjust table properties. You can also access these options via the overflow toolbar that appears beneath the table once it’s selected.
Adding external URLs
- Navigate to the page you wish to edit and select the Edit button at the top.
- From the toolbar in the Rich Content Editor, select Insert and hover your cursor over the Link option. Alternatively, click the Link button in the toolbar above the text box.
Note: If the button isn’t visible, click the three dots in the toolbar to reveal more options.
2. Select External Link.
3. Type the text you would like to display as the hyperlink in the Text box.
4. Type or paste the URL of the page into the URL box.
5. Click Done.
Adding hyperlinks to locations within the course
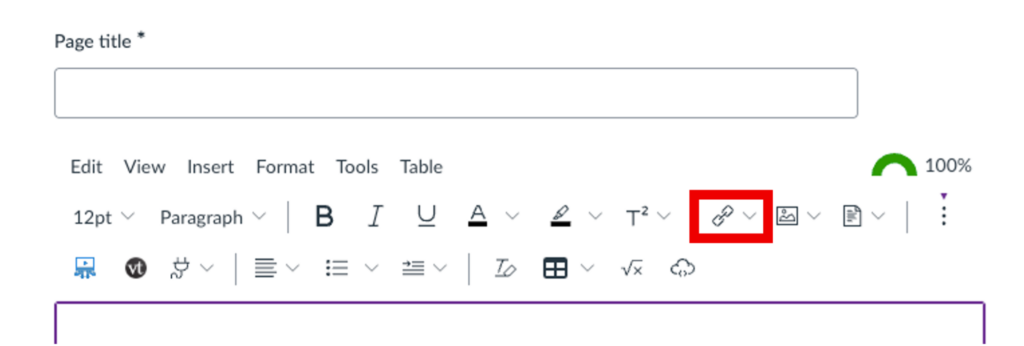
- Navigate to the page you wish to edit and select the Edit button at the top.
- From the toolbar in the Rich Content Editor, select Insert and hover your cursor over the Link option. Alternatively, click the Link button in the toolbar above the text box.
Note: If the button isn’t visible, click the three dots in the toolbar to reveal more options.

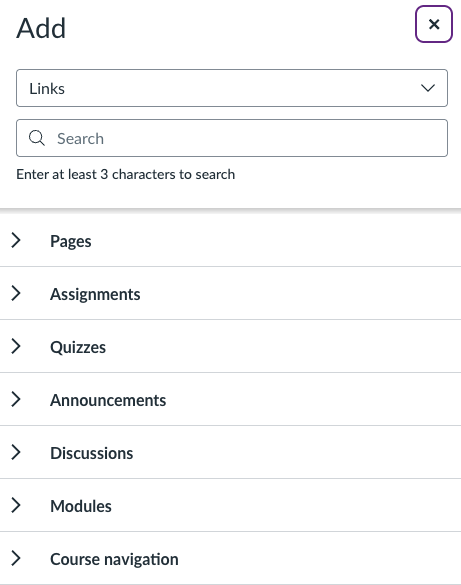
3. Select Course Link.
4. To search for course content, type at least three characters in the Search field. You search for a specific page, assignment, quiz, announcement, discussion, module, or course navigation tab.
5. To create a course link, simply click on the content item you wish to link to.
6. Confirm that a hyperlink to the correct course content now appears on your page.
7. To edit the hyperlink just added, select it and click on Link Options when it appears above the link.
6. You can edit the title of the link in the Text box, if it needs to be made clearer or more intuitive.
7. Click Replace.
Embedding images
- Navigate to the page you wish to edit and select the Edit button at the top.
- From the toolbar in the Rich Content Editor, select Insert and hover your cursor over the Image option. Alternatively, click the Image button in the toolbar above the text box.
Note: If the button isn’t visible, click the three dots in the toolbar to reveal more options.
- If you’ve already uploaded the image to your course or user Files area, simply choose Course Images or User Images, then select the image you want to use.
- If you have not yet uploaded the image to Files, select Upload image and upload an image from your computer.
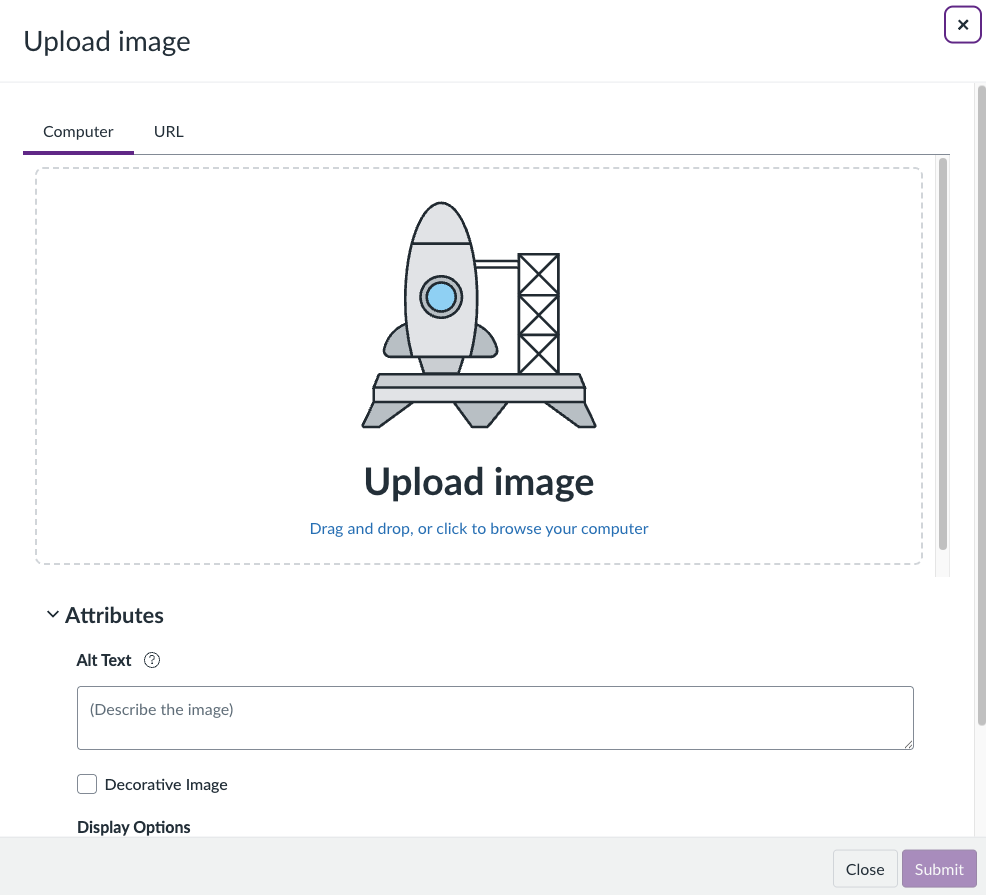
- Input a brief description of the image in the Alt Text box, or tick the Decorative Image option if the image doesn’t add information to the content of your page.
- Ensure Embed image is selected under Display Options.

- Click Submit.
Embedding documents
- Navigate to the page you wish to edit and select the Edit button at the top.
- From the toolbar in the Rich Content Editor, select Insert and hover your cursor over the Document option. Alternatively, click the Document button in the toolbar above the text box.
Note: If the button isn’t visible, click the three dots in the toolbar to reveal more options.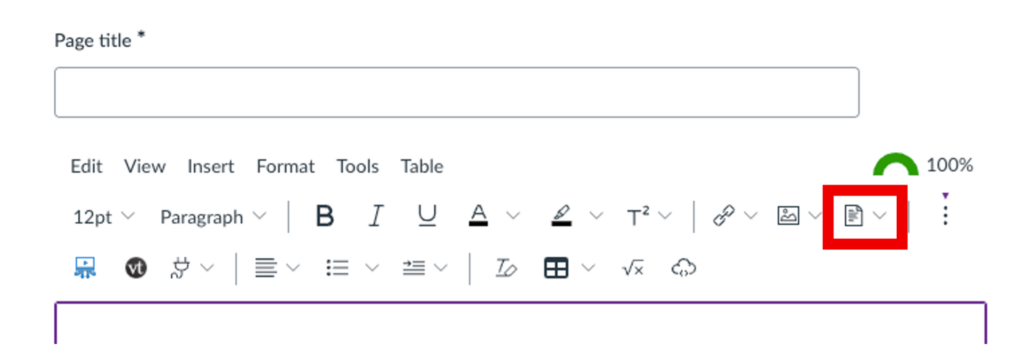
- If you’ve already uploaded the document to your course or user Files area, simply choose Course Document or User Document, then select the relevant file.
- If you have not yet uploaded the document to Files, select Upload Document and upload the document from your computer.
- Once the document is linked on your page, you can customise how it looks. Simply click anywhere on the link to select it, then choose Link Options from the toolbar that appears above.
- You can edit the link title by amending the Text box if you wish.
- To automatically show a document preview on the page, select Preview inline and check Expand preview by default.
- To display the document preview in a separate pop-up window, select Preview inline and check Preview in overlay.
- Click Done.
Embedding videos
You can embed a video using either Canvas Studio or the UoM Video Portal. These platforms are currently intended to coexist alongside one another.
Embedding videos from Canvas Studio
Canvas Studio is an interactive video platform within Canvas that lets instructors and students upload, manage, and engage with video content. It offers a more interactive experience where staff and students can comment directly on the video timeline, encouraging discussions at key moments. Quizzes and assignments can be integrated into videos, and students can contribute their own videos for projects and peer reviews. Timestamped feedback can be added.
For a quick overview of Canvas Studio’s key features and guidance on using the tool, head over to this page: Canvas Studio.
To embed a video into a Canvas page from Studio, follow the steps below.
- Navigate to the page you wish to embed the video into either via Modules or Pages.
- Click the Edit button above the page.
- Select the Canvas Studio button from the toolbar in the Rich Content Editor.
Note: If the button isn’t visible, click the three dots in the toolbar to reveal more options.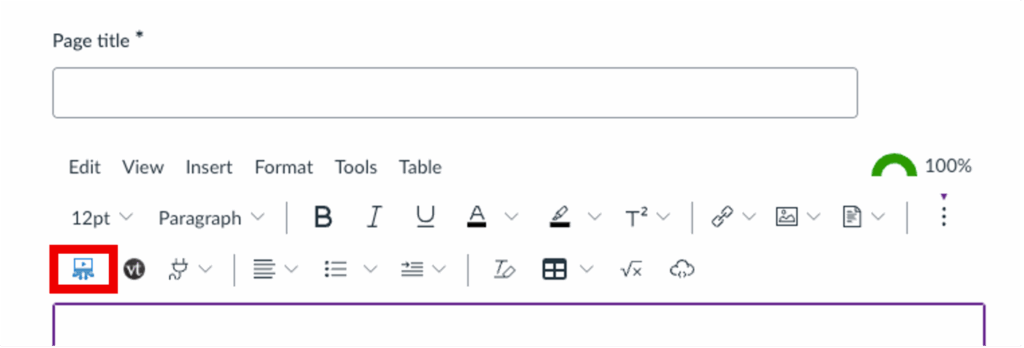
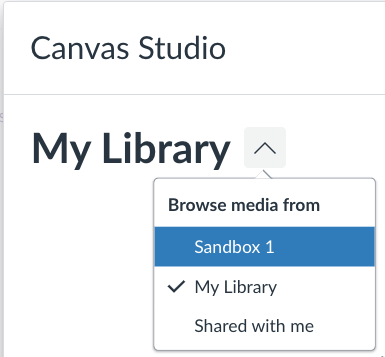
- Select the correct video library from the drop-down menu at the top.
- Select the video you wish to embed.
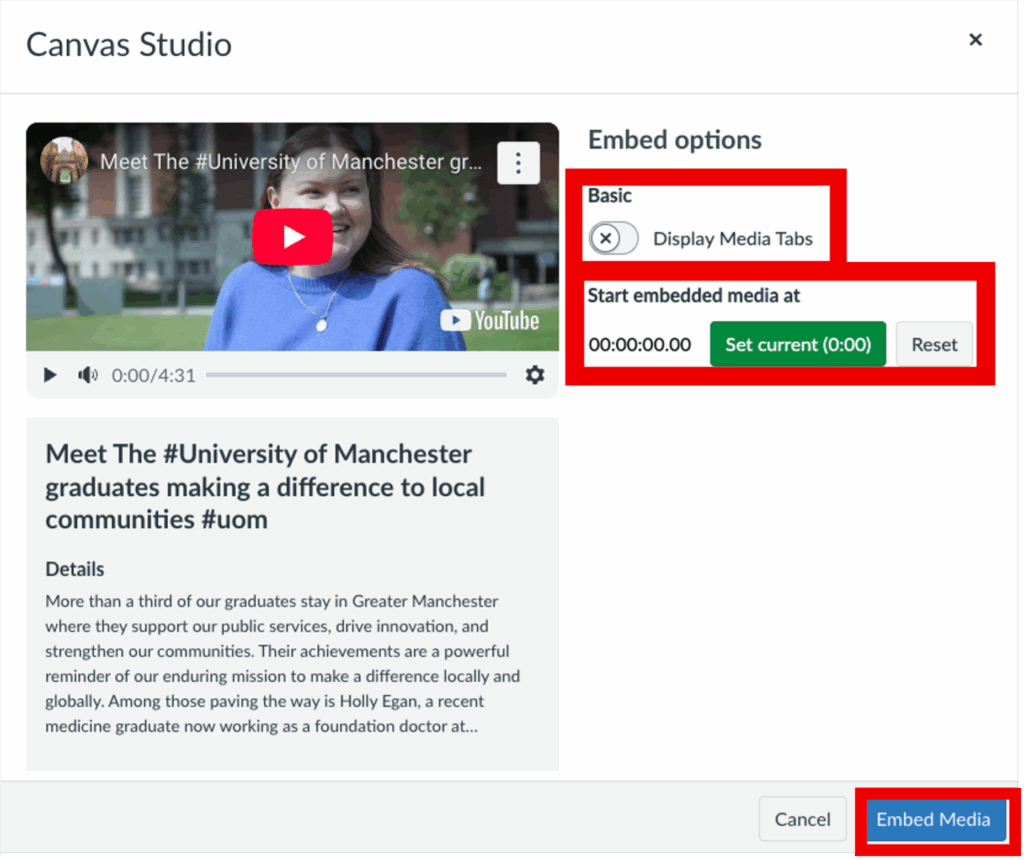
- Configure the Embed options:
- Choose whether to show media tabs – such as Details, Comments, and Insights – beneath the video by toggling them on or off. If enabled, click the Details tab to edit the video description.
- To set a specific starting point for playback, use the Start embedded media at option.
- You can also toggle the download setting to allow or restrict viewers from downloading the video, if supported.
- Click Embed Media.
Embedding videos from the UoM Video Portal
To embed a video from the Video Portal into a Canvas page, follow the steps in the link below.
How do I embed content from the video portal in Canvas?
Editing page settings
To edit the settings of a page, follow the steps below.
- Navigate to the page you wish to edit and select the Edit button at the top.
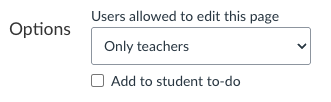
- Click the Add to student to-do checkbox if you want this page to appear in the students’ to-do lists, the course calendar and the course to-do list.
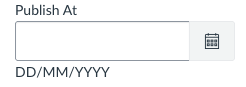
- To schedule when the page will be published, enter a date in the Publish At field.
- Use Assign To to release the page to specific students or sets of students, or set availability dates. For more guidance on using Assign To, see this link: Using Assign To.
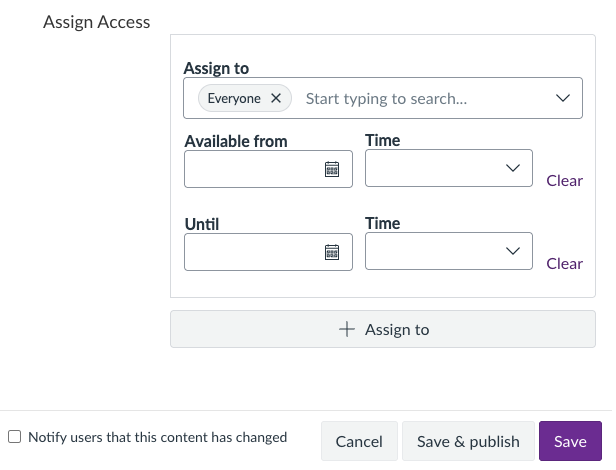
- If you wish to notify students that the content of the page has changed, tick the Notify users that this content has changed.
Note: if a user’s Course Content notification is turned off, they will not be notified. - Select Save to save the changes, or Save and Publish if you’re ready to publish the page.
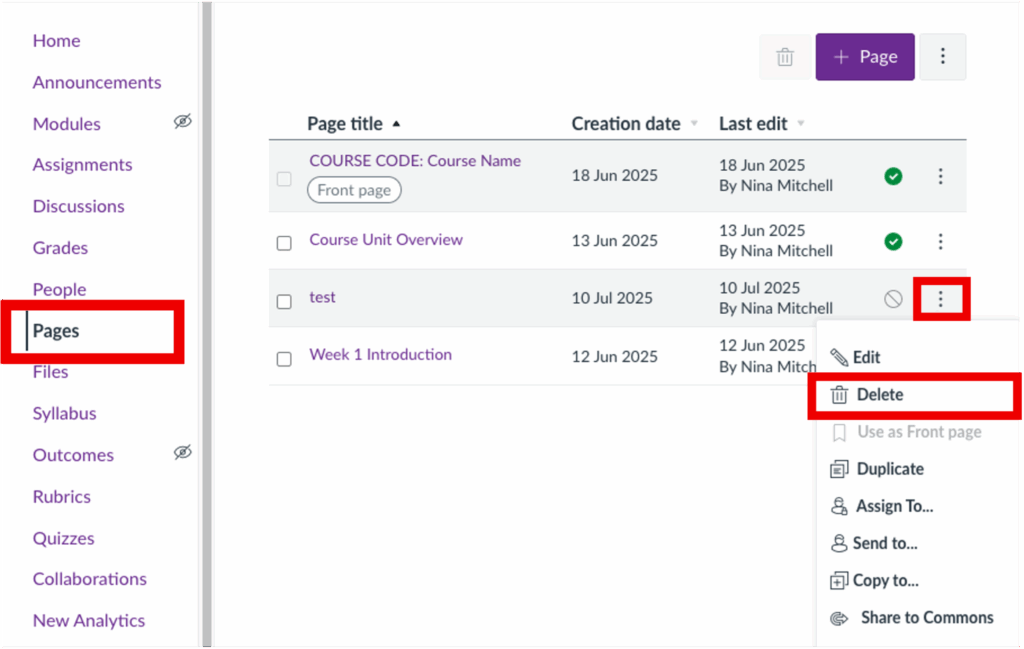
Deleting a page
- Navigate to the Pages tab within the left-hand course menu.
- Locate the page you wish to delete.
- Click the three vertical dots to the right of the page name.
- Click Delete.
If you have accidentally deleted content that you wish to restore, see this guide: Restoring deleted content in Canvas.