Canvas quizzes are a useful tool to engage students, assess their understanding and provide timely, formative feedback. This article will provide guidance on how to create quizzes, build questions and adjust settings to suit the course requirements.
Build your quiz
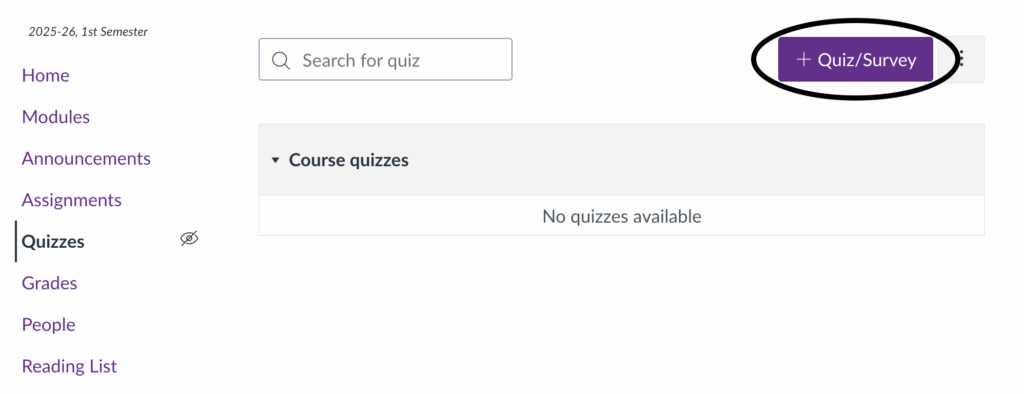
Step 1: Navigate to the Quizzes area on the course navigation menu and select the + Quiz/Survey button.
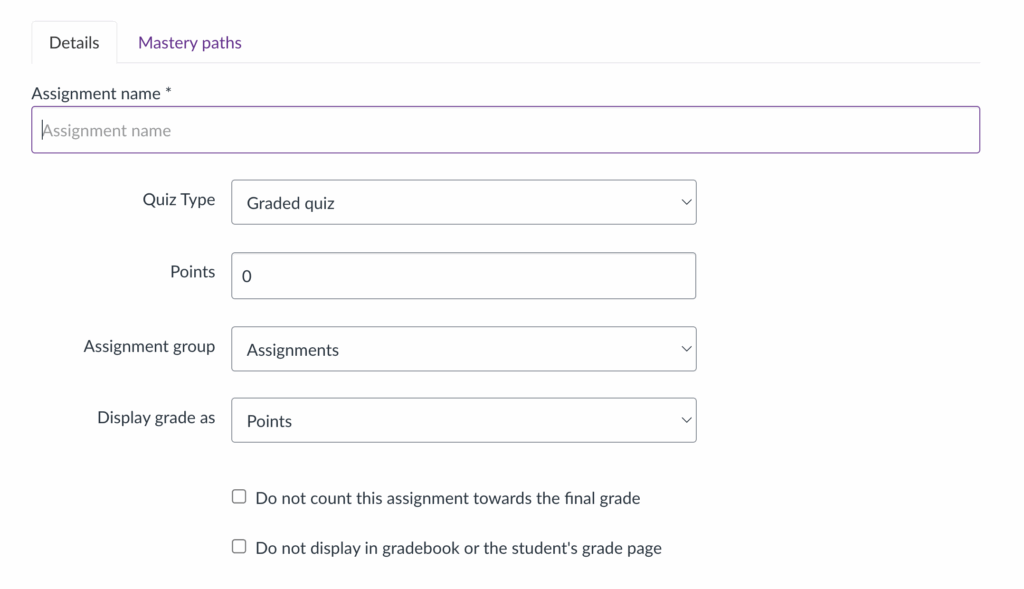
Step 2: Enter the quiz name and the maximum number of points it is worth. You can also choose how grades are displayed and decide whether to exclude the quiz from the course’s final grade calculation.
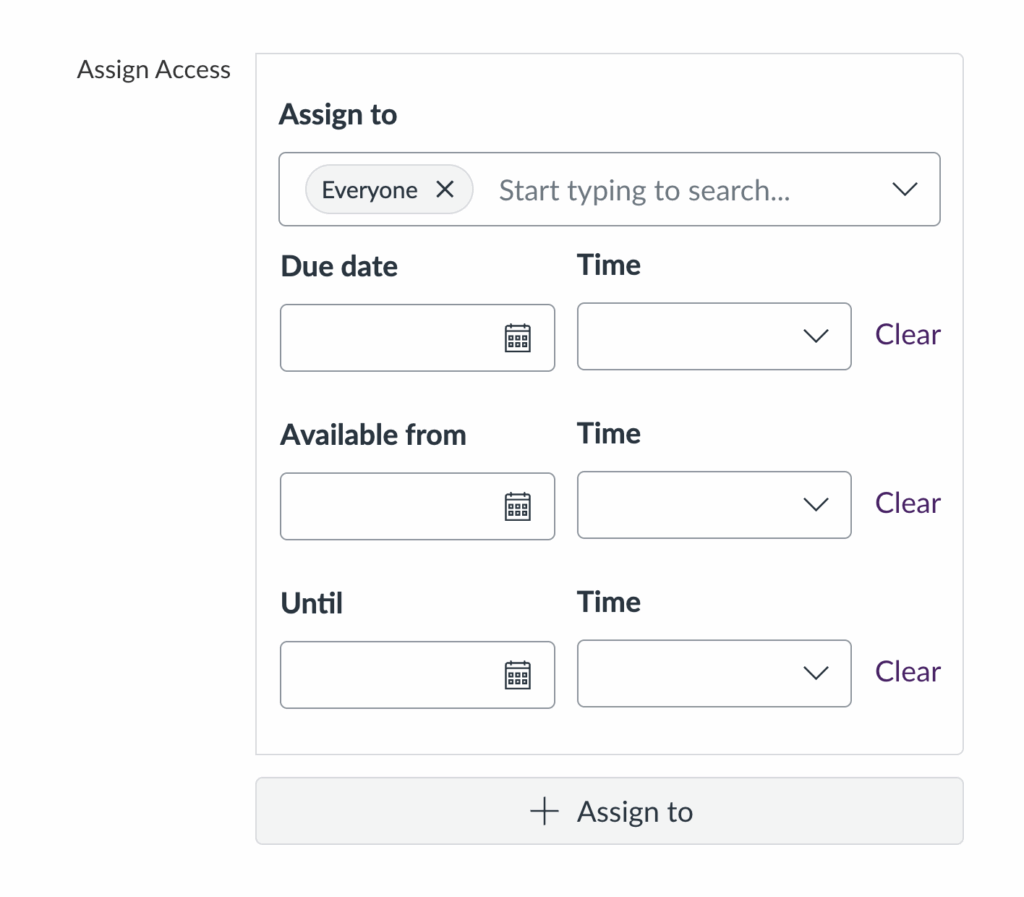
Step 3: Scroll to the Assign Access settings, where you can customise the quiz availability and set a due date. Use Assign to to release the quiz to specific students and apply custom deadlines.
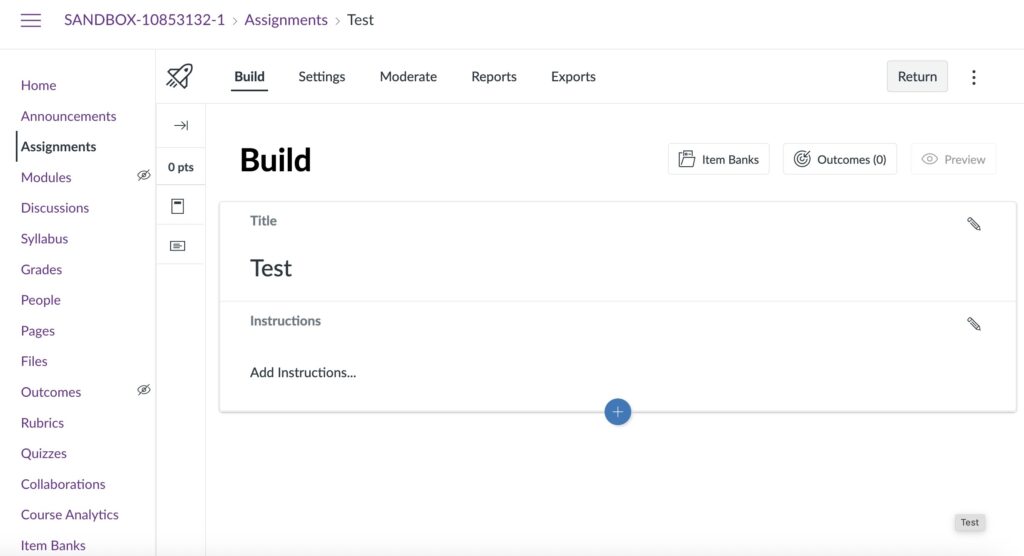
Step 4: Scroll to the bottom of the page and click Build to start building your quiz.
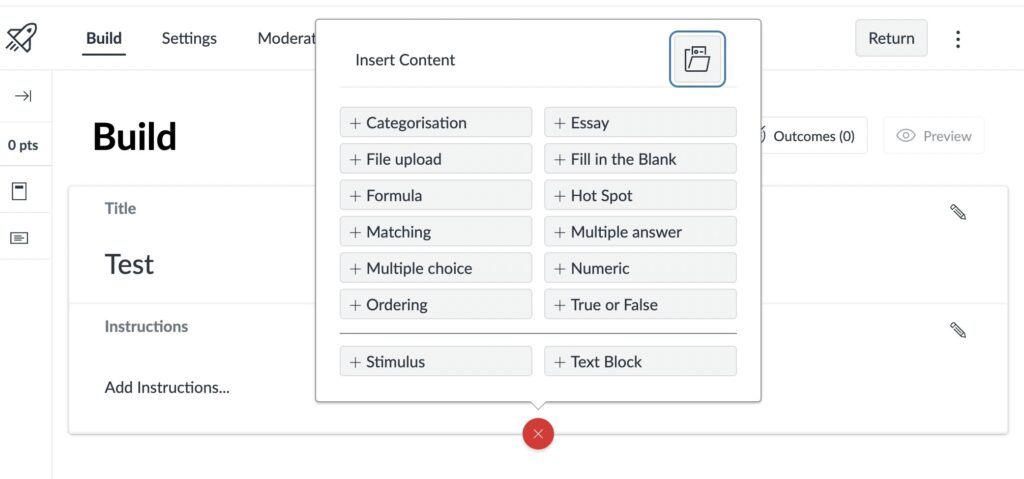
Step 4: Click the + button to add a question.
Here you can choose from a range of question types. You’re free to mix and match these throughout your quiz to better align each question with the learning outcomes.

You can easily edit, reorder, duplicate or delete questions. For guidance, go to: Edit, Reorder, Duplicate, or Delete Quiz Questions.
Quiz question types
You can choose from a range of question types, many of which can be automatically marked.
Categorisation
Students move answers into the correct categories while ignoring distractors.
Essay
Students write a free-text response. Grading is manual.
Although Canvas Quizzes can handle long written responses, it’s better to set essay tasks as a Canvas assignment.
File Upload
Students submit a file. This can include Studio video submissions as well. Grading is manual.
Fill in the blank
Students type a word or phrase to complete a sentence.
Formula
Allows you to create maths questions with variables that are randomly generated for each student.
Hot Spot
The student selects a specific area on an image. This can be used for labelling diagrams, identifying areas on a map etc.
Matching
Students match prompts to the correct answer.
Multiple answer
Students select all correct answers from a list.
Multiple choice
Students select the correct answer from a list.
Numeric
Students answer questions by entering a number.
Ordering
Students order items in a list.
True or False
Students decide whether the answer is true or false.
Stimulus
Allows you to give students a piece of content (e.g., an image or a text) with questions attached to it. For guidance see: Inserting stimulus content.
Text block
This is a non-question item used to provide instructions, add context, diagrams, or background information, separate sections in the quiz, add media etc.
Add general student feedback
To add general student feedback to a question, edit the question, then select the feedback icon at the bottom of the settings. From there, you can add feedback for correct answers, incorrect answers, and a general comment that students will see no matter which option they chose.
Canvas allows you also to add tailored feedback to each answer option in a Multiple‑Choice question, so students only see the comment linked to the choice they selected. In addition to per-question feedback, you can also include general feedback that appears for all students once they’ve submitted the quiz. For more guidance on adding feedback to a quiz, see the article below.
Configure the quiz settings
From the quiz Build page, navigate to the Settings tab to configure the quiz settings.

You can customise the following settings:
- Shuffle questions: automatically reorders your questions, randomising their order per student.
- Shuffle answers: randomises the order of answer choices within each individual question.
- One question at a time: Reveals one question at a time rather than on all the same page. You can decide whether the student can or cannot return to a question once they have completed it.
- Require a student access code: you can provide the students with a password or code that allows them to enter the quiz in order to keep it locked for a certain amount of time or to other students.
- Time Limit: Set how many minutes the students have to finish the quiz.
- Detect Multiple Sessions: monitor if a student opens the same quiz in more than one browser window or device during the attempt, helping you identify potential cheating.
- Filter IP addresses: Restricts who can access the quiz.
- Allow clearing selection (Multiple Choice): Students can deselect an answer they’ve chosen, leaving no option selected.
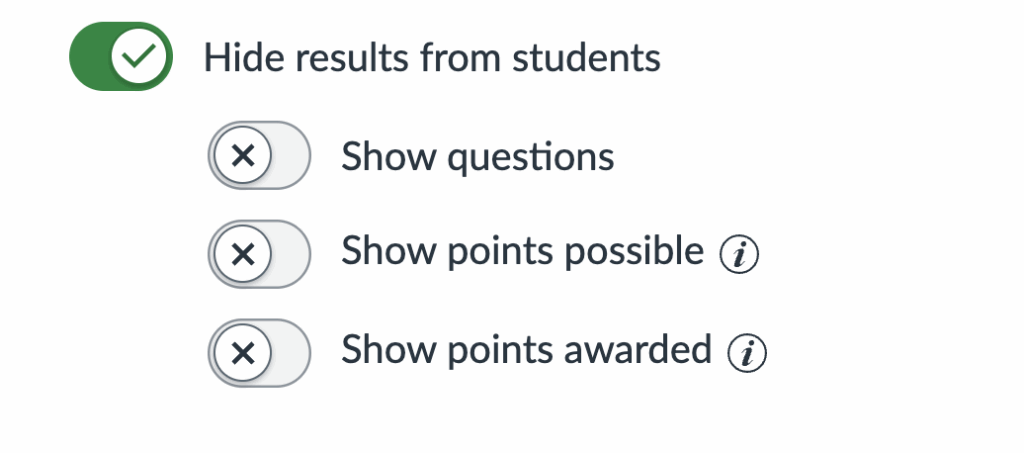
- Hide results from students: Customise what results and feedback is revealed to students and when. Toggle on this option to reveal more settings.
Edit, reorder, duplicate or delete questions
You can easily edit, reorder, duplicate and delete questions from the quiz Build page, by selecting the buttons in the top-right corner of the question.
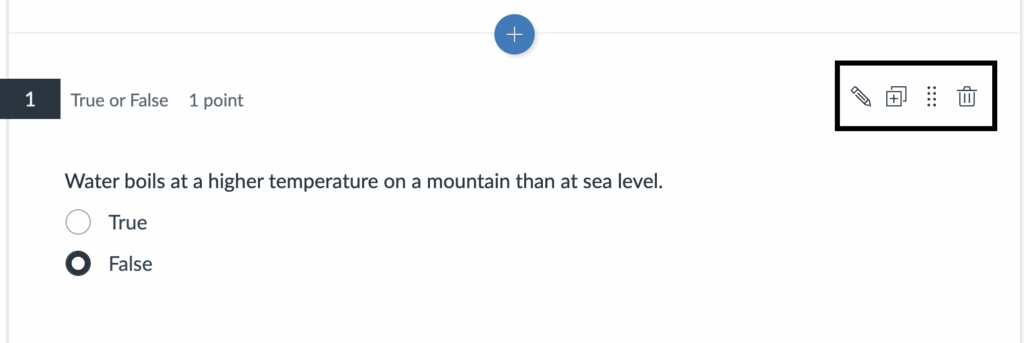
- Select the pencil icon to edit the question.
- Use the eight‑dot icon to drag the question up or down.
- Select the + icon to duplicate a question.
- To delete a question, click the rubbish bin icon.
Using Item Banks
If you wish to organise and reuse quiz questions across multiple quizzes and courses, you can create an item bank. Navigate to Item Banks at the top of the Build page to create a new item bank or reuse existing ones.
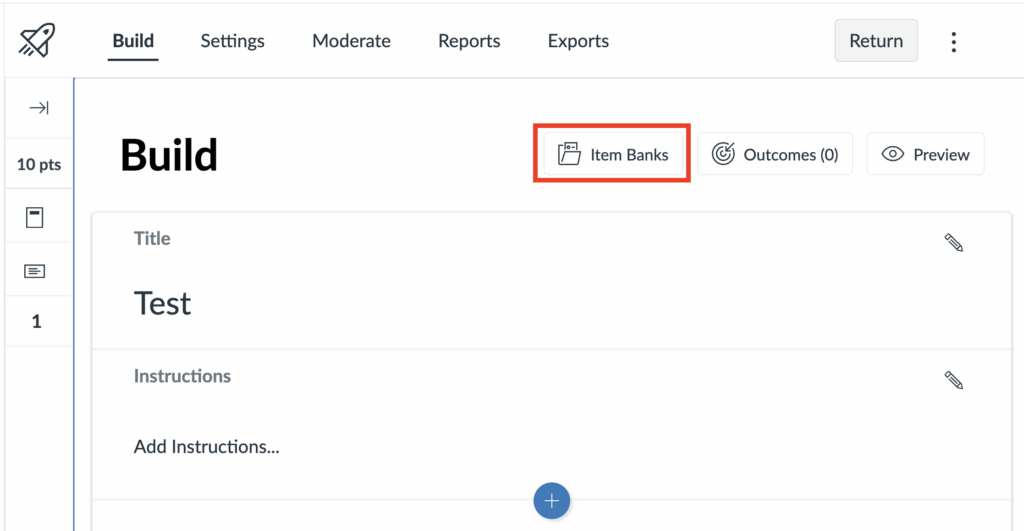
More guidance on Item Banks is available at the links below.
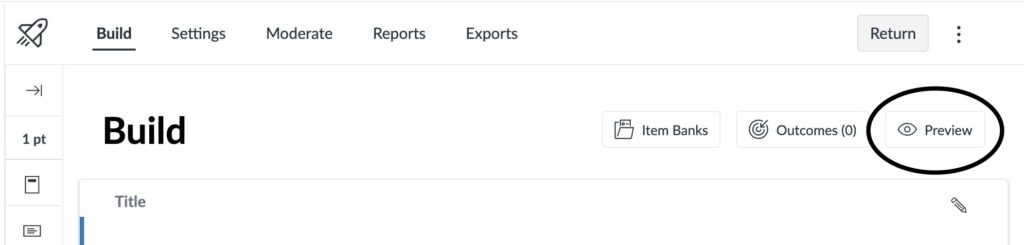
Preview a quiz
Before publishing your quiz, it’s best practice to preview it to ensure everything is set up correctly. Select Preview from the quiz Build page. Avoid using the View as Student option, as this can make future edits to the quiz more difficult.
Adding quizzes to a Module
Once you have created your quiz, you can then add it to a Module so that it’s embedded within your course materials. This will help students engage as they progress through the course.
Step 1: Navigate to the Module you would like to add the quiz to.
Step 2: Select the + button on the Module bar.
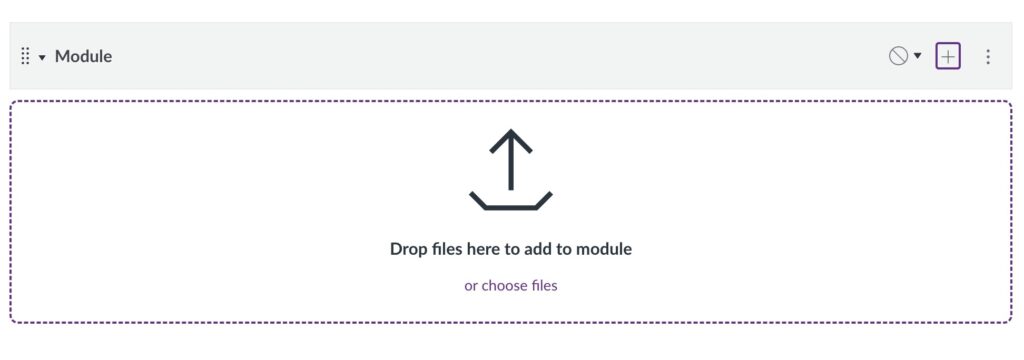
Step 3: From the drop down, add Quiz and select the quiz you would like to add to the Module.
Step 4: Once the quiz has been added to the Module, you can publish it to make it visible to students. To make it visible, you will need to publish the Module and the Quiz.
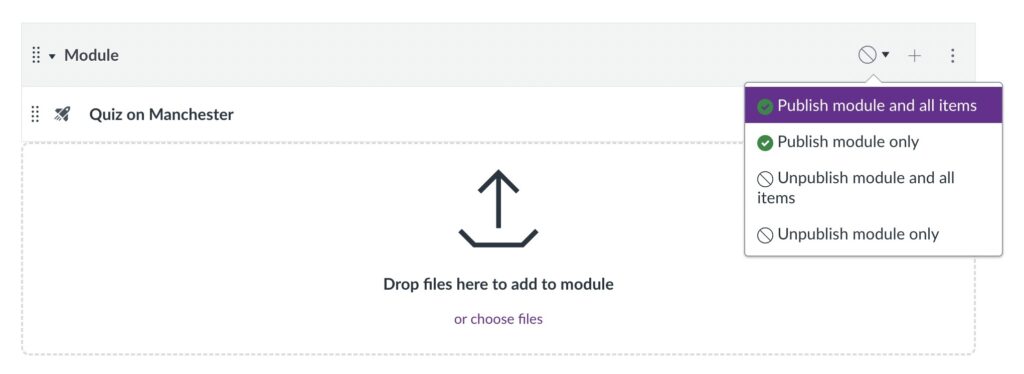

You can publish a Module without publishing the quiz embedded into it, and vice versa. If you publish the quiz but leave the Module unpublished, students will still be able to access it through the Quizzes section of the course. However, if you publish the Module but not the quiz, the quiz will remain inaccessible to students in both the Module and the Quizzes section.
Editing quizzes when submissions have been made
It may sometimes occur that you need to edit a quiz once submissions have already been made. This can happen when mistakes are found in the quiz, for instance. For guidance on how to navigate this scenario, please see the article below.