Gradescope bubble sheet assignments allow students to complete paper based multiple choice exams and for those papers to be scanned and largely automatically marked. This article provides an overview of the stages for setting up a bubble sheet assignment. For information on managing papers post submission see: Processing and Grading Gradescope bubble sheets.
How do bubble sheets work
Bubble sheet assignments can be used for paper based multiple choice questions.
- Staff can predefine the answers for up to 200 questions, with answer choices A-E. Gradescope supports scoring options of exact, partial or either/or scoring.
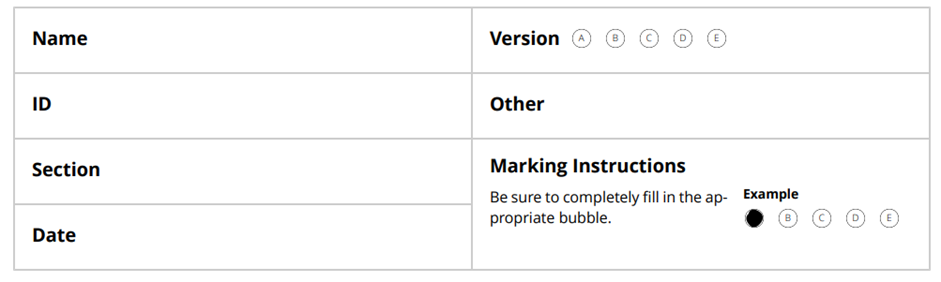
- Students are provided with a printed Gradescope Bubble Answer Sheet (PDF) to enter their name, student ID number and their answer choices.
- Completed answer sheets are scanned (using a standard photocopier). The scanned pdfs are then uploaded to Gradescope.
- Gradescope automatically matches students to their scanned paper based on name / student ID. (Staff can assign any papers not automatically matched).
How does marking work?
Papers are scanned and uploaded to Gradescope and auto matched with students submissions. Once papers are associated with students grading can begin.
- Gradescope will automatically grade answers that it is sure about.
- Gradescope will identify uncertain marks which require checking (typically this may be because a student has crossed out an answer).
- Staff need to review and confirm uncertain marks.
- Once reviewed, final grades can be released.
Preparing for a bubble sheet exam
We recommend that you provide a practice test so that students have an opportunity to complete the answer sheet and you can see how the marking process works. To do that:
- Download the Answer template: Gradescope Bubble Answer Sheet (PDF) and ensure a printed copy of the answer sheet, is provided to students sitting the exam.

Do not make changes to the answer template. Changing the answer template could prevent Gradescope from being able to scan the answer sheets successfully.
Instructions for students
On the day of the exam, students must enter their name and ID number, section (unit code) and answers onto the printed Gradescope Bubble Answer Sheet. If a student needs to change their answer, we recommend they put a X through the incorrect answer (see example below).
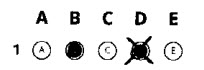
In this example student has crossed out answer D as incorrect.
If you wish to give additional guidance to your students with their answer sheet, you can Download example instructions here. We recommend that you do not staple additional guidance to the answer sheet, as any additional cover sheet would need to be removed before the answer sheet is scanned.
Assignment set up
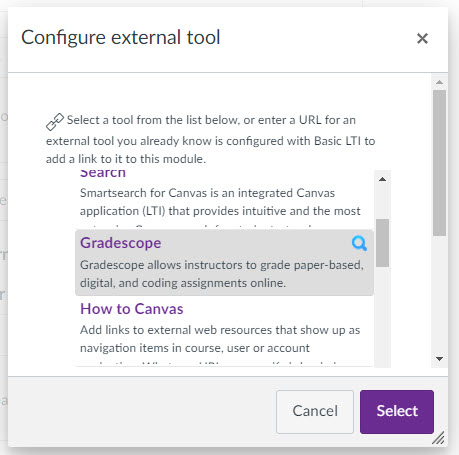
The first step is to create your assignment in Canvas, choosing the assignment type External tool and selecting Gradescope. For full step-by step instructions see How do I set up a Gradescope assignment in Canvas.
Once you have launched Gradescope within Canvas you will be asked to choose your assignment type. Follow the instructions below for setting up your Bubble sheet.
- For Assignment type select Bubble Sheet and click Next.
- Enter an Assignment Name.
- Submission Anonymization (leave this check box unticked).
- Who Uploads Assignment should be set to Instructor (as staff will be scanning and uploading the paper).
- Rubric permissions: Leave as ‘all staff can edit rubrics’
- Click Create Assignment to save the settings you have selected.
- Once you’ve entered some initial details for your assignment in Gradescope, you will return to Canvas.
- Choose Select to navigate away from the popup box, then tick the checkbox Load this tool in a new tab.
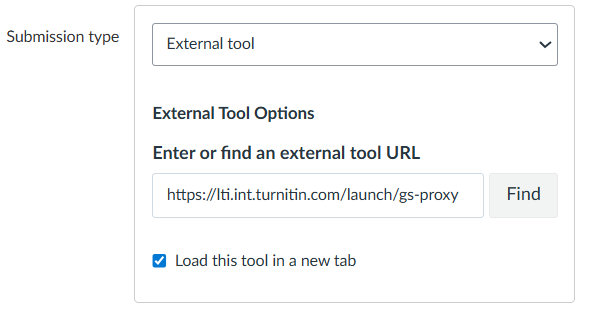
- Finally, scroll to the bottom of the screen and ensure that you Save the Canvas assignment.
- Once your assignment has been saved you will return to the Assignments screen. You can access and manage the assignment via the Assignments menu, opening your assignment link and then choosing Load Gradescope in a new window.
Setting up and editing your marking scheme
Once you have created your Bubble sheet, you will need to set up your marking scheme, to define the correct answers for each question, how many points each question is worth and the marking basis (eg. exact/partial credit). In Gradescope this takes place in the Edit Answer Key screen.
- For questions with more than one answer option, the scoring key allows you to apply exact, partial or either/or scoring to all questions. The default point value for each question is listed as ‘1’.
- Allocate the correct answers to the numbered questions by clicking on a letter or letters underneath the question.
- Click on the cog icon next to a question number if you wish to change the default scoring (exact, partial, either/or) or the points value for that question.
Once you have defined your answers click Save Answer Key.

To return to the marking scheme, open the assignment in Gradescope and navigate to the Edit Answer Key screen.
TIP: You can edit the answer key after submissions have been uploaded. Any changes you make will be applied to marking.
Editing the Answer Key:
- To exclude a question from marking, go to the Edit Answer Key screen and uncheck any selected answer bubbles for that question and then Save the answer key to apply the changes.
- Next go to the Review Grades screen. You should see that the maximum total score for the paper has been adjusted to reflect that you have excluded a question from marking.
Further resources
For information on how to manage bubble sheet papers after an exam check out: Processing and Grading Gradescope Bubble sheets