In Canvas, there are a few ways in which you can release specific course content to students. This is done by configuring settings within Modules or individual Module Items.
This guide walks you through the options of releasing certain materials.
Lock Until
You can set a specific date and time at which the content of an entire Module block becomes available to students.
To do this, follow the steps below.
Step 1:
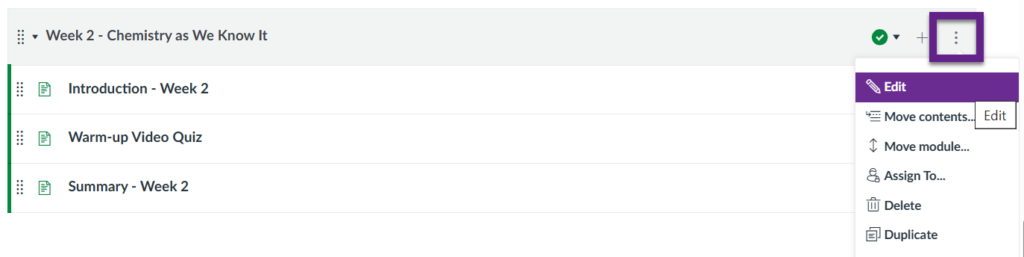
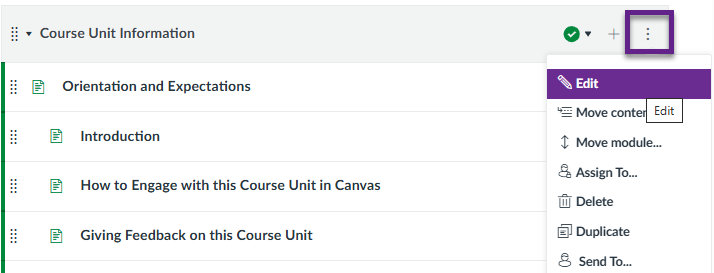
Navigate to the Module block you wish to ‘lock’ (hide from students). Select the kebab menu of the Module and choose ‘Edit’.
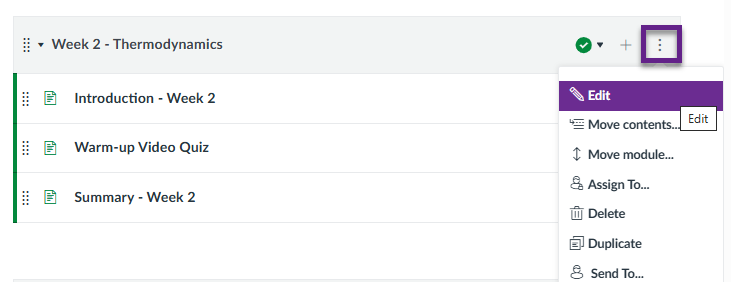
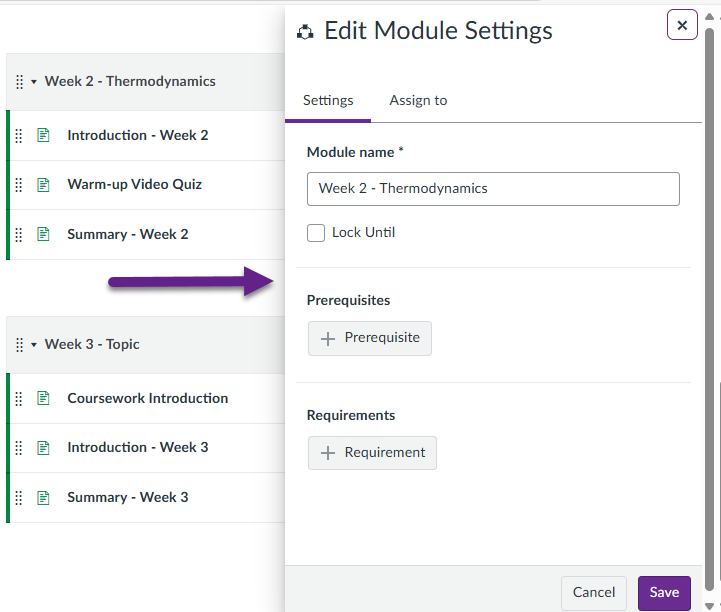
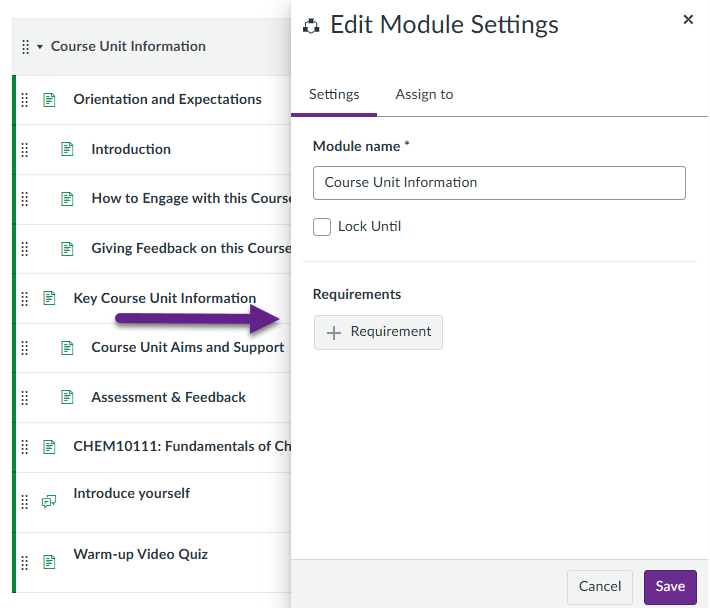
This opens the ‘Edit Module Settings’ menu.
Step 2:
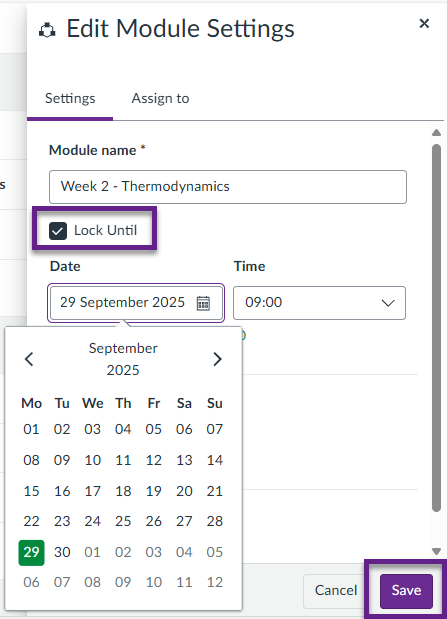
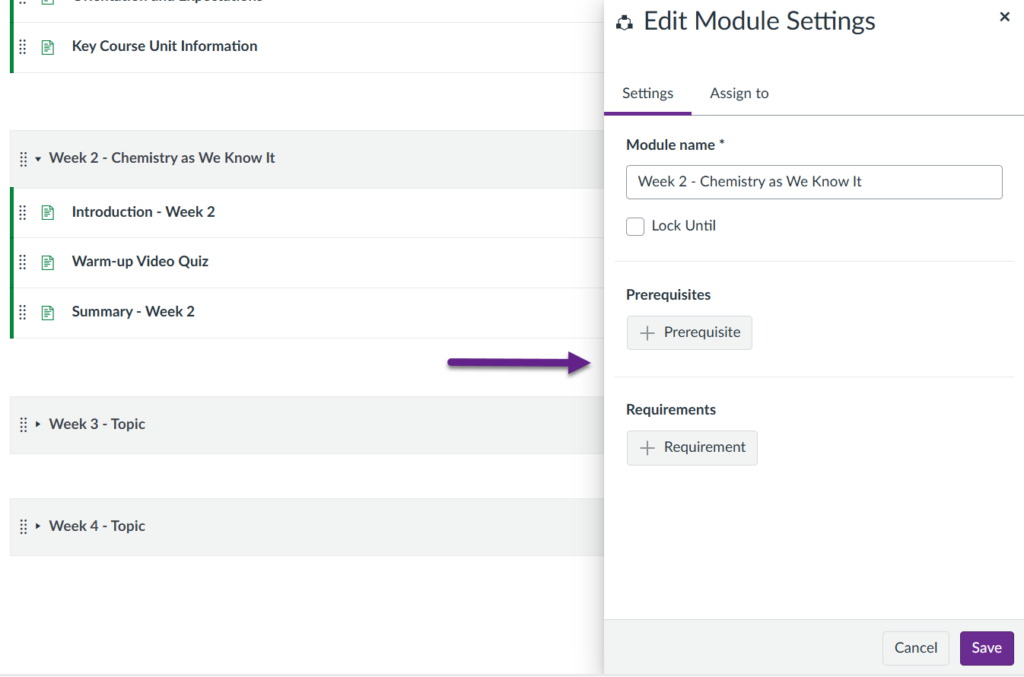
Under ‘Module name *’, select ‘Lock Until’, and choose the date and time at which you’d like the entire Module to be released and viewable to students.
Once configured, select ‘Save’ at the bottom of the page.

Please remember that the content (and course itself) MUST be published for it to be viewable to students. Even if you have configured your Module settings to be locked until a certain date and time, students will NOT be able to see the Module even after the release date, unless you have set the Module content to ‘Publish’.
Canvas: The Final Act – Publishing Courses: View this guide to learn more about publishing content.

‘Assign to’ for Module items: If you wish to ‘lock’ a specific item within a Module, rather than the whole Module block, use the ‘Assign to’ settings when editing the item.
Student View
While Modules can be locked until specific dates, the Module title and the titles of any of the items within the Module will still always be visible to the students.
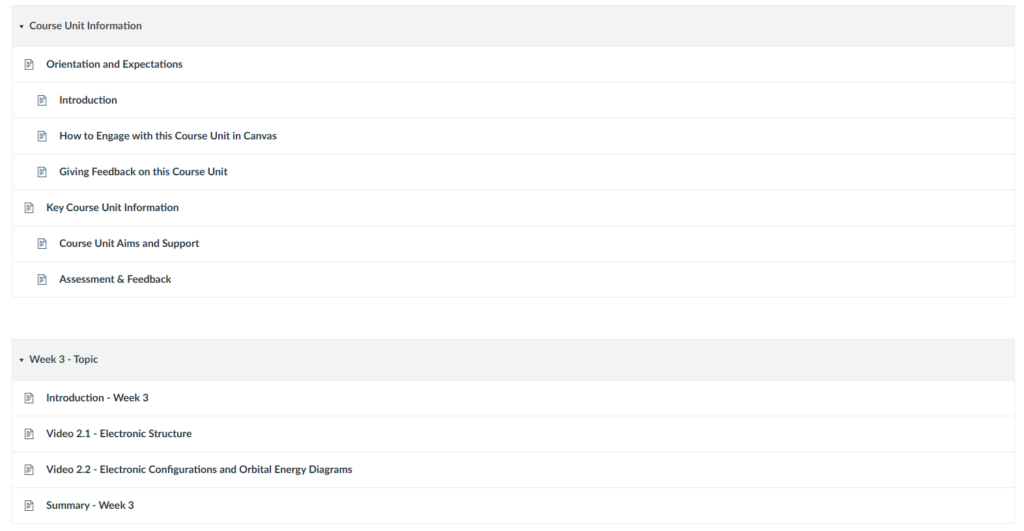
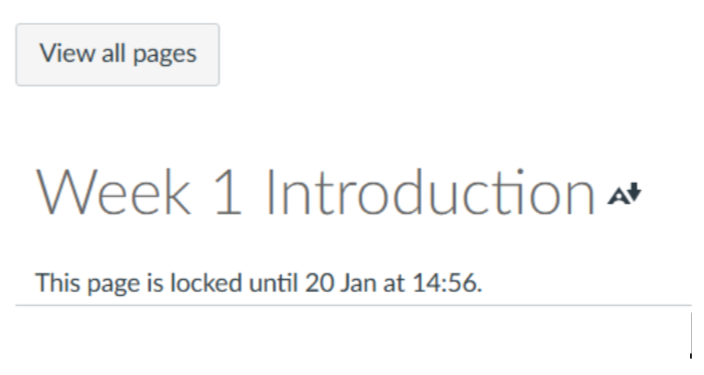
For example, the below Module is currently locked until a future date, however, a student can still see the following:
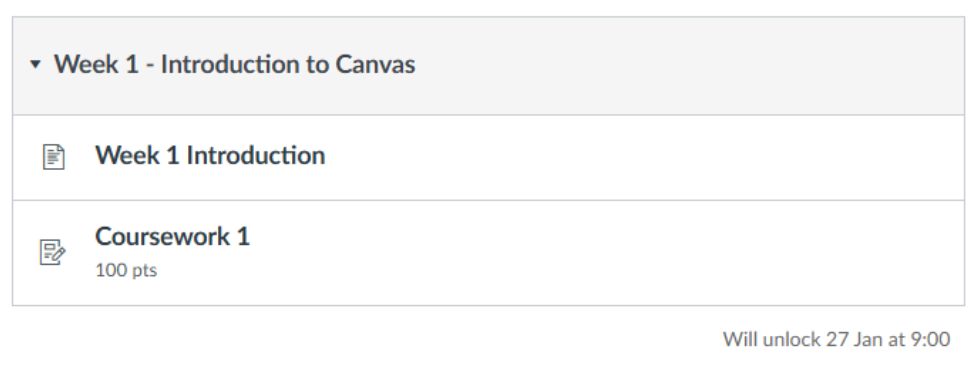
Note that it indicates beneath the Module the date and time that it will unlock and become available.
If you were to select any of the items within that Module while it’s locked, it would show the following:

This will also be the same for any Assignments or Quizzes that you have added into the Module.
Assign To
It is possible to release certain course content to specific students or sets of students. This is done using the ‘Assign to‘ function. You can use this feature for an entire Module or for particular items within a Module.
If you wish to assign content or assignments to different sets of students within a course, you need to use Differentiation Tags. Tags let you assign materials and manage course access for targeted sets of students with ease. Full guidance is available here: Differentiation Tags.

Canvas Groups cannot be used to assign content – they’re strictly for collaborative activities like group submissions and discussions. If you need to release content to specific sets of students, use Differentiation Tags instead. Tags are the correct tool for targeting specific sets of students with tailored materials.
Part 1 – ‘Assign to’ for an entire Module
Step 1:
Navigate to the Module block you wish to assign to specific students. Select the kebab menu of the Module and choose ‘Edit’.
This opens the ‘Edit Module Settings’ menu.
Step 2:
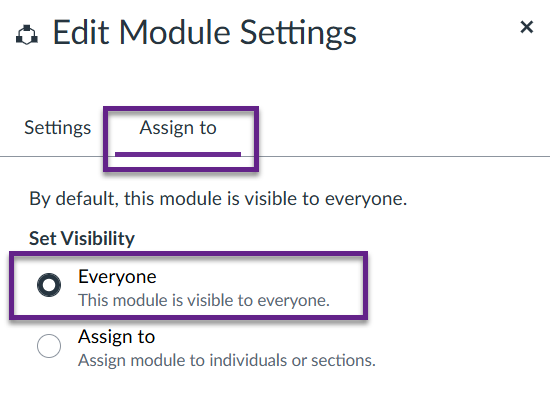
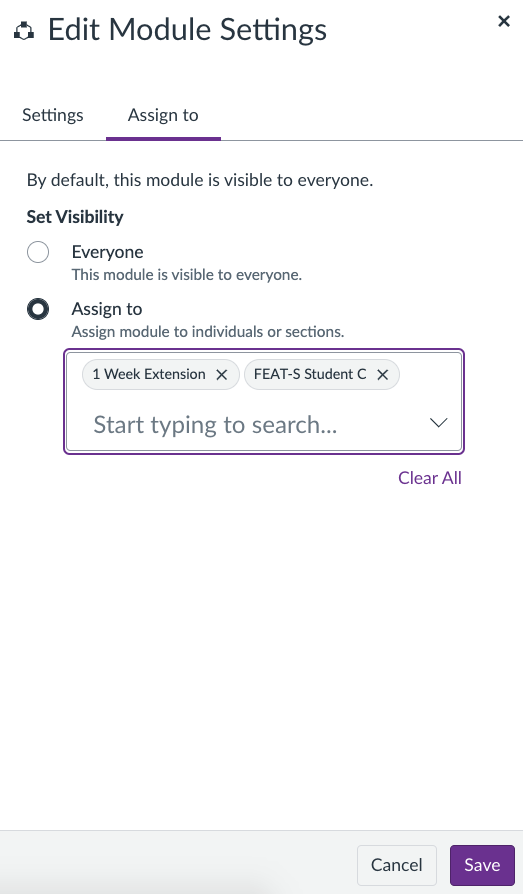
Select the ‘Assign to‘ tab. You will see that, by default, the Module is visible to everyone enrolled in the course.
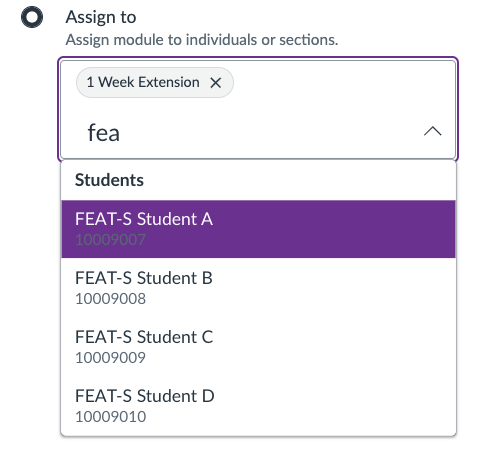
Choose ‘Assign to‘, then select the drop-down arrow in the ‘Start typing to search…‘ box that appears.
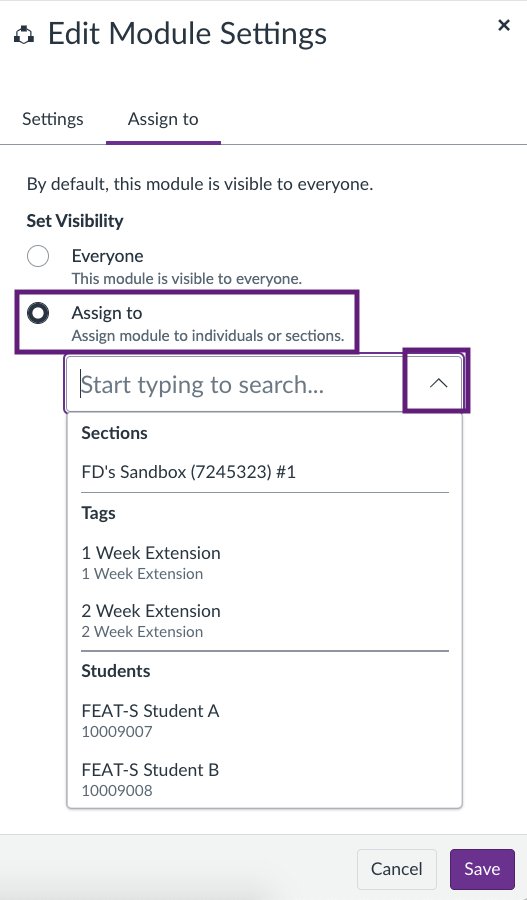
You will then see a list of the sets of users (Tags) you have created, followed by a list of all the students enrolled in the course.
Select the Tag(s) you wish to assign this Module to. You can also type the name of a student to assign the Module to them specifically, as shown below.
When you have chosen all the Tags and/or specific individuals you would like to assign this Module to, choose ‘Save‘ at the bottom of the page.
Once your Module settings are saved, you should see that the Module block appears with a link to ‘View Assign To‘, indicating that certain students have been assigned this Module and it is therefore only available to them.
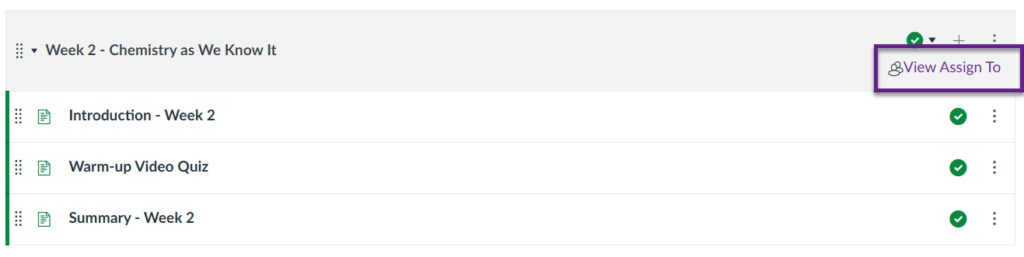
You can verify and edit the students you have assigned this Module to by selecting the ‘View Assign To‘ link.
Student View
If the ‘Assign to‘ Module settings are configured correctly as above, the Module should be available or unavailable to students depending on whether they are in the assigned Tag(s) chosen for that particular Module.
Part 2 – ‘Assign to’ for Module items
‘Assign to‘ can also be configured on items within a Module, such as Pages. This is effectively the same as ‘Lock Until’ on the Modules.
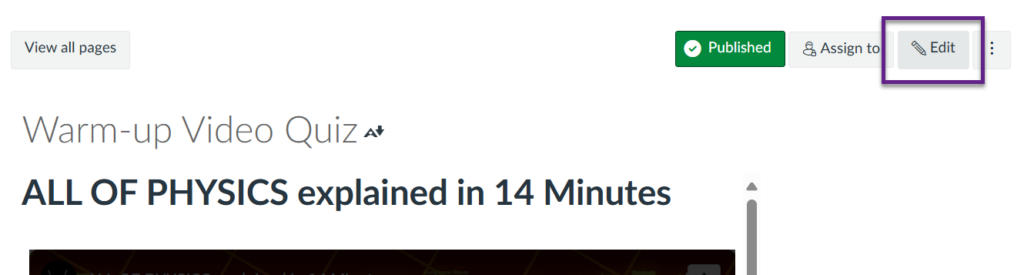
To navigate to the ‘Assign to‘ settings of an item, select the item from the Module block.
Then, choose the ‘Edit‘ button.
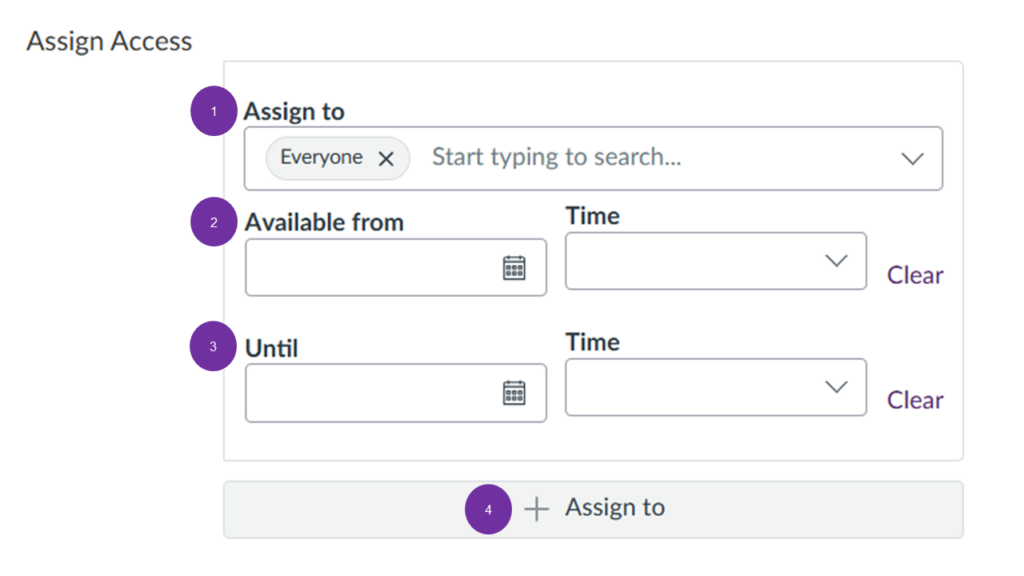
At the bottom of this page, configure the ‘Assign Access‘ settings as you see fit. It allows you to (1) select who to assign the item to, and also (2) from when and (3) until when you want it to be available. (4) Select the ‘+ Assign to‘ button to assign the item to as many different groups with different item availability as you wish.
Even if the item is ‘locked’, students will still see it listed within the Module, but if they select it, it will say ‘locked until [date/time]‘, as shown below.
Requirements and Prerequisites
It is possible to configure the Module settings so that students need to complete certain material before they can move onto the rest of the course. This is done by setting Module ‘Requirements’ and ‘Prerequisites‘.
Please note that if you wish to hide the content of a Module and release it only after students have accessed material from previous Modules, this is only possible if you set requirements AND prerequisites together as shown in the steps below.
It is possible to just set requirements and prerequisites for a Module, but if you don’t link these together as explained below, all content will still be visible to students. They would still have to complete the set requirements, and the prerequisite label on a Module would still tell them what content they need to cover first before viewing that Module, but there would be nothing stopping them from actually accessing those materials whenever they want to.
To do this, follow the steps below.
Part 1 – Setting Module ‘Requirements’
Step 1:
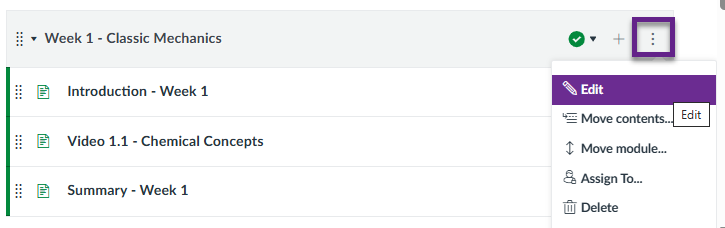
Navigate to the Module block you wish to mandate completion of items. Select the ellipsis drop-down menu of the Module and choose ‘Edit’.
This opens the ‘Edit Module Settings’ menu.
Step 2:
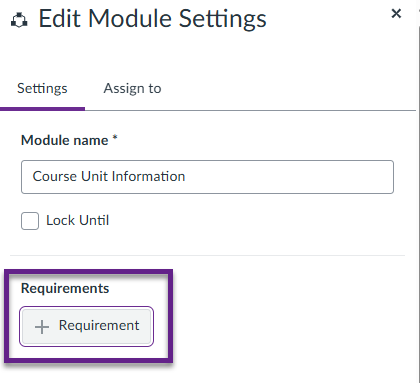
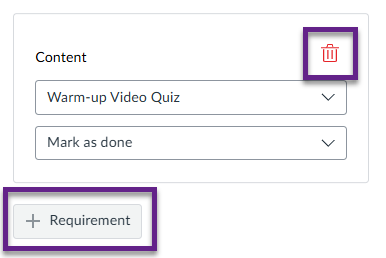
Under ‘Requirements’, select ‘+ Requirement’.
You then have the option of ‘Complete all’ or ‘Complete one’.
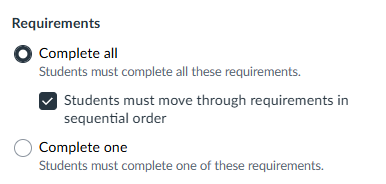
Selecting ‘Complete all’ means students must complete all the requirements you set for this Module block.
Choosing ‘Complete one’ means that the students will only need to complete one of the set requirements of this Module block. As long as they complete ONE item set as a requirement, they can continue to the rest of the course materials.
You can also make it so that students must move through the requirements in sequential order by choosing the corresponding tick box underneath this option.
Step 3:
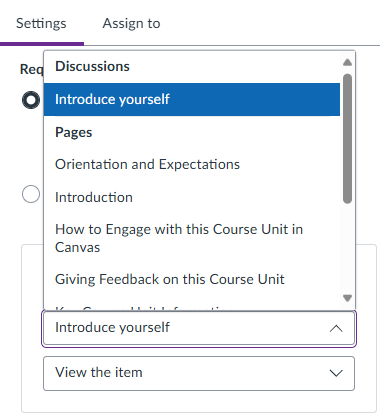
Select the drop-down menu in the ‘Content’ box, then choose your desired item.
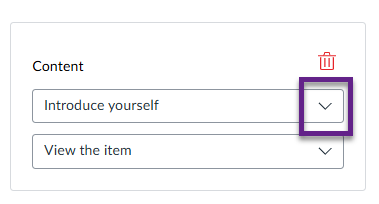
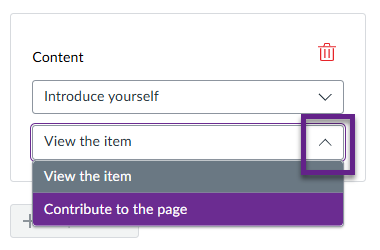
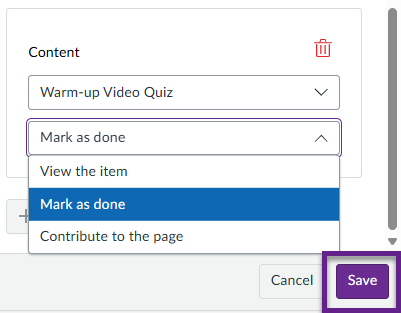
Next, select the following drop-down menu to set the action the student must take on this item.
To add more requirements, select ‘+ Requirement’ and repeat the steps above. You can add as many as you like.
To remove requirements, simply select the bin icon.
When you’re happy with your set requirements, choose ‘Save’ at the bottom of the page.
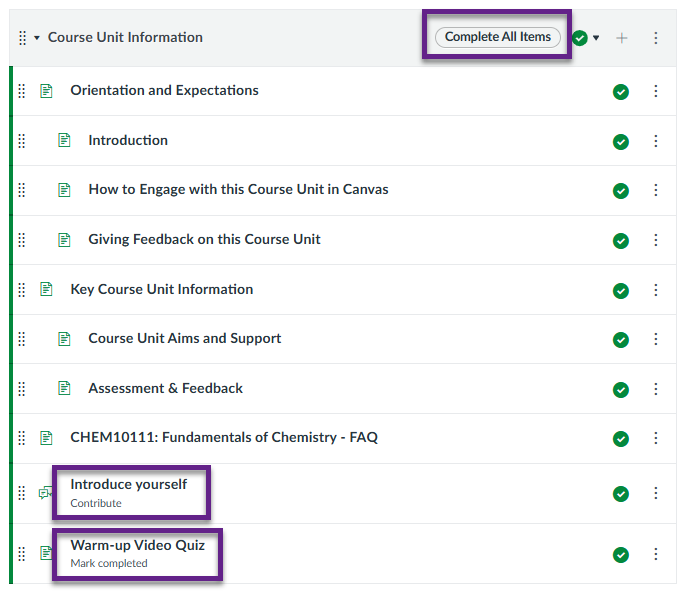
Once your Module settings are saved, you should see that the Module block is labelled ‘Complete All Items’ and that the configured requirements are labelled on the respective items.
Part 2 – Setting Module ‘Prerequisites’
Step 1:
Navigate to the Module block you would like to set a prerequisite to. Select the ellipsis drop-down menu of the Module and choose ‘Edit’.
This opens the ‘Edit Module Settings’ menu.
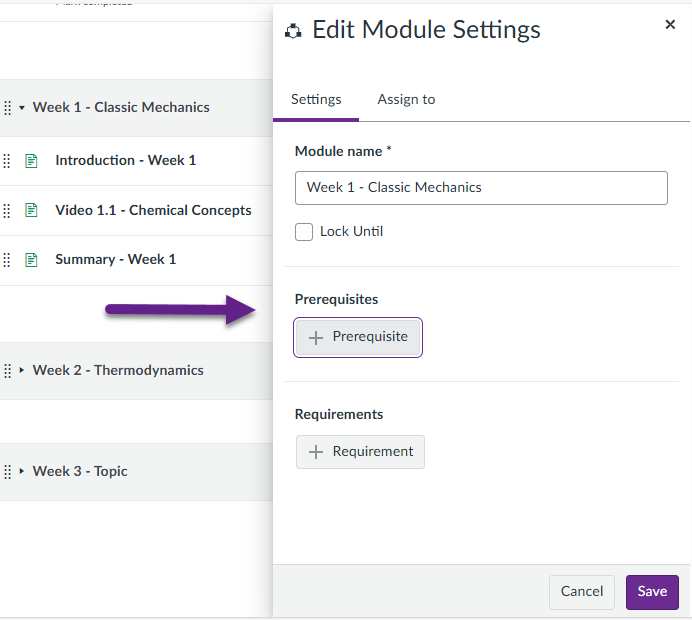
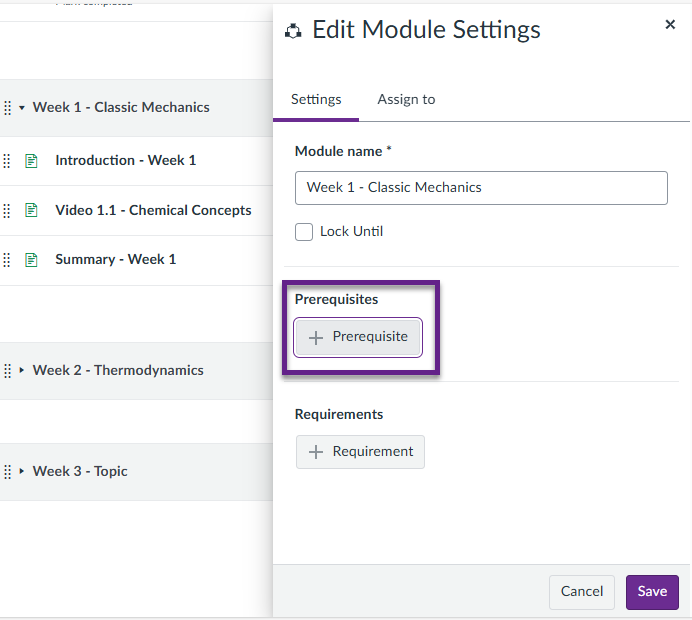
Step 2:
Under ‘Prerequisites’, select ‘+ Prerequisite’.
Then, select the drop-down menu and choose your desired Module, before selecting ‘Save‘.
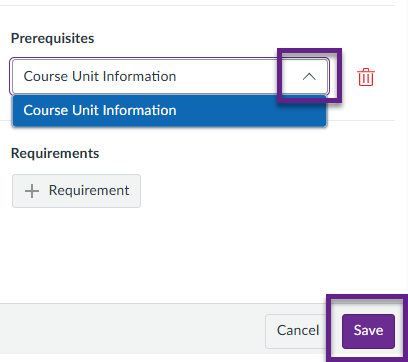
The options in the drop-down menu list would be any of the previous Modules in the course, and the one you choose would mean that the students need to complete this Module and any of its set requirements before they can access this Module.
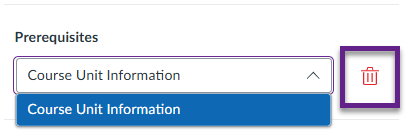
To remove a prerequisite, simply select the bin icon.
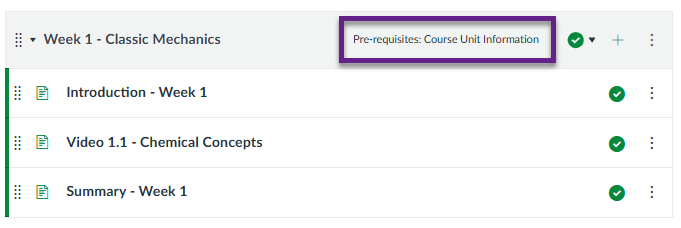
Once your Module settings are saved, you should see that the Module block is labelled ‘Pre-requisites: [Module title]’.
Student View
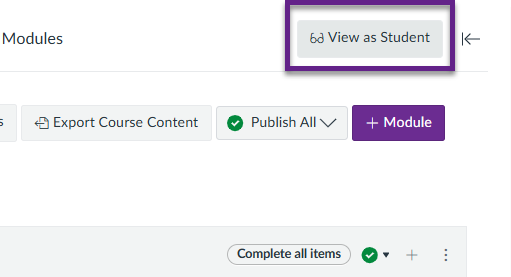
Check that you’ve set up your requirements and prerequisites correctly by viewing the Modules area of your Canvas space as a student.
Do this by selecting ‘View as Student‘ on the top right-hand corner of the page, as shown below.
Your Module blocks should look something like this:
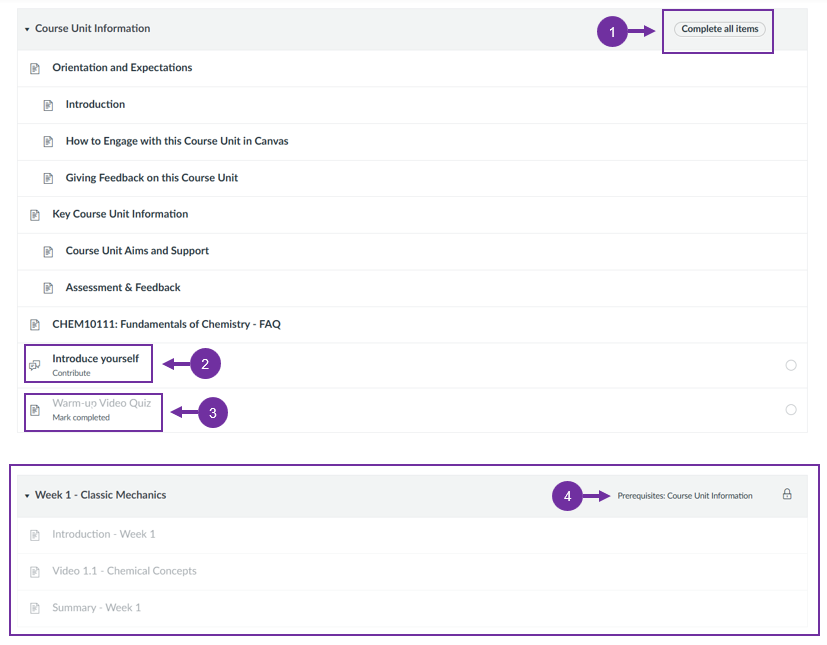
1. ‘Complete all items’ Module label
The Module that you set requirements to has a ‘Complete all items‘ label, letting the student know that they must complete all set requirements for this Module in order to move on with the course.
2. Item requires contribution
The ‘Introduce yourself‘ Discussion item has a ‘Contribute‘ label, indicating to the student that they must comment on the post.
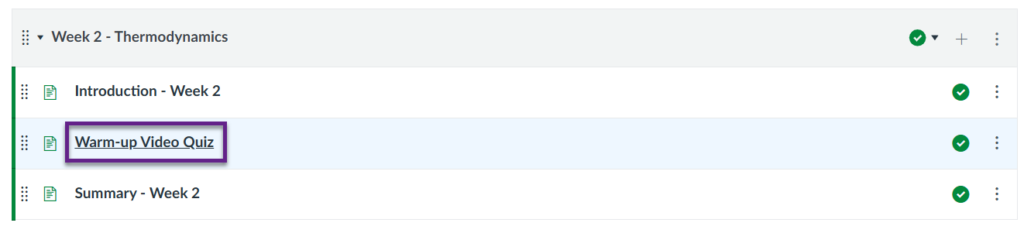
3. Item requires completion mark
The ‘Warm-up Video Quiz‘ item has a ‘Mark completed‘ label, telling the student that they must take the video quiz and mark it as complete.
Note that this is faded out, meaning this item is inaccessible until the student completes the previous requirement: contributing to the ‘Introduce yourself‘ Discussion item. This is because the Module settings are configured so that the students must complete all requirements in sequential order.
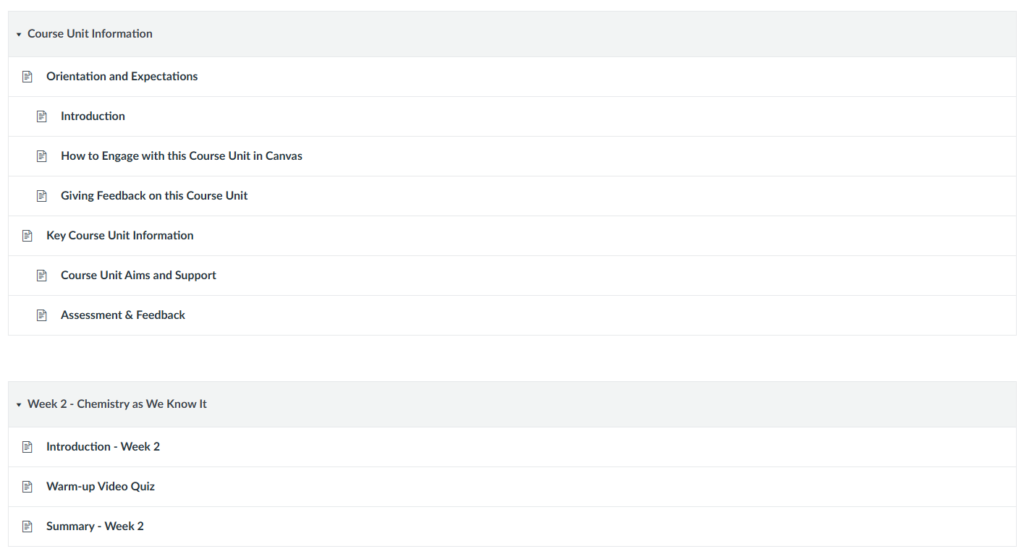
4. Prerequisite configuration = locked Module
The following Module is labelled ‘Prerequisites: Course Unit Information‘, and therefore is locked and faded out. This tells the student that the entire Module is inaccessible to them until they complete the requirements set for the ‘Course Unit Information‘ Module. Once they complete these requirements, this ‘Week 1 – Classic Mechanics‘ Module will then appear as normal and they will be able to access it.
Please note that if you wish to hide the content of a Module and release it only after students have accessed material from previous Modules, this is only possible if you set requirements AND prerequisites together as shown in the steps above.
It is possible to just set requirements and prerequisites for a Module, but if you don’t link these together as explained above, all content will still be visible to students. They would still have to complete the set requirements, and the prerequisite label on a Module would still tell them what content they need to cover first before viewing that Module, but there would be nothing stopping them from actually accessing those materials whenever they want to.