Looking to assign content or assignments to different sets of students within your course? Look no further – differentiation tags are here!
About Differentiation Tags
Differentiation tags are a brand new Canvas function that are now available across Canvas courses. These tags allow you to categorise students within your course without their knowledge, whether that be for differentiating assignments between students, or for identifying students who are eligible for automatic assignment extensions. Importantly, you can also use these tags to Assign To – meaning that you can use tags to grant those extensions, and assign different assignments to different cohorts.
Before You Start
The differentiation tag feature is still relatively new in Canvas and continues to be developed and improved by Instructure. Please note the following limitations and considerations:
- Each course can have a maximum of 40 tags.
- When creating tags, you can include up to 10 tags per set.
- The CSV upload feature can occasionally be a little unreliable during import.
If you encounter any issues during tag creation or upload, please contact our team and we will be happy to support you.
Assigning and Managing Tags
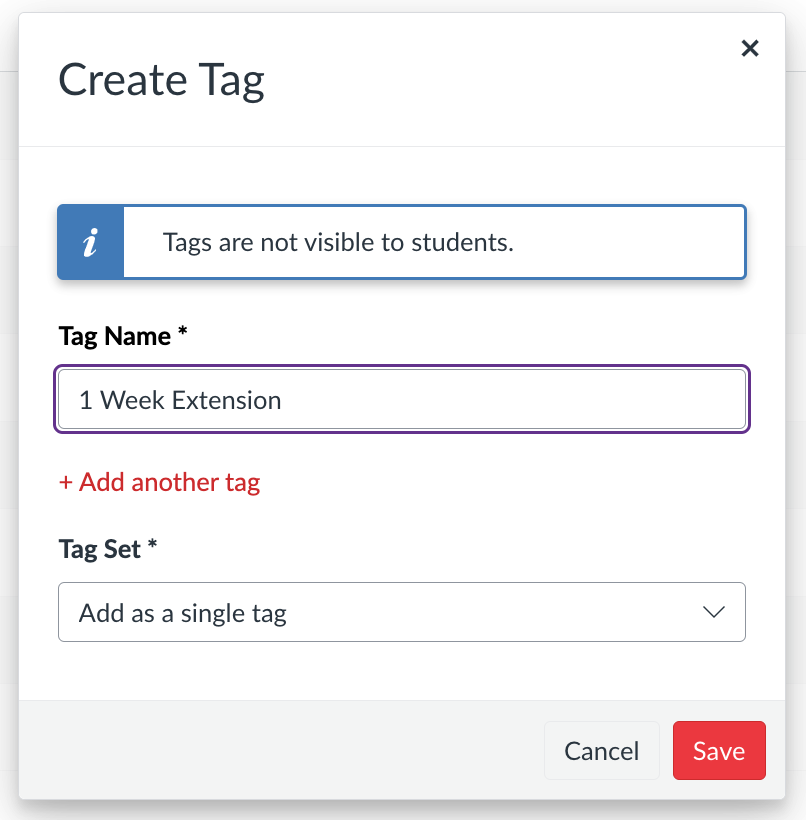
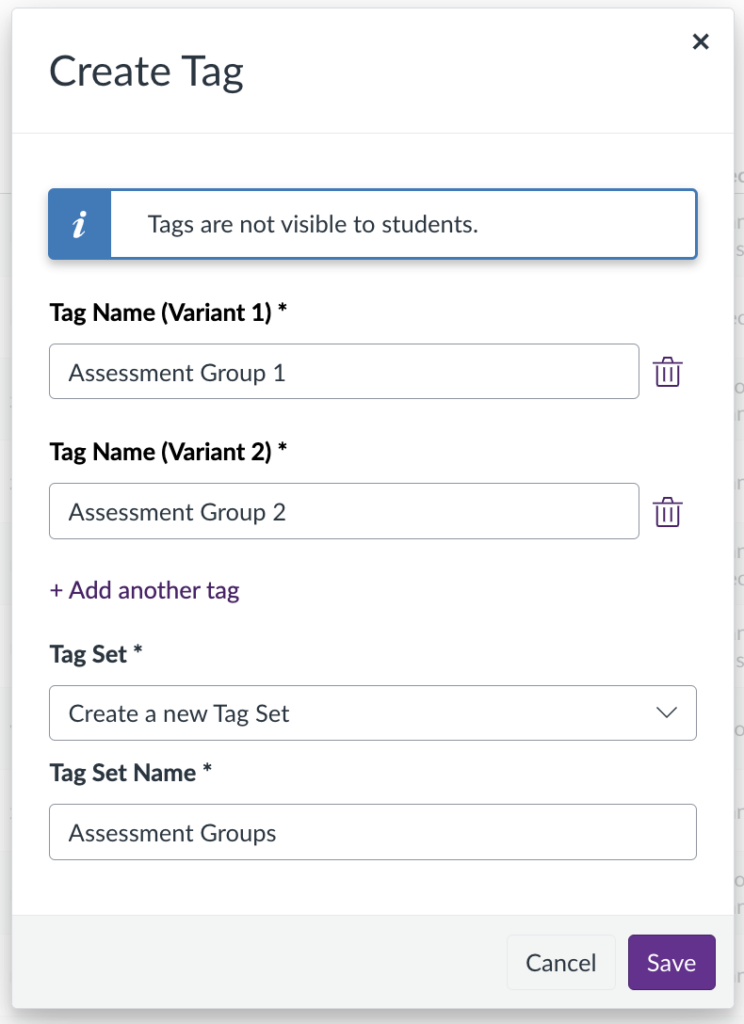
Tags are assigned to users from the People page. Select the drop down “Tag As” menu. If you are choosing to create differentiation tags for the first time, choose ‘New Tag‘.

This will open the Create Tag dialog box. Here, you can create a single tag, or you can create multiple tags and assign them to a tag set (i.e. a group of tags).
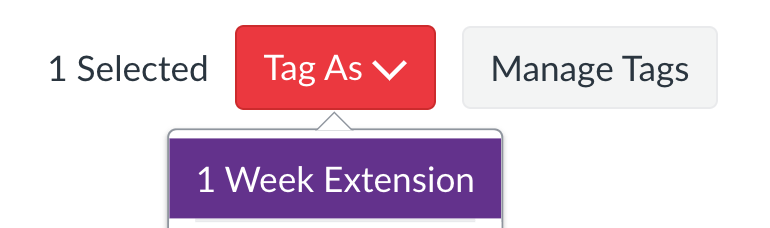
To assign a tag to a student, select the checkbox next to their name(s) and select the drop down “Tag As” menu – you should now be able to see the tag or tags that you just created. To assign a tag to the student, simply select and choose it from the list.
Once assigned, the People page will display a ‘tag’ symbol next to any student with an existing differentiation tag.
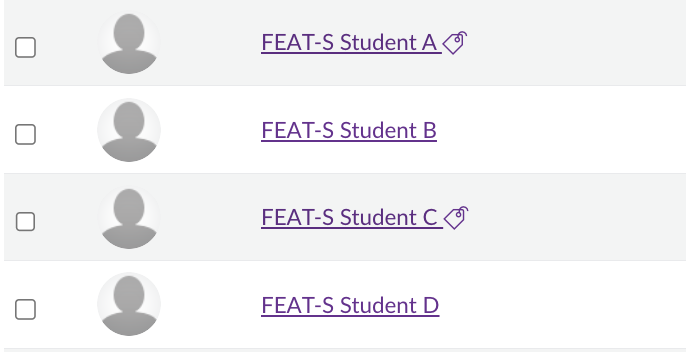
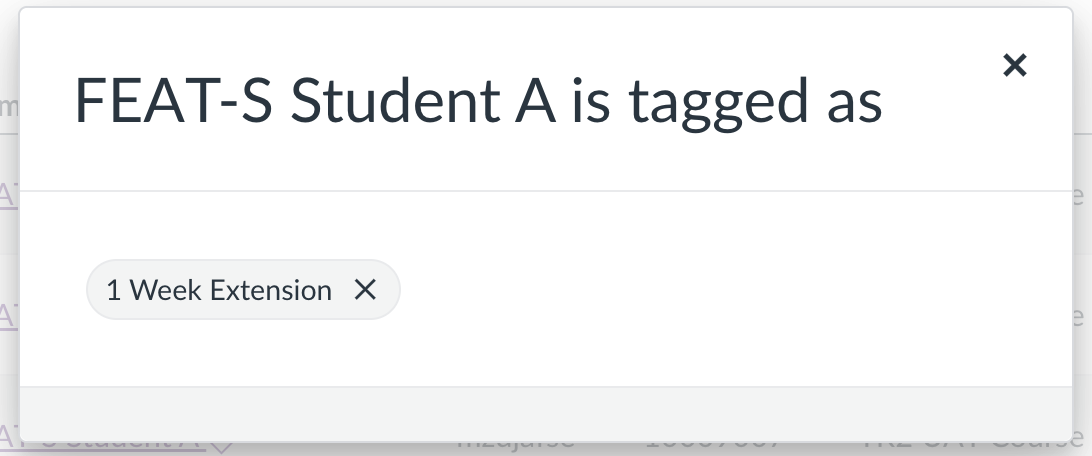
Select the tag icon to view the student’s assigned tags. To remove a tag, choose the ‘X’ icon next to the tag name.
Before removing the tag, you will be presented with a short message, and then asked to confirm if you wish to go ahead with the deletion.
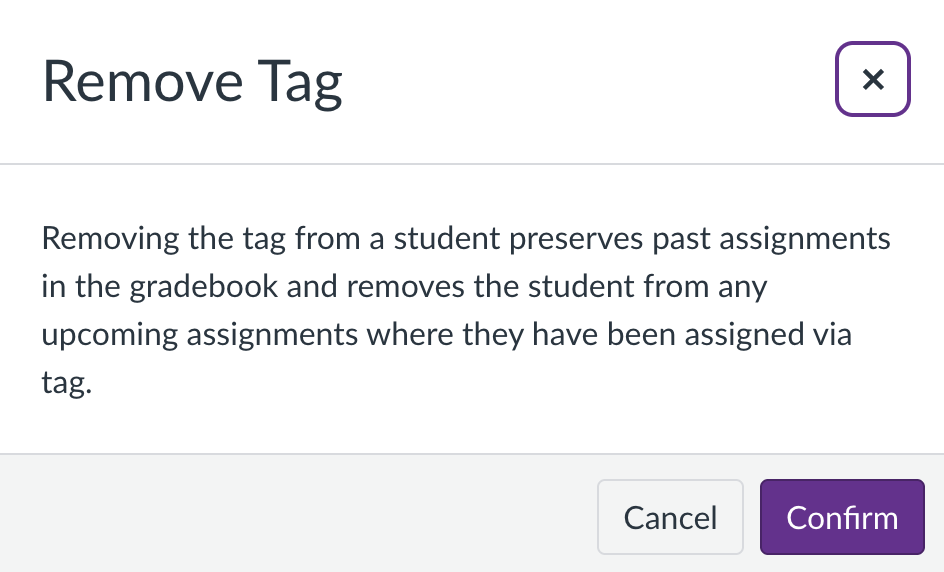

Be careful when removing differentiation tags from students who have already submitted work for assignments that use tags and Assign To. Our testing shows that if Assign To is applied, removing a tag will:
1. Remove the student’s access to the assignment
2. Hide any grades that have been assigned to them
Both access and grades can be restored by reapplying the same tag. However, we strongly recommend caution when removing or editing tags linked to existing assignments in your course.
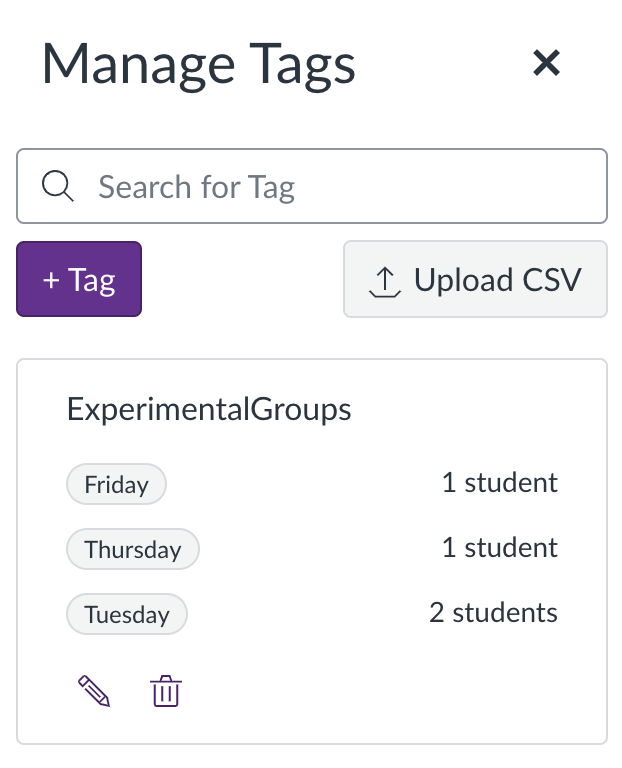
Managing Tags
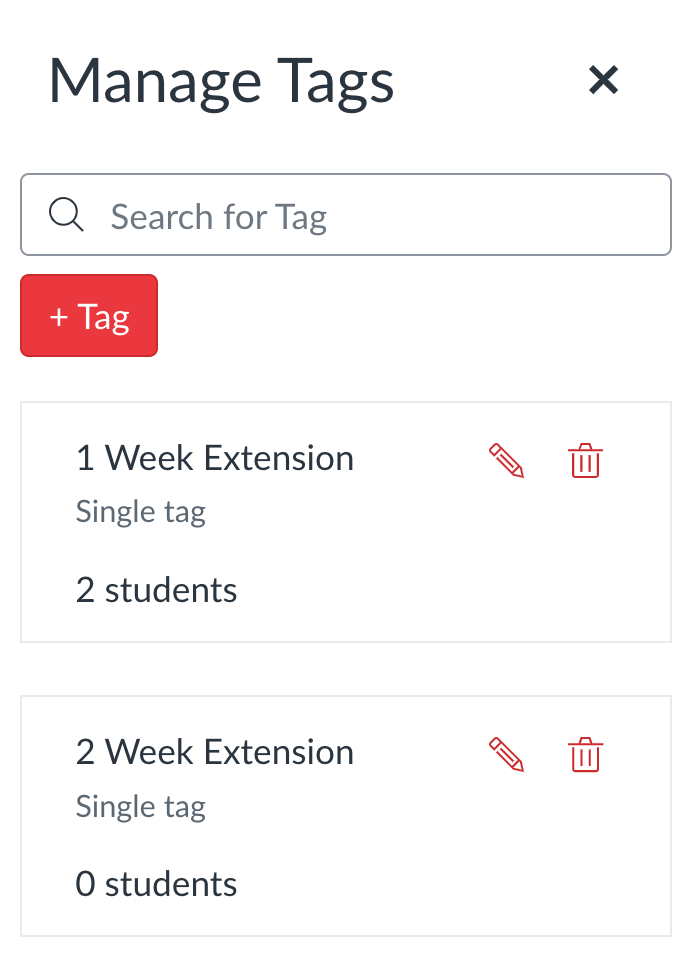
Differentiation tags can also be created, renamed and deleted from the Manage Tags area. Here, you will see a full list of all active tags within your course. To rename a tag, select the pencil icon, and to delete a tag, choose the bin icon.
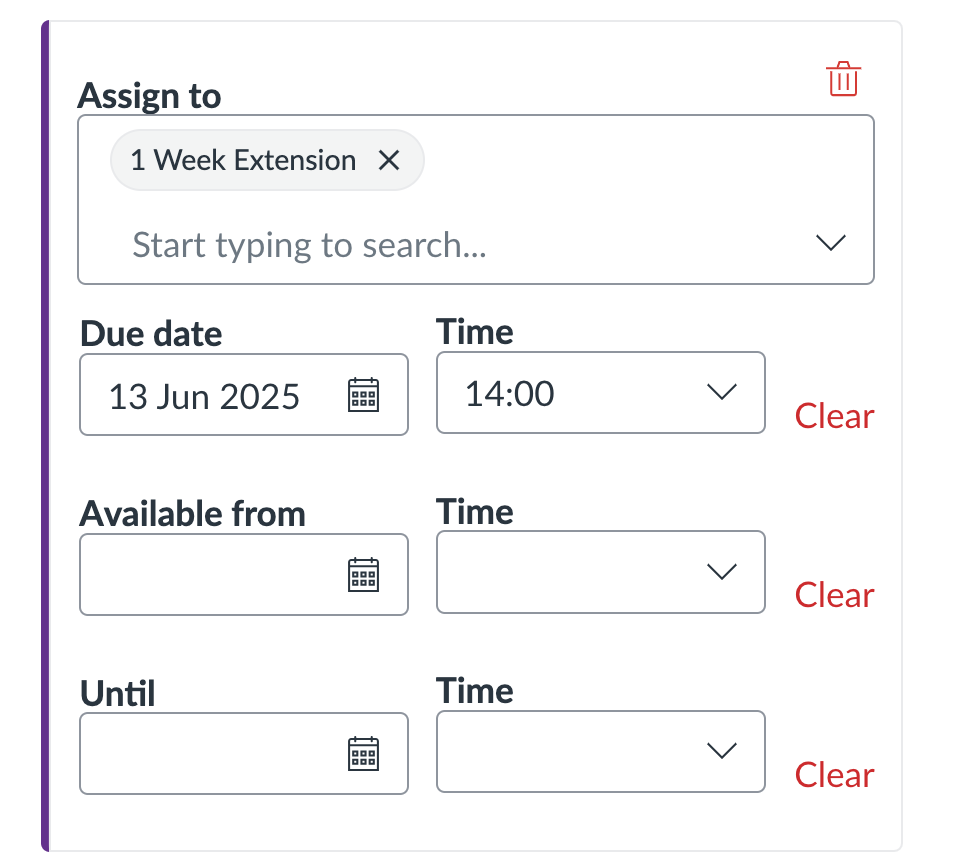
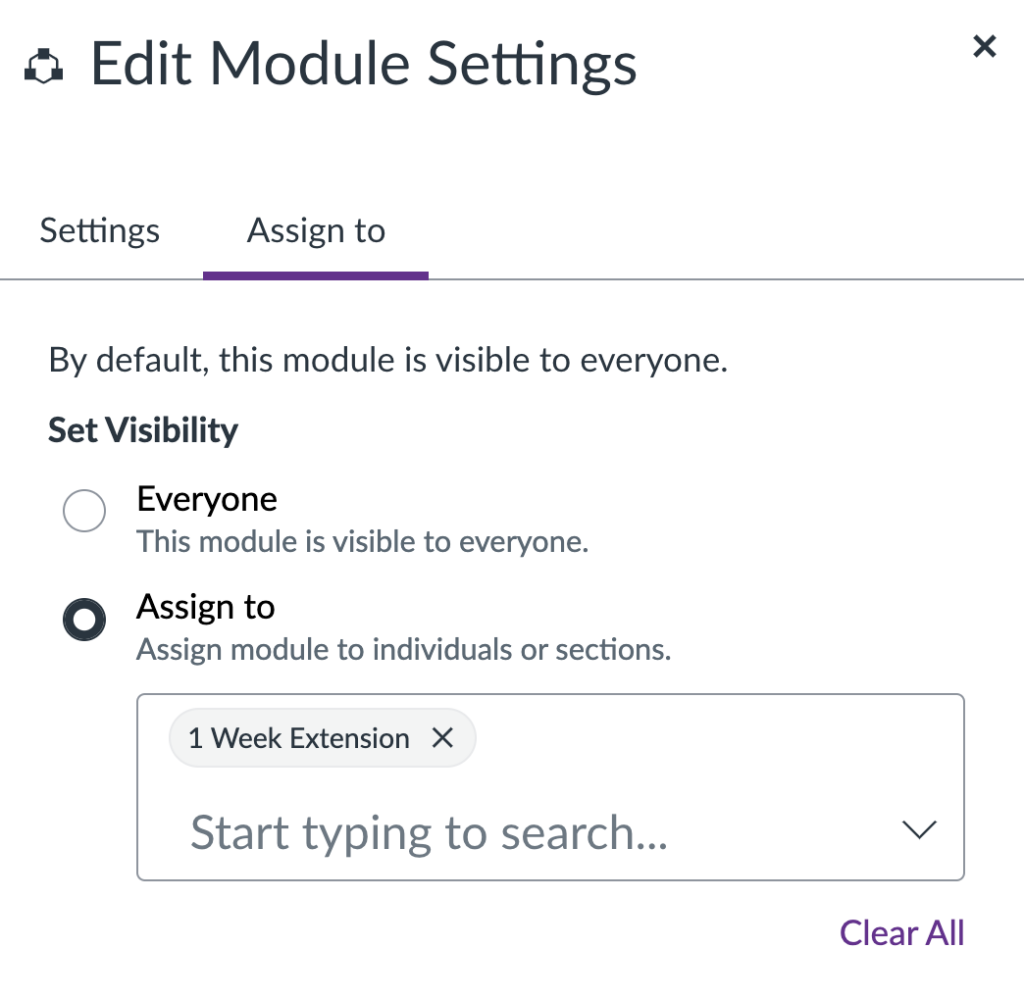
Using Differentiation Tags to Assign To
Similarly to sections and individual students, tags are available to select from in the Assign To area of an assignment or content item.
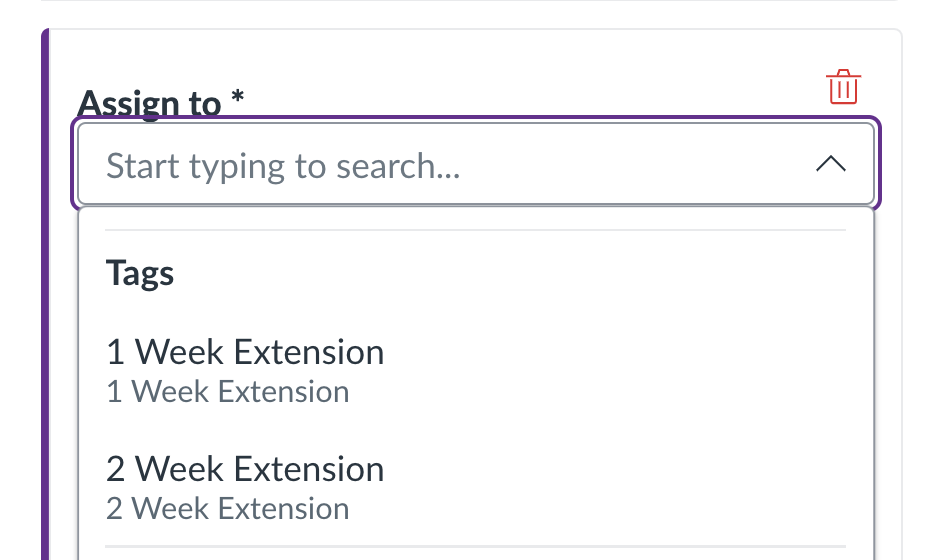
As a result, they can be used to differentiate due times and/or availability dates between sets of students on your course.

They can also be used to limit access to modules and/or items within the course.
Opening SpeedGrader Using Differentiation Tags
Should you be using differentiation tags in your course, it’s possible to filter SpeedGrader via differentiation tag. That is, you can navigate to an assignment, choose your relevant tag, and when opening the assignment in SpeedGrader, only students from the selected tag will display. This feature is particularly useful on large courses, where marking allocations may be split across different members of staff.
First, you will need to enable the below setting from the course Settings page.

Only when this setting is enabled are you able to filter assignments by tag in SpeedGrader. Note that enabling this setting will also allow you to filter SpeedGrader via collaborative student groups.
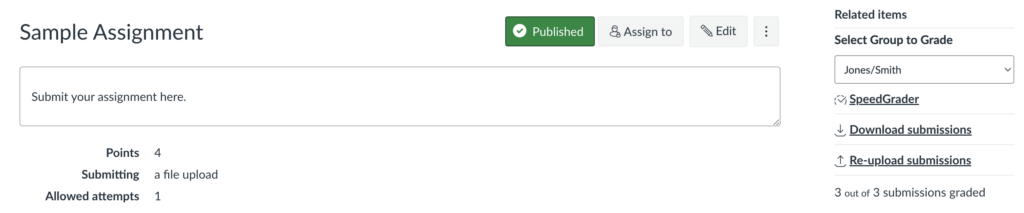
To filter SpeedGrader via tag, open up the Assignment overview page. Under ‘Select Group to Grade‘, you will find a list of all active tags in your course – choose the relevant tag from the last and then select SpeedGrader below to launch the tool.
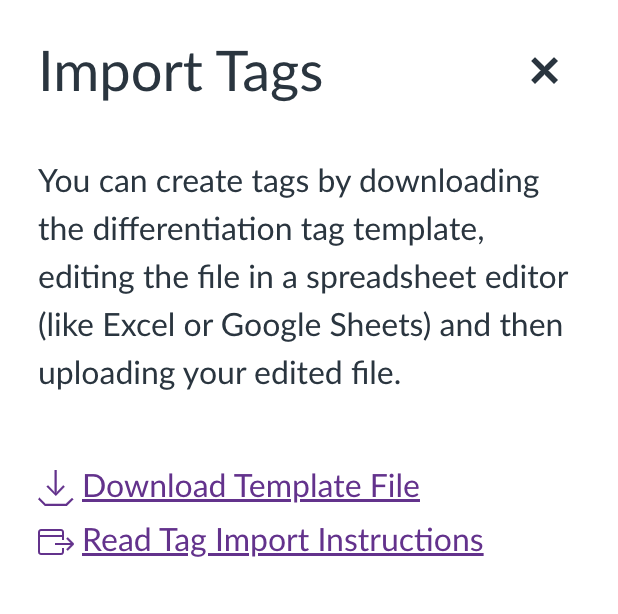
Managing Tags via CSV Upload
If you’re working with a large number of students or tags, you may find it easier to use the Upload CSV option. This allows you to assign students to tags in bulk, saving you from having to select each student individually. You can either download the CSV file from your Canvas course or use a blank template.
When creating tags, remember each course can have up to 40 tags, with a maximum of 10 tags per set.
Method 1: Download Existing CSV from Canvas
To download the existing CSV from Canvas, navigate to the People page, then select Manage Tags > Upload CSV, and finally download the template file.

You may find that the Download Template File option is not yet available to you. If so, we have provided instructions on how to assign tags using a blank template: Assigning Tags From a Blank Template.
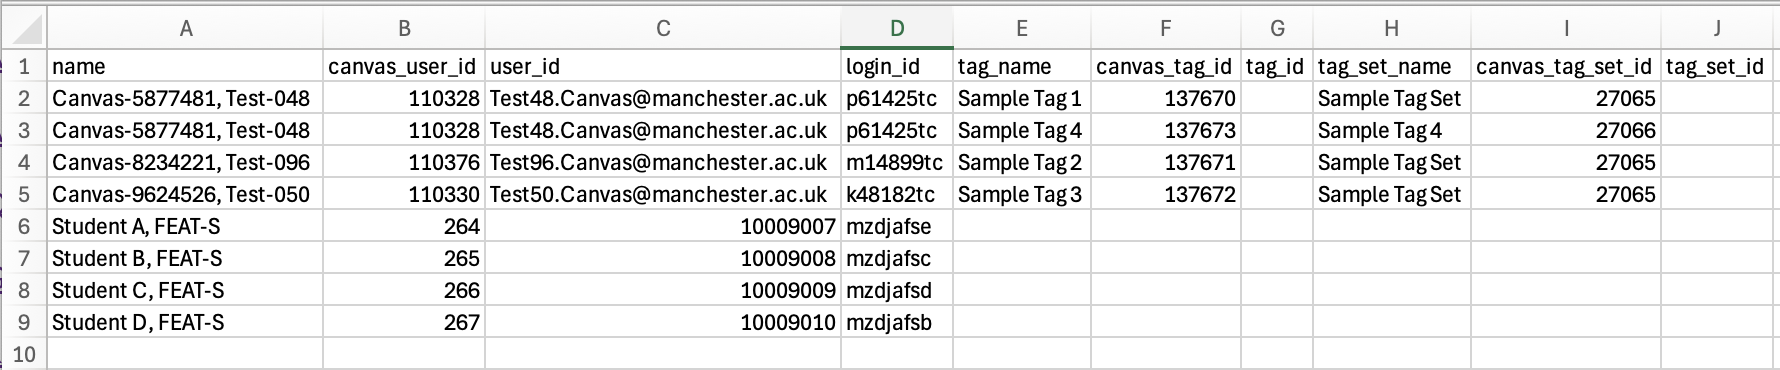
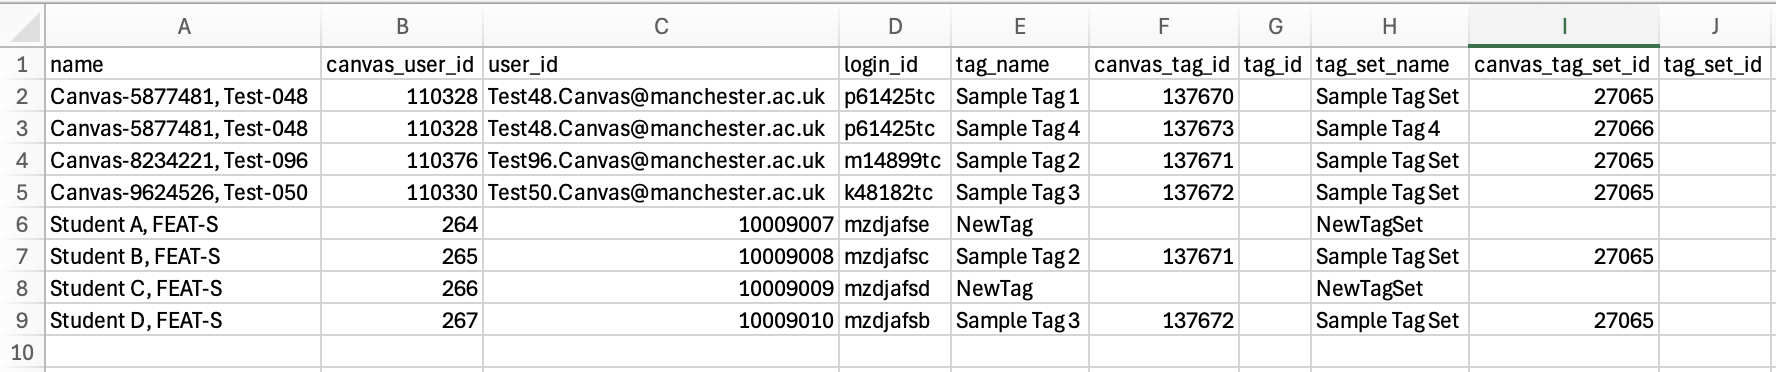
Selecting the Download Template File option will generate a .csv file containing a list of students enrolled in your course, along with any tags already associated with them.
- If no tags have been assigned, the file will simply display the students and their details, as shown below.

- If a student has a tag assigned, it will appear alongside their details. If a student has multiple tags, they will appear in the list more than once, once for each tag, as shown below.
Assign students to existing tags via CSV upload
To add one or more students to an existing tag, copy the relevant tag_name and, if available, tag_set_name information and paste it into the relevant cells.
In the example below, Student B is to be added to Sample Tag 2, and Student D is to be added to Sample Tag 3.
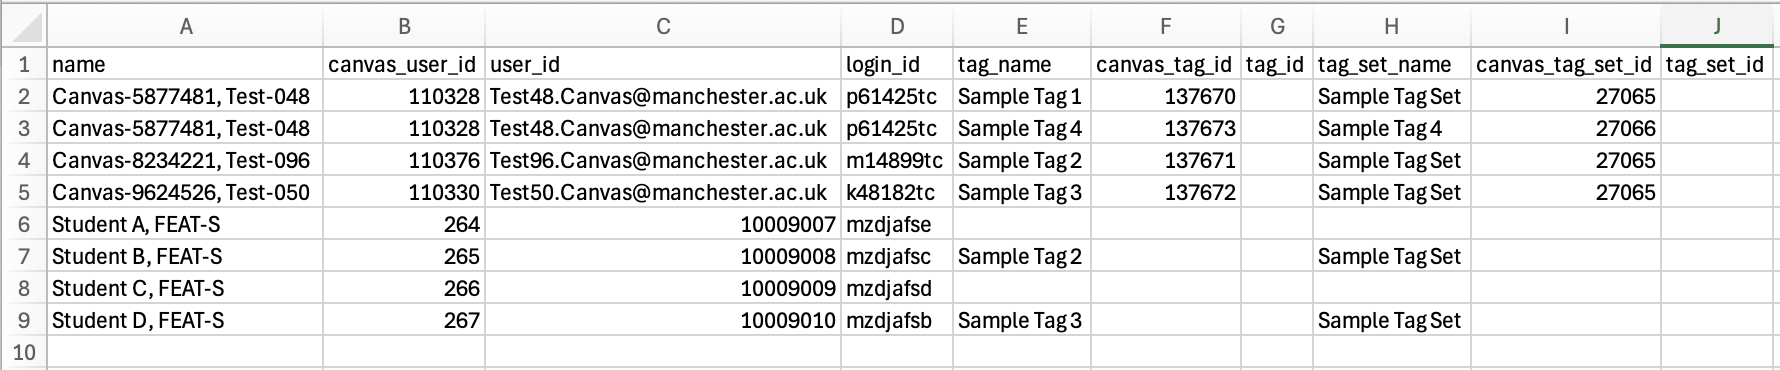
When you’re finished, save the .csv file and upload it using the Import CSV function. The selected students will then be assigned to the tags.
Create new tags and assign students via CSV upload
It is also possible to create brand new tags via the CSV Upload function. To do this, on your template file, enter a tag name in the tag_name column, and optionally add a tag set name in the tag_set_name column. Once saved as a .csv file and uploaded, your students will be assigned the new tag.
We recommend creating all tags within an associated tag set. This helps keep your course organised and makes it easier to manage tags over time.
When creating tag sets, remember each set can contain up to 10 tags. If you need more than 10 tags, we recommend splitting them into multiple sets. For example, A–L Markers and M–Z Markers.
Method 2: Use a Blank Template
You can also assign tags without using the pre-populated template. In other words, you don’t need to download the template file from Canvas – you can start with a blank template instead.
First, download the blank differentiation tag template file to get started.
When using the blank template, there’s no need to fill in all the information fields. It is sufficient to enter only the following details:
- user_id or login_id (required)
The student’s user ID is also known as their UoM Student ID number; the login ID is also known as their username - tag_name (required)
- tag_set_name (optional)
If needed, user IDs can be retrieved by downloading the Class Roster from Course Analytics. The required value can be found in the Student SIS ID column.

When you’re finished, save your file as a .csv and upload it using the standard import method. The students will then be assigned the differentiation tags you specified.