This article will explain what a Sandbox is, how you access a Sandbox, how to edit a sandbox name, and how to add users to a Sandbox in Canvas.
What is a Sandbox?
A Sandbox in Canvas is the equivalent of a Playground in Blackboard. Simply put, it is an empty course that you can play around with and use for whatever you like. For example, you could use your Sandbox to familiarise yourself with the Canvas interface, test tools such as building quizzes and assignments, or create and store content that you may wish to use in the future with students in live Canvas courses. You can also add other staff users to you Sandbox course so that multiple people can contribute to it in various ways, whether that be in an admin or student capacity.
How do you access a Sandbox?
Unlike Blackboard where you had to request a Playground, in Canvas all staff have a Sandbox available by default. You can access your Sandbox course by navigating to either the Dashboard or Courses items on the main left-hand navigation menu in Canvas. These two areas will display both published and unpublished courses, dependent on the status of the courses that you have access to. If you have never used or published a sandbox area previously, simply look for a course name that has the word Sandbox in it within your unpublished courses area, as shown in the below example from the Dashboard menu:

Editing a Sandbox name
If you would like to edit and customise the name of your Sandbox, simply click on the Dashboard item in the Global Navigation Menu in Canvas. Locate your Sandbox tile, and then click on the ellipsis (three vertical dots) in the top right corner of the tile. From here you can add a nickname for your course to make it more personable and recognisable, and you can also select what colour you would like the tile to be by selecting a colour option located below the nickname box. Once you have completed these steps, simply select Apply to save these changes:
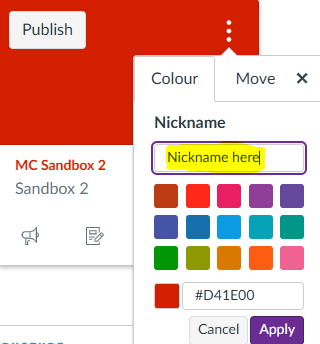

Note: Course Nicknames will only appear for yourself, they do not update the nickname for anyone else viewing your course.
How to add users
- From the Dashboard or Courses are in the Global Navigation Menu, locate and open your Sandbox course.
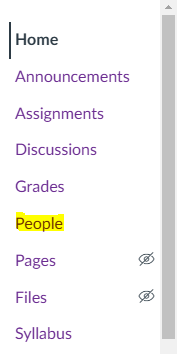
- Once in your Sandbox, click on the People menu item from the Canvas Course Menu:

Tip: The People screen lists anyone who is enrolled on to your course. You can also manage student groups from here.
- Click on the +People button located towards the top right-hand corner of the screen:

- You will then be presented with the Add People screen:
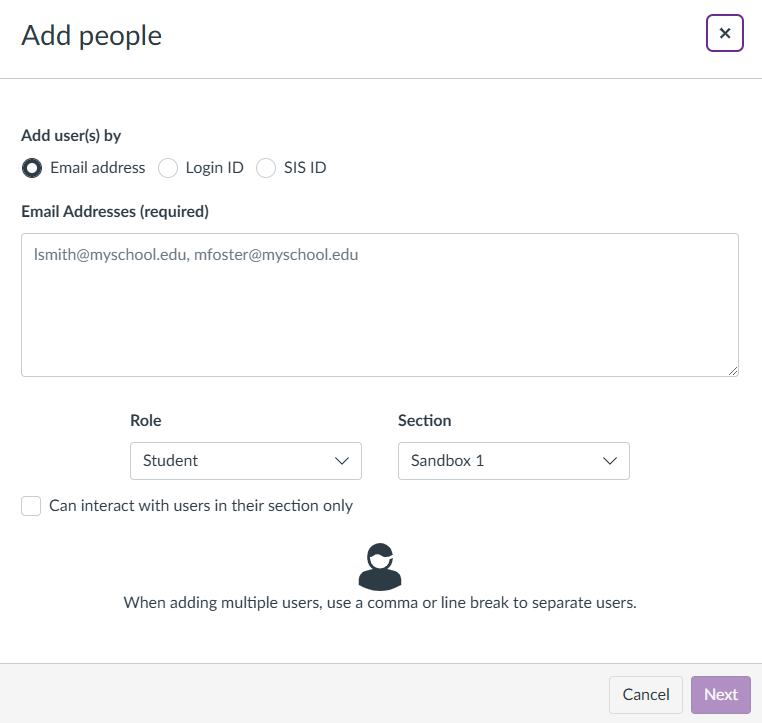
Tip: You can add people by using either their email address, login ID, or student ID
- Add a user by selecting the relevant search criteria (e.g. email address or student ID) and entering this information into the search box.
- To add multiple users, simply add a comma at the end of each email address, user ID or student ID (e.g. name1@manchester.ac.uk, name2@manchester.ac.uk etc). Adding each user to a new line in the search box also works, and in this case there is no need to add a comma after each ID is entered.
- Select a role for the user by clicking on the Role drop-down menu. In this example the role of Student has been selected.
- Ensure that the name of your sandbox appears in the Section drop-down menu.
- Leave the Can interact with users in their section only unchecked:

- Finally, click on the Next button located at the bottom right-hand corner of the screen.
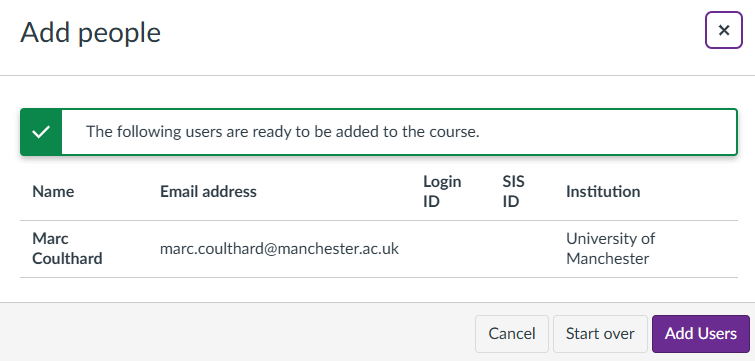
- A summary screen will appear confirming the users that you are about to add. Check that you are happy with the summary of users then click the Add Users button:
- You will then be taken back to the main People screen where the enrolments that you have added will be displayed.
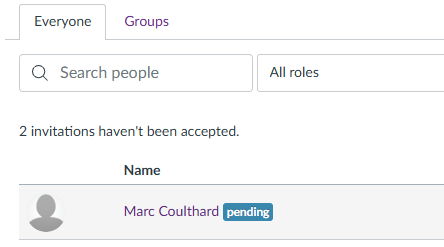
Users that you add to your sandbox are essentially ‘invited’, and each user must accept the invitation to your sandbox by logging into Canvas and clicking on the invitation pop-up that appears at the top of the screen when they log in. Any users who have not accepted the invitation will have a Pending icon next to their name until they accept the invitation: