Testing online exams in Blackboard

Assessment / Testing Online Exams in Blackboard
This webpage contains detailed guidance on how you can combine Blackboard’s Student Preview and adaptive release tools to verify tests or assignments and test out marking process.
It is particularly important, to make sure that assignments or tests that you are using for examination are well-designed and function as you expect.
With Blackboard’s student preview feature, you can view a test or assignment (or many other types of content) as a student does.
The system creates a student account—the preview user account. While in student preview mode, you can:
- Submit assignments
- Take tests
- View student tools, such as My Grades
After you have taken a test or submitted an assignment with the preview user account you can exit preview and check your marking workflow and grade calculations.
Limitations of Student Preview
Student Preview can be used to test elements such as adaptive release, tests, groups, and discussions, however, should not be used for some third-party tools as the preview account will not be recognized in the third-party tool such as Turnitin or Piazza.
How to Test Marking in Blackboard:
This is an overview of the process:
- Enter Preview Student, exit Preview Student (to prompt the system to create the preview account)
- Set up Adaptive release – only the preview user account can access the assignment.
- Activate Preview Student Submit the assignment, Exit Preview, go to the grade centre and mark.
This video demonstrates the whole process on a dummy assignment (the text beneath also details the process):
1. Enter/Exit Student Preview
To enter student preview mode, select the Enter Student Preview icon:
Student preview creates a student account, called the preview user. You’re logged in as the preview user and enrolled in the current course. When you enter student preview mode, the student preview bar appears at the top of each page:

Student preview mode is active only in the courses where you enable it.
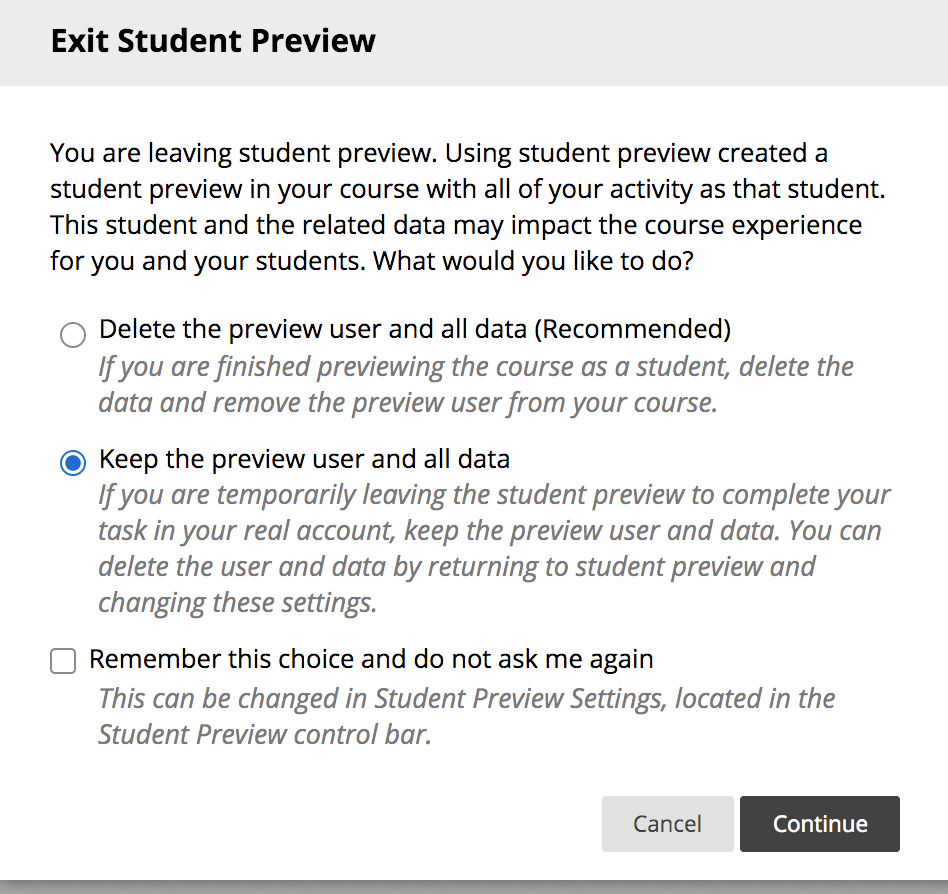
Important: Keep The Preview User and Data
When you exit the student preview, you’re asked if you want to keep or delete the preview user and all associated data. You must Keep The Preview User and Data, to continue with the process:
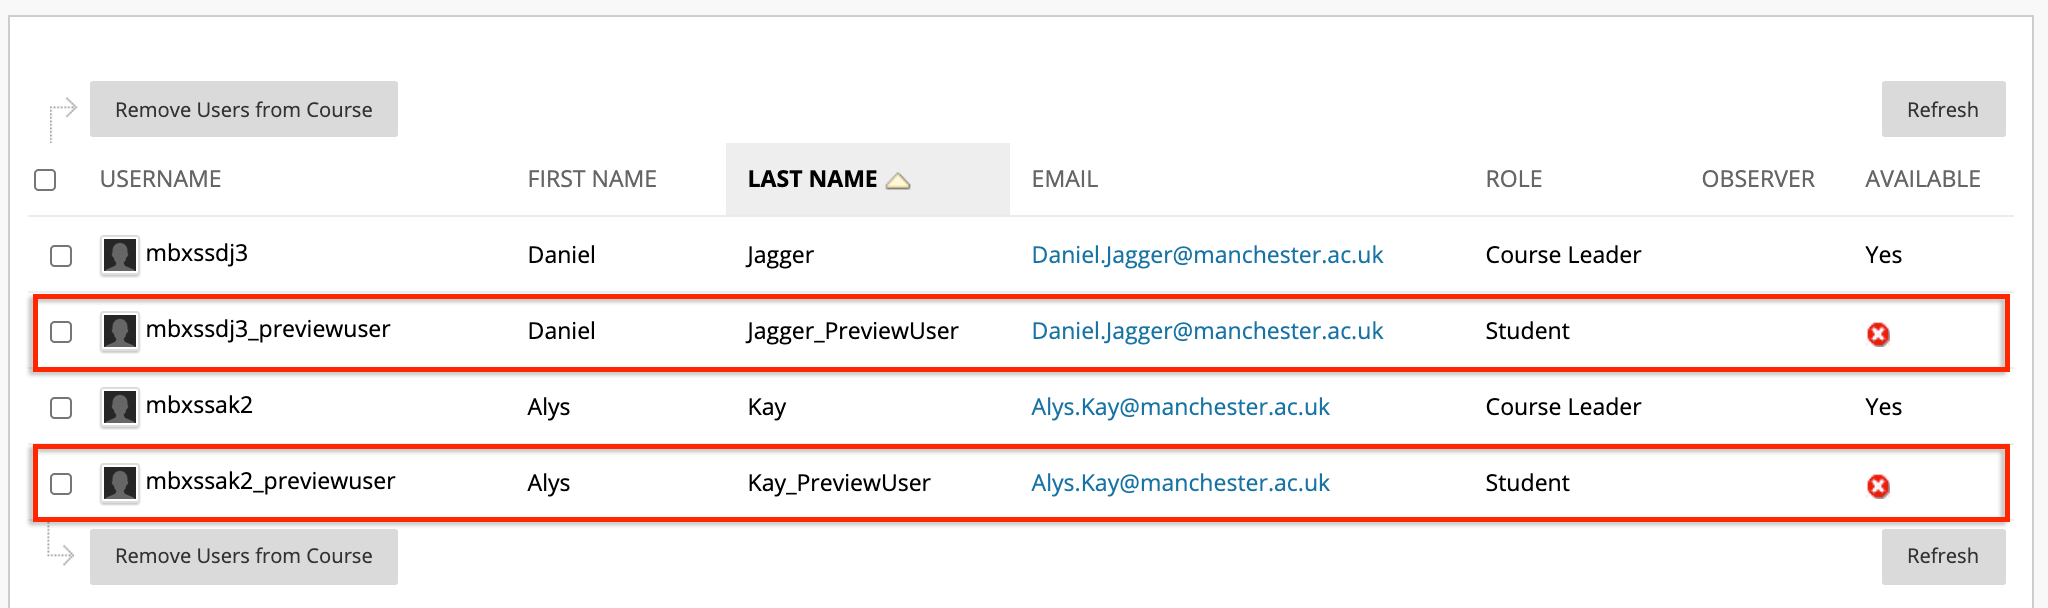
It is easy to identify your preview user account by the name. The account name is your last name appended with _PreviewUser and the username is your username appended with _previewuser.
2. Setup Adaptive Release
Important: For extra confidence in this testing process it is wise to create a copy of your assignment or test (more info on copying content here) that does not contain any critical exam information to test out the look of the test canvas/layout of question and instruction, or the marking processes.
Adaptive Release
Adaptive Release of Content provides controls to release content to users based on a set of rules you create. The rules may be related to date and time, individual users and groups, scores or attempts on any Grade Centre item, or review status of another item in the course.
In the case of verifying assignments or tests, you will use the Membership criteria to restrict assess to the preview user:
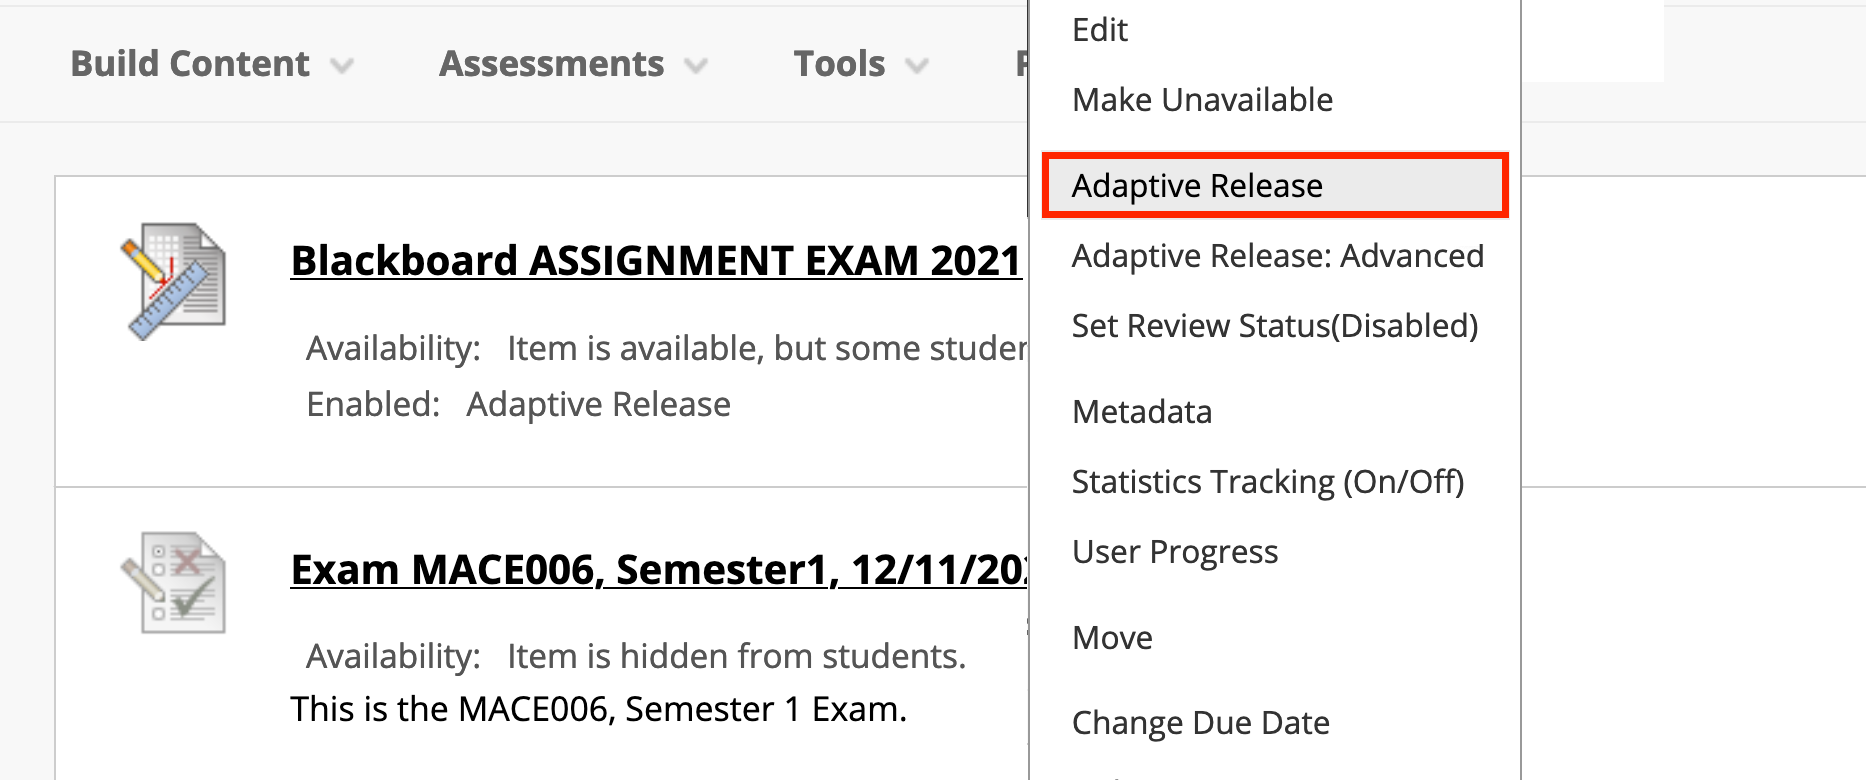
- With Edit mode on, identifying the content item for which you wish to enable Adaptive Release.
- Click on the Modify button beside it.
- Click on Adaptive Release.
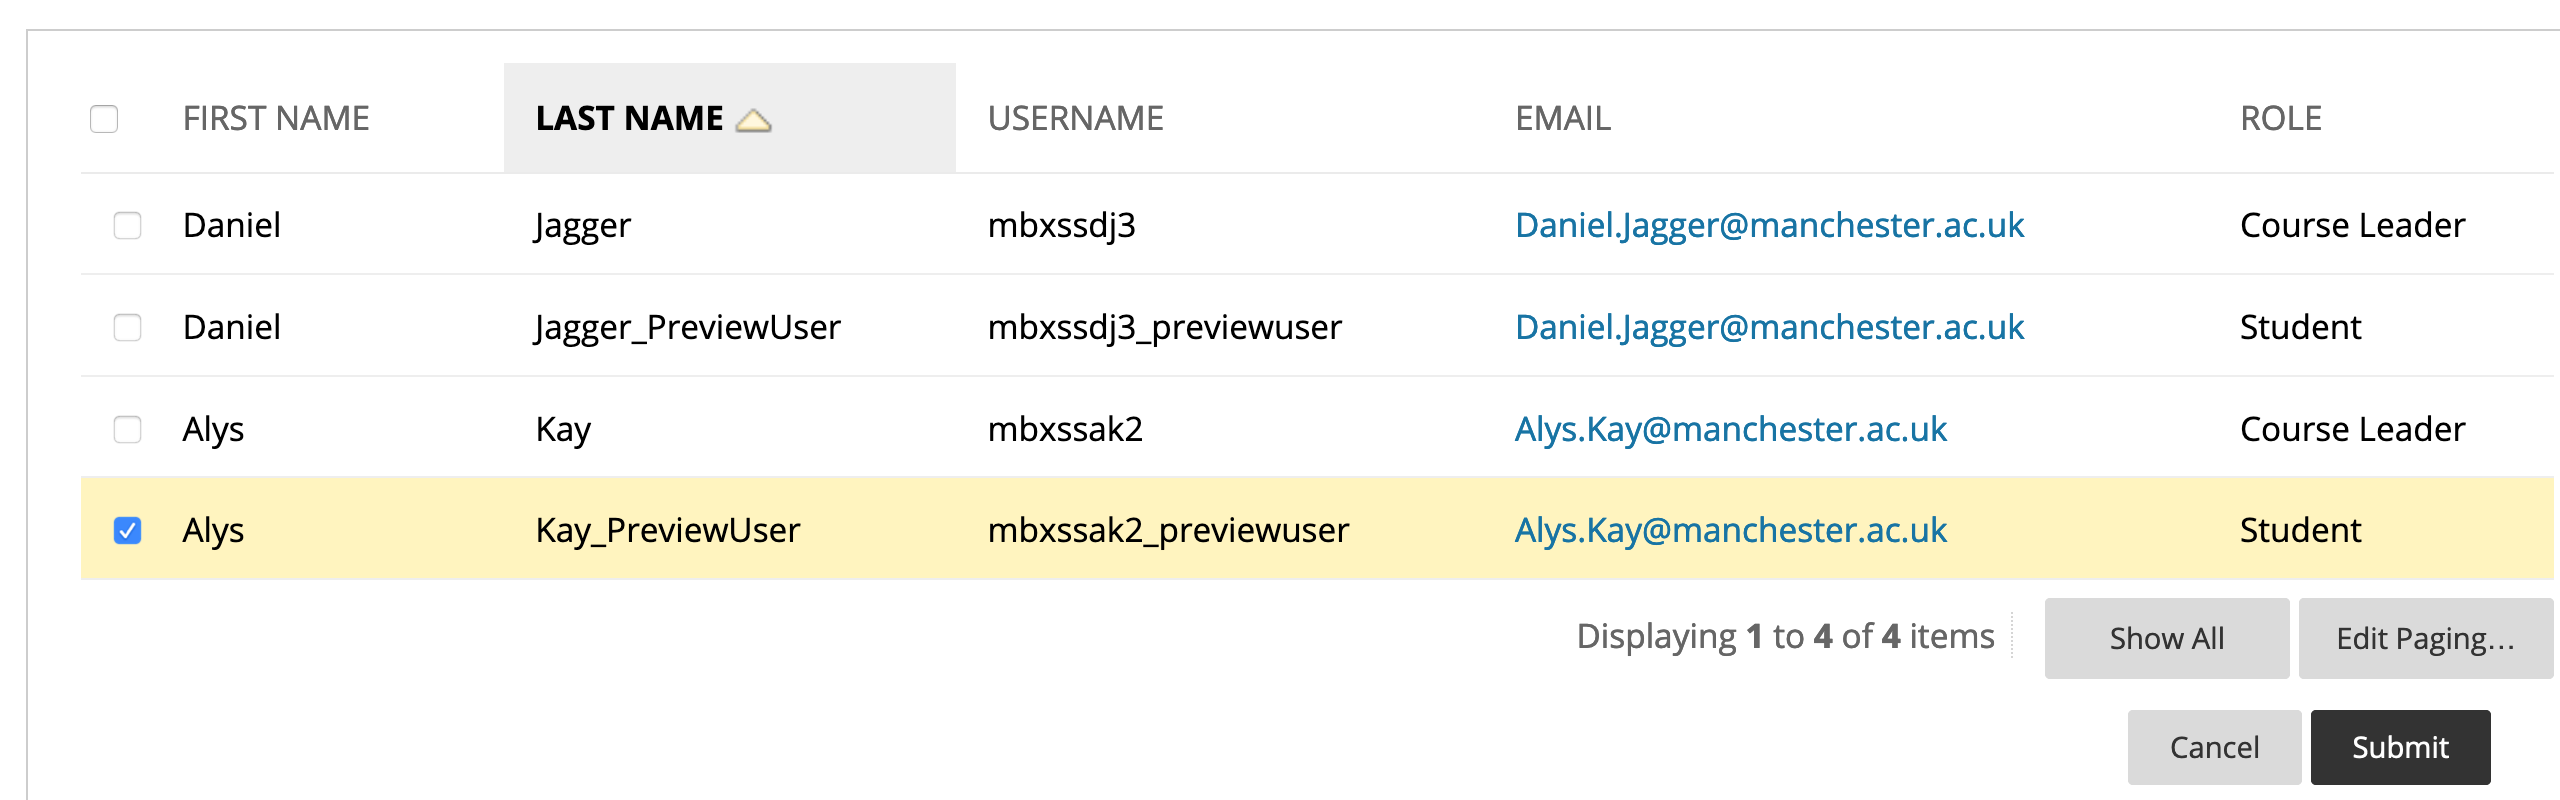
- Scroll down to Membership. You set this to restrict content to a user by their username – you can click on Browse to find users on your course. The preview user account always has the username appended by _previewuser e.g. “mbxssak2_previewuser”.
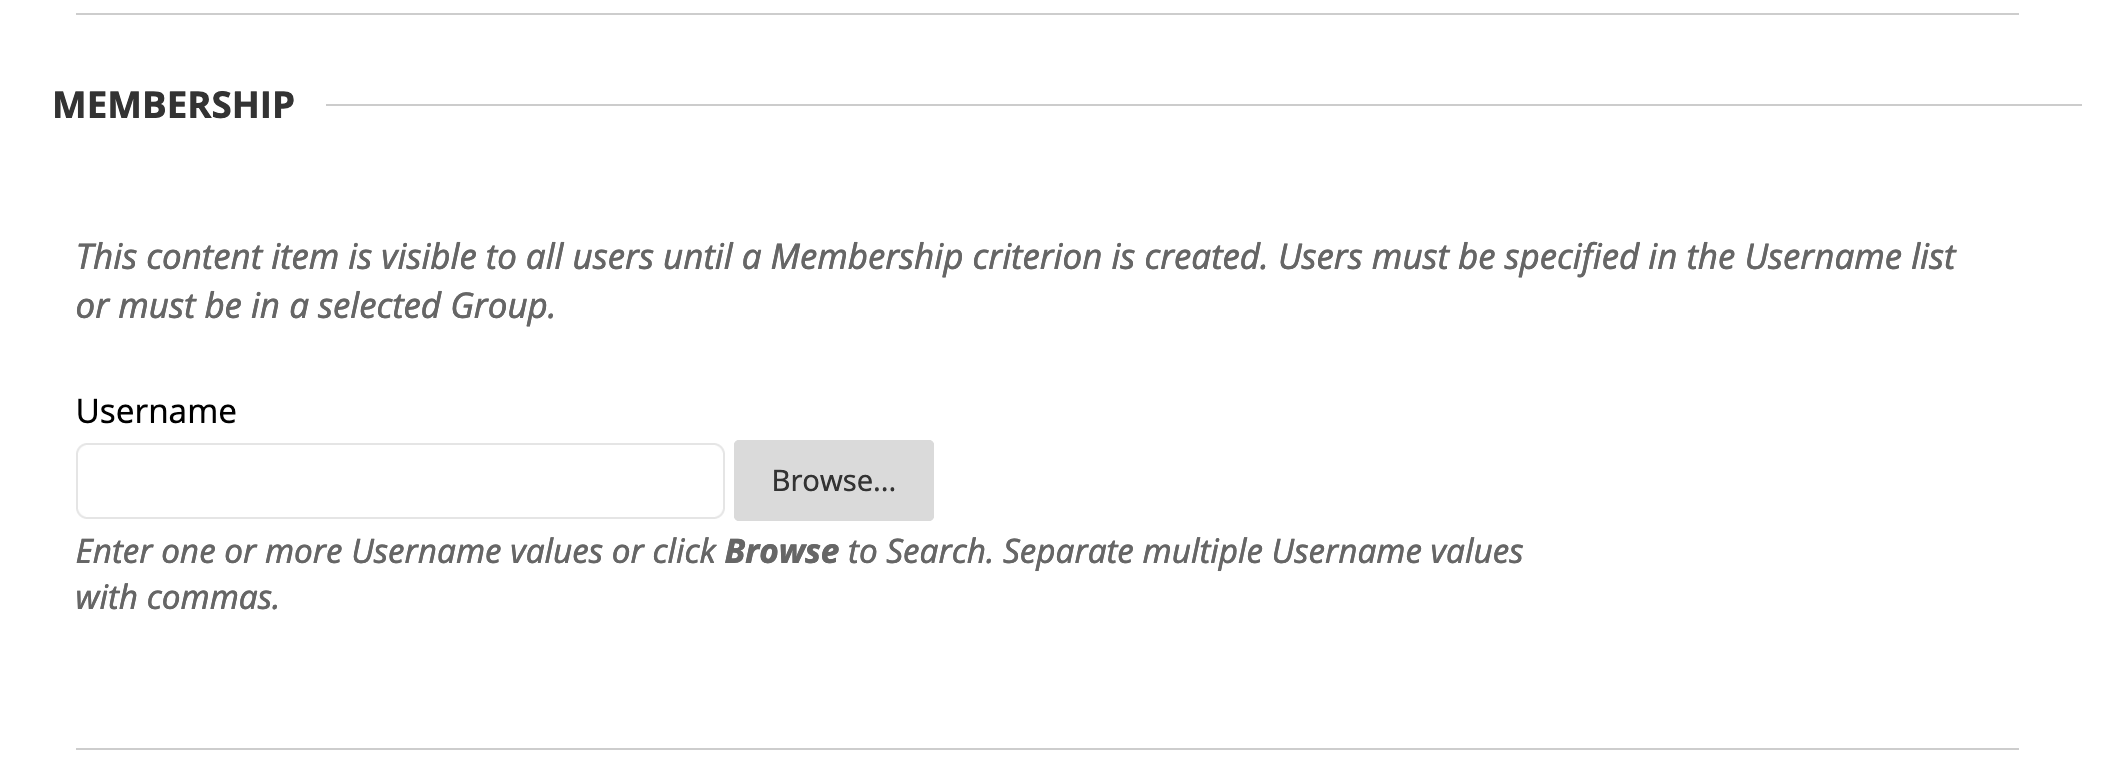
- Click Browse, and select the previewuser:
- Click on Submit to finish.
3. Enter Student Preview, Submit, Exit Student Preview, and Mark
You will now submit a dummy assignment through the student preview account:
- Enter student preview (click the student preview icon).
- Navigate to the assignment, and submit an assignment by following the onscreen instructions.
- Exit student preview.
- Go to the grade centre, click needs marking.
- Click on the submission to access the marking tools:
- Mark the submission and click submit to finish.
You can now check the outcome of the marking on that submission by going back into Student Mode and viewing the submission.