Zoom for Education

Getting Started
A full guide has been created detailing how to use Zoom’s many features. This guide includes breakout rooms, polling, essential security tips and cloud recording.
Download the University how to Zoom guide here.
Understanding the Zoom Interface
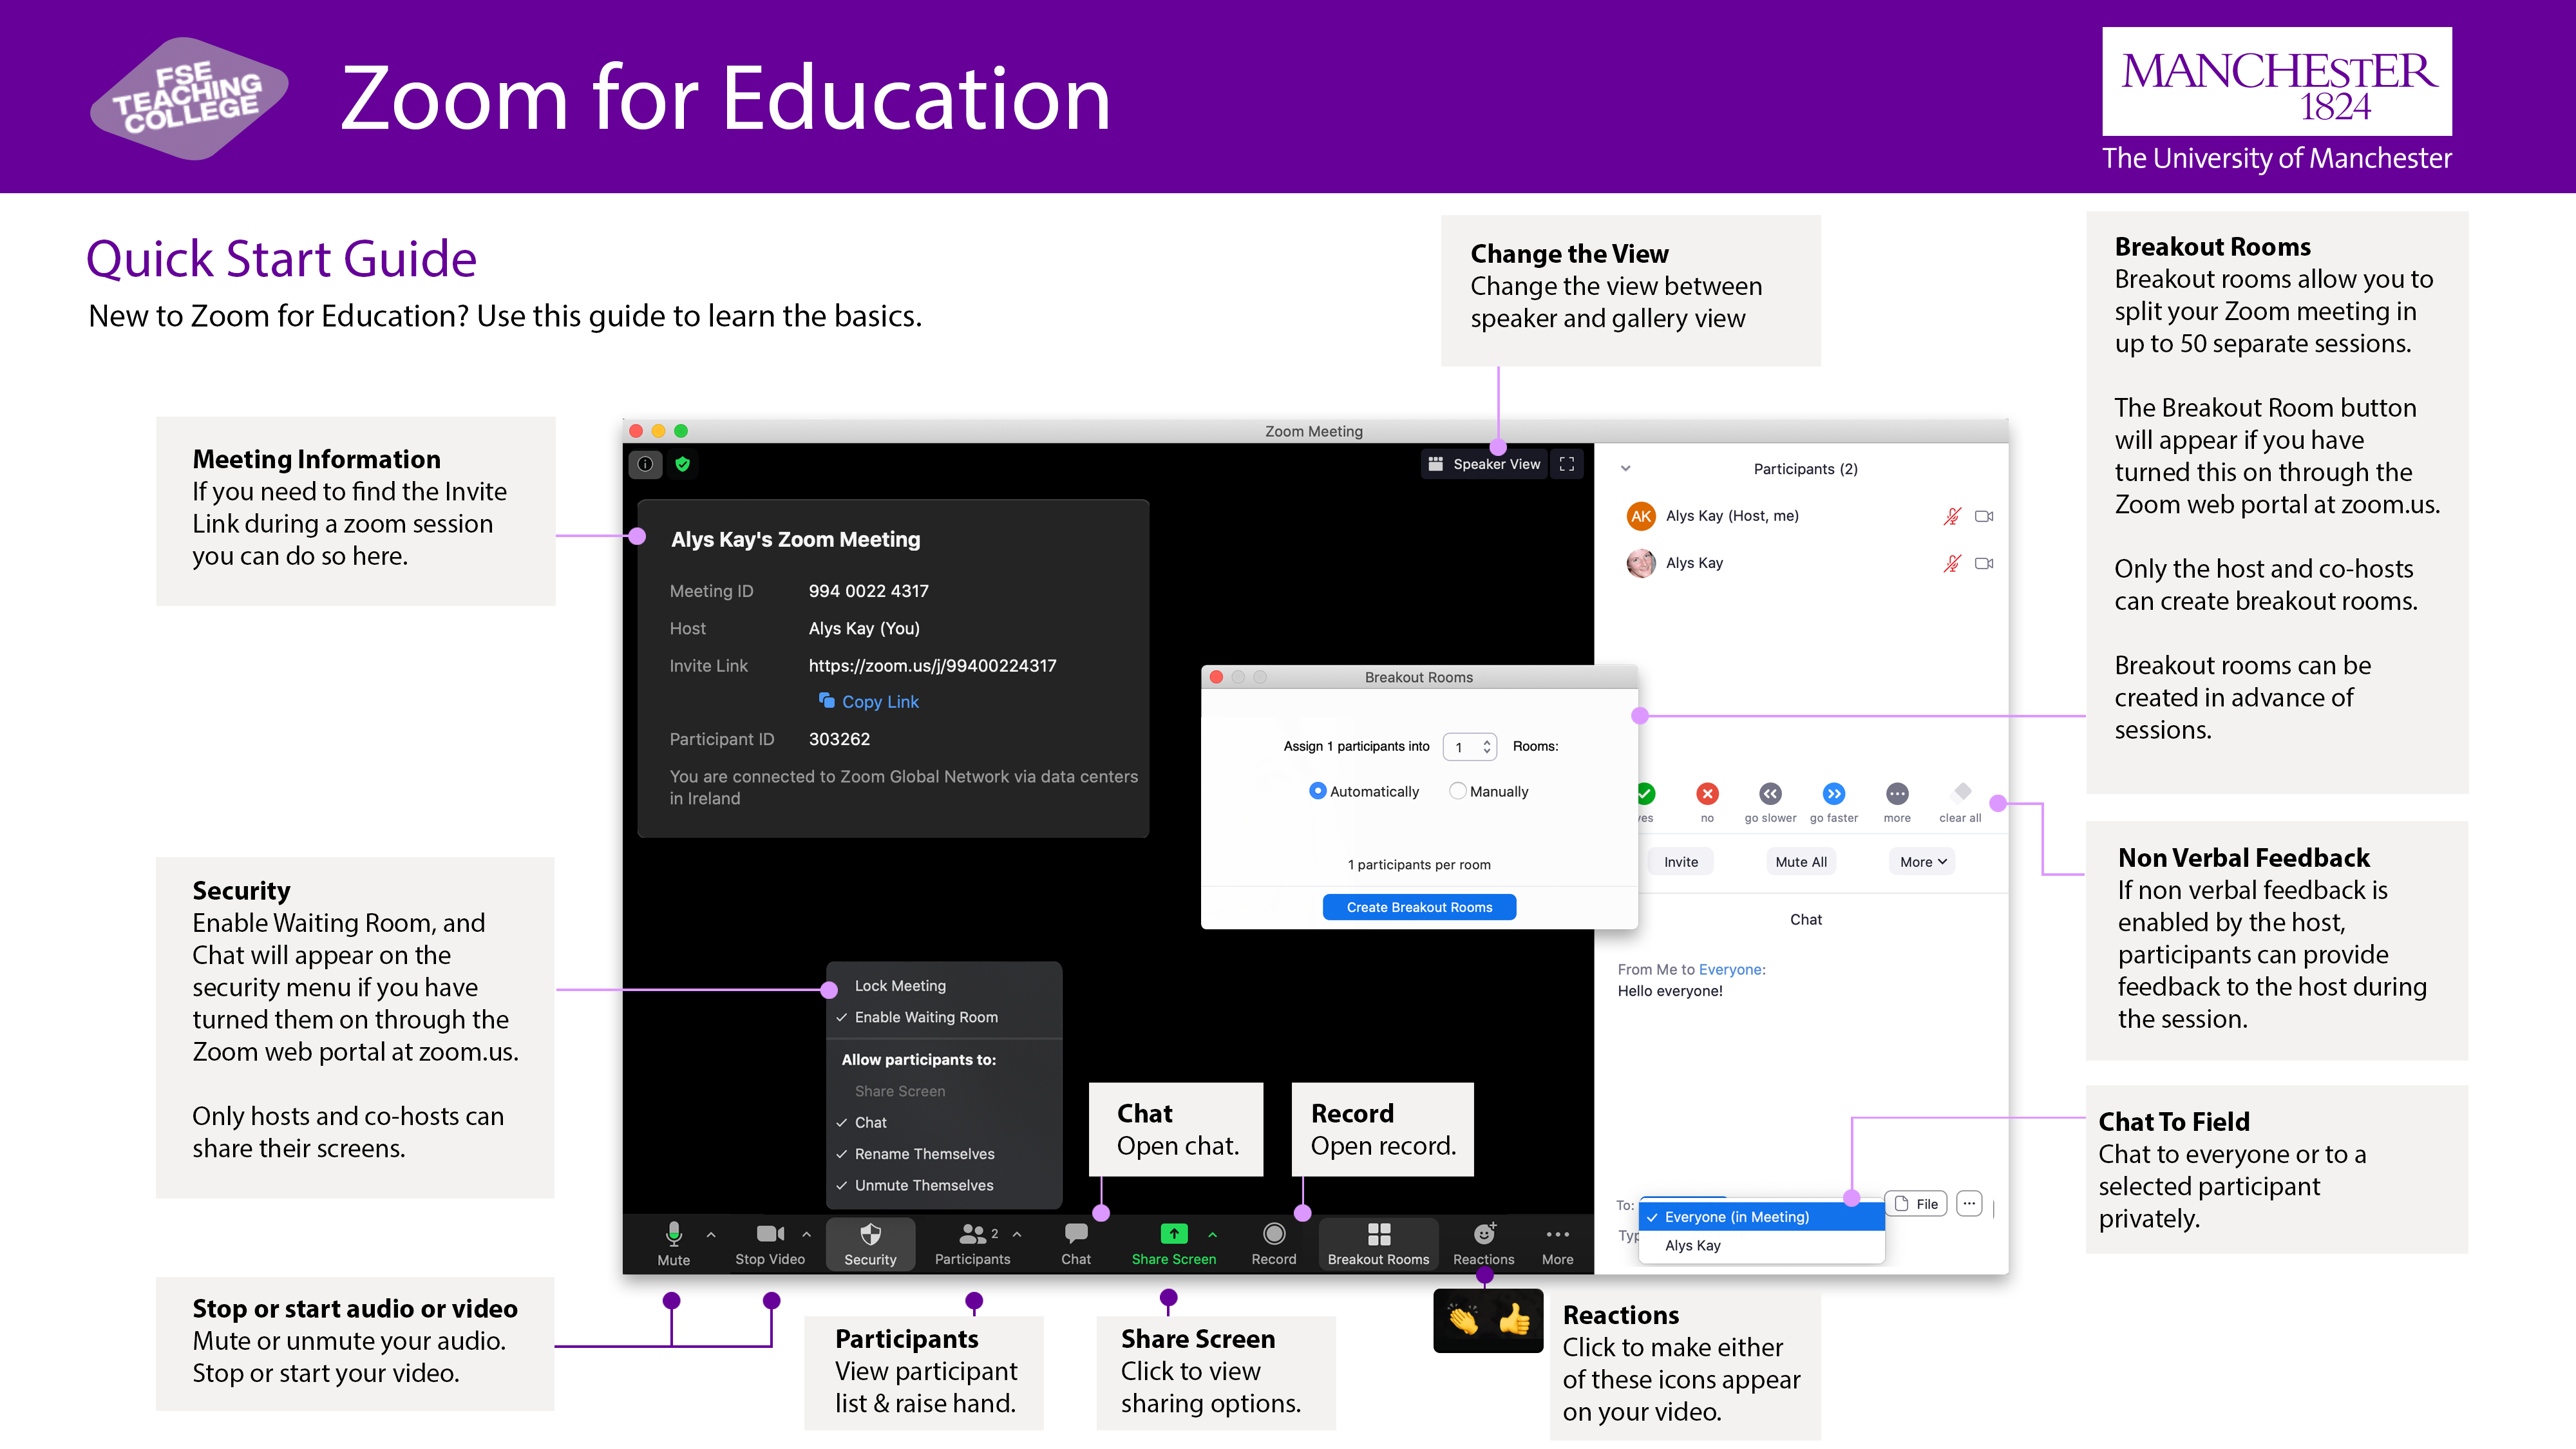
Also available as PDF here: Zoom-for-Education-Quick-Start
Zoom Settings
To access and edit meeting settings you need to use the Zoom web interface:
- Go to https://zoom.us
- Login with your UoM username and password.
- Select Settings from the side menu.
Note: The Settings page has three tabs (located at top of page): Meeting, Recording and Telephone.
- Click individual items on each page to toggle a setting On (coloured blue) or Off (coloured grey as in picture below).
 |
Breakout rooms and polls need to be enabled before the session in the web interface. A full list of settings is available, as well as recommendations for settings for large group session (<300 participants):
Delivery Tips
- With a new cohort focus on activities that will create social interaction; student-to-student and student-to-lecturer. Read these suggested Social Ice breakers for details of how to structure and facilitate social activities in a remote learning environment.
- Spend time at the start of the session making sure that your students are familiar with the features of Zoom you want them to use, and communicate your expectations about how you expect them to be used, as you would in a face-to-face teaching situation. Return to this periodically.
- Pre-set your meeting to mute participant’s microphones upon entry. This helps to avoid unwanted background noise and allow your students to focus on your lesson.
- Look at the camera to create eye contact with your students. This helps to create a more personal connection while teaching over video.
- Speak as if you’re face-to-face with the participants while ensuring you’re at the appropriate distance from the microphone for the best audio experience.
- When delivering a presentation, sharing images, files or video, asking students to use one of the response tools, plan in sufficient time for your students to open or take in what you’ve shared.
Breakout Rooms
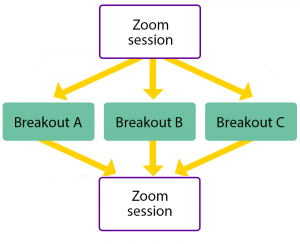
The Breakout Rooms feature of Zoom allows you to split the participants in your session into smaller groups, you as the host can move between breakout rooms, and then bring everybody back together again, as shown in the diagram to the left.
You need to enable breakout rooms in your Zoom settings before you will have access to the ‘Breakout Room’ button in the Zoom interface.
Pre-assigning participants to Breakout Rooms
You can create breakout rooms and assign participants to them prior to the start of an existing meeting. To do so you will require all the participants’ Zoom sign-in email addresses. This is the email address that is linked to each individual’s Zoom account. It is therefore important that all students use their University of Manchester email addresses to access your zoom session.
More Info: How to pre-assign breakout rooms in zoom
Breakout Questions
Can the host share content from the main room to breakout rooms?
- Zoom does not support the ability to share a screen or chat across breakout rooms.
- If you want breakout room participants to have access to a graph; you would have to share the handout/worksheet beforehand, so that one of the participants could share his/her screen with the rest of the group.
- The host can send a message to breakout room participants that consists of text only.
What happens inside the breakout room?
- Breakout room participants can chat, share their screens and record the breakout room (if enabled in settings).
- Chat has to be saved locally by one of the participants whilst they are in the breakout room if you want this to persist, this is the same for recordings or the collaborative whiteboard.
- Participants have access to a ‘ask the tutor for help’ button which will alert the host via pop-up box whilst in breakout.
For the whiteboard tool you can instruct students to use the save button on the drawing tools:

Zoom Resources
The Zoom Website has many comprehensive how to guides, we have listed some of the ones most relevant to teaching here:
- Polling: Using the interactive question tool
- Breakout Rooms: Getting started with breakout rooms
- Non-verbal Feedback: Non-verbal feedback during zoom sessions
- Virtual Backgrounds: Virtual Backgrounds
- Sharing a Screen: How do I share my screen
- Whiteboard: Sharing a whiteboard
- Annotation: Using annotation on a shared screen or whiteboard
- Transcription of meetings: Automatically transcribed Zoom sessions
- Chat: In session chat
- Attendance Reports for Registration and Polling: Generating reports
- Recording: Finding and viewing recordings
Comparison of Zoom and Collaborate
Wondering about whether you should be using Zoom or Collaborate to host remote teaching activities?
The main differences between these options are:
- The number of participants: Zoom allows up-to 300 (unless you buy an extended licence), Collaborate allows up-to 500 (breakout room functionality is only available for 250 participants).
- The way that breakout rooms can be set-up: Zoom allows you to set-up and pre-populate breakout room in advance of the session, Collaborate does not.