How to create an exam using Blackboard’s test tools
This guide is designed for anyone who is new to or has not previously built an online test and wishes to use this for an examination.
Phase 1: Write your Questions
By far the most time consuming part of the process. To write your questions you need to be aware of what question options there are in Blackboard. Essentially, there are two types of question available in a Blackboard test:
- Questions that require manual marking – E.g. Essay Questions and Short Answer
- Questions that can be automatically marked – E.g. Multiple Choice, True/False
- An overview of Blackboard question types
- Techniques to minimise academic malpractice with online exams
Phase 2 – Build Your Test
While repetitive, the process for building a test is not complicated. For each question you will be presented with an online form that requires completing with:
- the question text,
- the answer options,
- the correct answers,
- distractors,
- question feedback,
- points per question and other options that are relevant to each question type.
Question types such as Multiple Choice are very obvious; some types such as Calculated Formula or Fill In the Blanks may require a bit of testing to get working exactly as you want.
To build a test and add questions in Blackboard:
- Use the left-hand menu to navigate to Control Panel > Course Tools > Tests, Surveys, and Pools > Tests
- On the Tests page click: Build Test
- On the Test Information page, type a name. Optionally, provide a description and instructions.
- Select Submit.
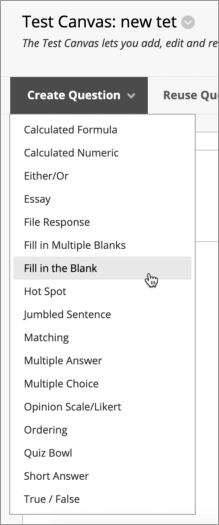
- On the Test Canvas, from the Create Question menu, select a question type.
- On the Create/Edit page, provide the necessary information to create a question.
- Select Submit.
- Repeat until you have added all the questions to your test.
When you create a test and add questions, the test is added to the list on the Tests page but is not available to students until you deploy the test.
Phase 3 – Deploy Your Test
Before you deploy your test make sure you have checked it for errors. After creating all your questions you may suffer from “Test Blindness” or “Blackboard Fatigue” we also recommend you get a colleague to review your test with a fresh pair of eyes.
N.B. If you have built/developed your test in a Sandpit/Playground space, you can copy the test questions over to your course unit space but you cannot copy the test settings over.
After you create a test and add questions, the next step is to deploy the test to students.
To make a test available to students:
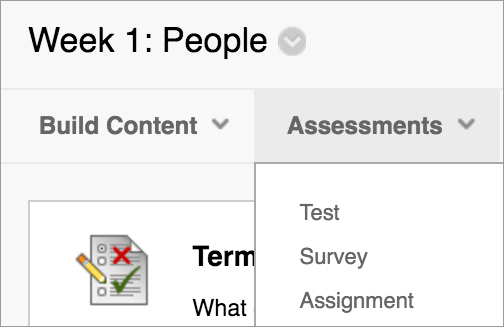
- With edit mode on: Navigate to the page in Blackboard where you want the test link to appear.
- Select Assessments to access the menu and select Test.
- Select your test from the test list and select Submit.
- The Test Options page appears. Make sure you read the Test Options document below for a full guide on the recommended options for this exam period.
- Make the test or survey available to students.
- Select the options for feedback and display, and set the due date and display dates – see the document on Adaptive Release below for further information.
- Select Submit.
Suggested Bb Test Settings – setting by setting walkthrough
Adding adaptive release to your Blackboard test
How to enable Extra Time for DASS students in your Blackboard Test
Phase 4 – Hiding Marks from Students
The final stage of creating an online exam, is to add specific measures to ensure that Marks from your test are not released to students before you intend them to be. There is further guidance on hiding the test column in the Grade Centre.


Hello
I would like to book a 1-2-1 online or in-person Blackboard training on how to create exams and quizzes. I am a new teaching fellow at the University of Manchester for Foundation studies. Please do let me know how this can be arranged. Thank you for your time and I look forward to your reply.
Best wishes
Chrisoula Chappell
Hi Chrisoula, if you click on the link “http://www.elearning.fse.manchester.ac.uk/fseta/book-a-virtual-1-to-1/” there will be a range of dates and times available for you to select. One of the team would be happy to help you with this. Best wishes, Anna